A basic guide to setting up Forge for absolute beginners
SHILL
I also have a textgen guide!
First determine if your computer is good enough to use these models.
If you have a Nvidia gpu with a minimum of 8gb of vram and that has been released in the last 4-5 years then you can use SDXL models. The more vram and the newer the GPU the better but I have 8gb of vram and it's fine for SDXL and only really encounters problems for more advanced models.
AMD and Intel is trickier. They are much improved since where they used to be at but you will need to put in some extra work compared to NVIDIA users. I can't help with this but there are anon in /vtai/ who use AMD that may be able to help.
Don't try to run CPU only it's not going to go well.
If you computer is good enough then download the one-click install package. Unzip to an easy to access place on your computer.
Run update.bat wait for it to finish and then run run.bat. The UI should automatically open in your main browser.
In the top left corner, switch from sd to xl.
Download NoobAI Epsilon-pred 1.1
Go to webui\models\Stable-diffusion and place the downloaded model there. On the webui click the reload button next to the checkpoint, click the checkpoint dropdown and click your downloaded model.
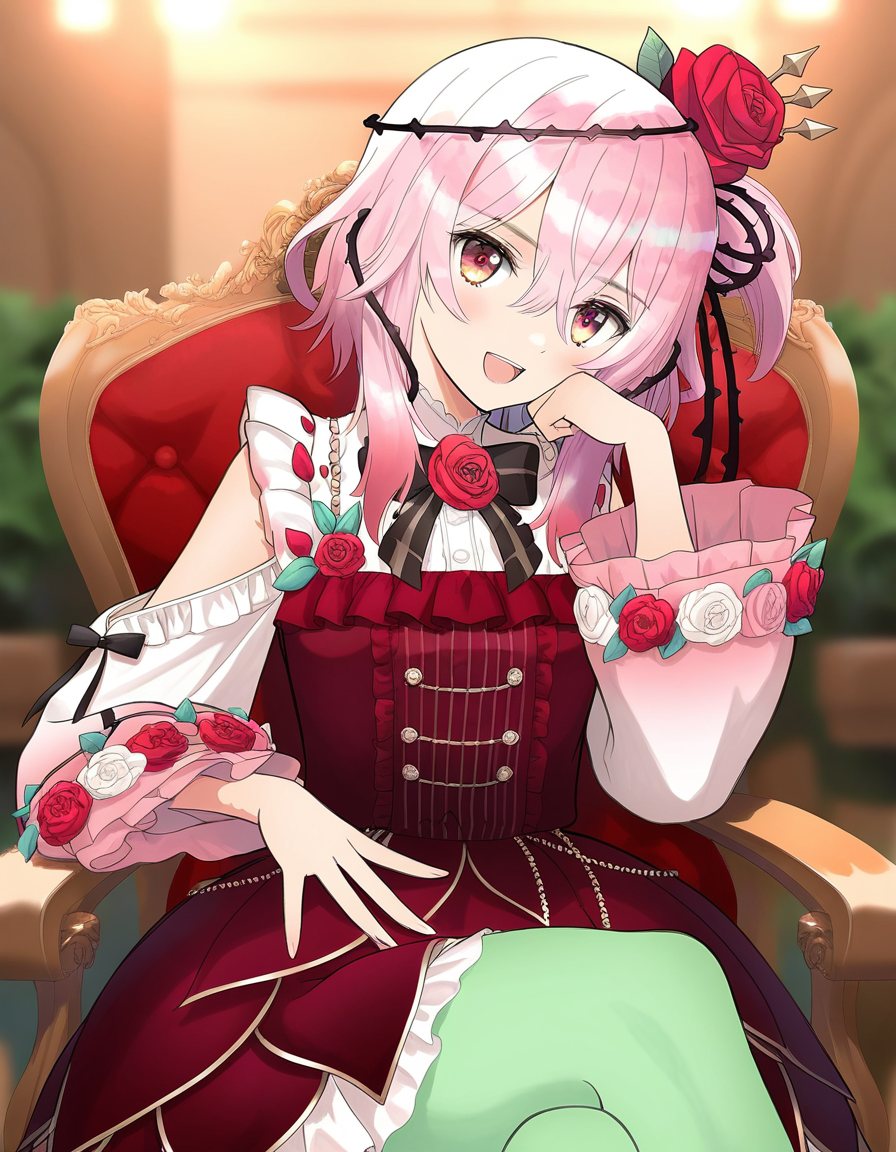
Then download the above image, go to the PNG Info tab, upload it, click send to img2img and then click generate. If everything goes well then you should have a very similar if not exactly the same image in a few seconds.

The top prompt is the positive prompt, this is where you put everything you want in your image. It's best practice to use tags from Danbooru/Gelbooru instead of plain text but there are some specially trained tags like the "_ quality" tags. The bottom prompt is the negative prompt, everything you don't want goes there. Later on we will discuss an extension that will help with tags. For now, try changing this prompt such as replacing Rosemi Lovelock with Enna Alouette or Tony Taka with Kanikama.

You now have the basics down, lets scroll down a little and discuss all of this.

The sampling method and scheduler go hand-in-hand. They're a bit more advanced so I won't go too in depth but different models work better with different sampling methods. Some samplers smooth things out and others add more detail. Some are faster then others.
You can thing of steps as how much time you give to the model. The higher the steps, the more time the model has to work and generally the better the image. Don't crank it all the way up though because there's diminishing returns after a while. You don't want to be spending 5 minutes on an image barely better then a 30 second one. Around 20-30 is typically a smart range.
Hires fix makes an image larger and regenerates it with more detail. This is needed because an image that is too large for the model's resolution will result in worse anatomy and various breakages. This is mitigated by upscaling with a low denoise value. For non-latent upscalers, keep denoise strength around 0.5 or below.
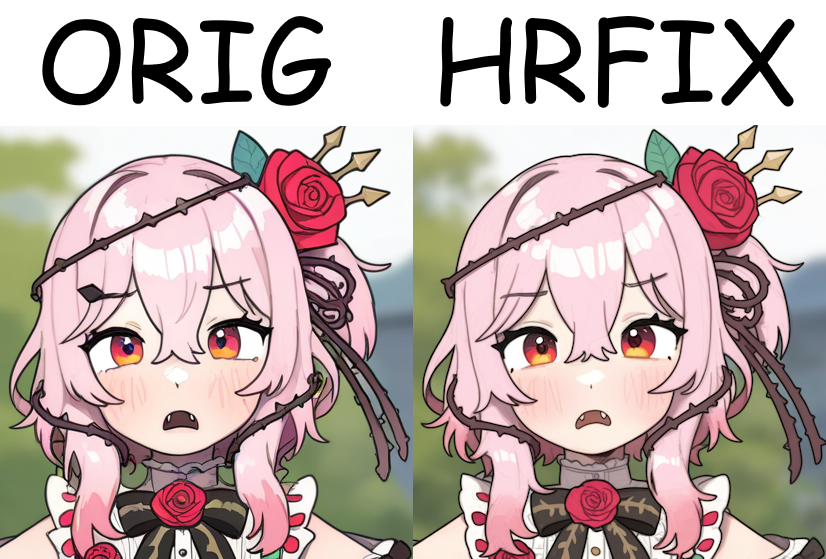
Compare the level of detail between the pre-hires fix and after hires fix image. I made both of them the same size and cropped to just her face so it's easier to compare. Note the improved details in places such as her mouth, eyebrows and eyes.
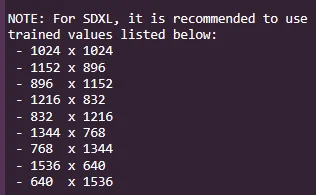
Width and height are pretty self-explanatory though it's important to note that models have specific dimensions they were trained on and that they work best with.
Batch size is how many images to generate at once and batch count is how many images to generate in sequence. If you set both to 2, you would get 4 images. 2 of which were genned at the same time.
CFG Scale is how strongly the image should conform to the prompt. Too low and you'll get a smeary mess, too high and you'll get oversaturated blobs. Keep this around 4-5.
Seed is the starting post for your image. Even with the exact same prompt, different seeds will give differing results. Click the dice button to get a random seed and click the recycle button to use the same seed as your latest image.
Everything below this is even more advanced and you can mostly ignore them if you're a beginner. The only thing I will point out is the script dropdown and the x/y/z plot script. This script is useful as it allows you to test out different settings in sequence and it outputs an easy to reference grid. For example, here's what different CFG scales look like.
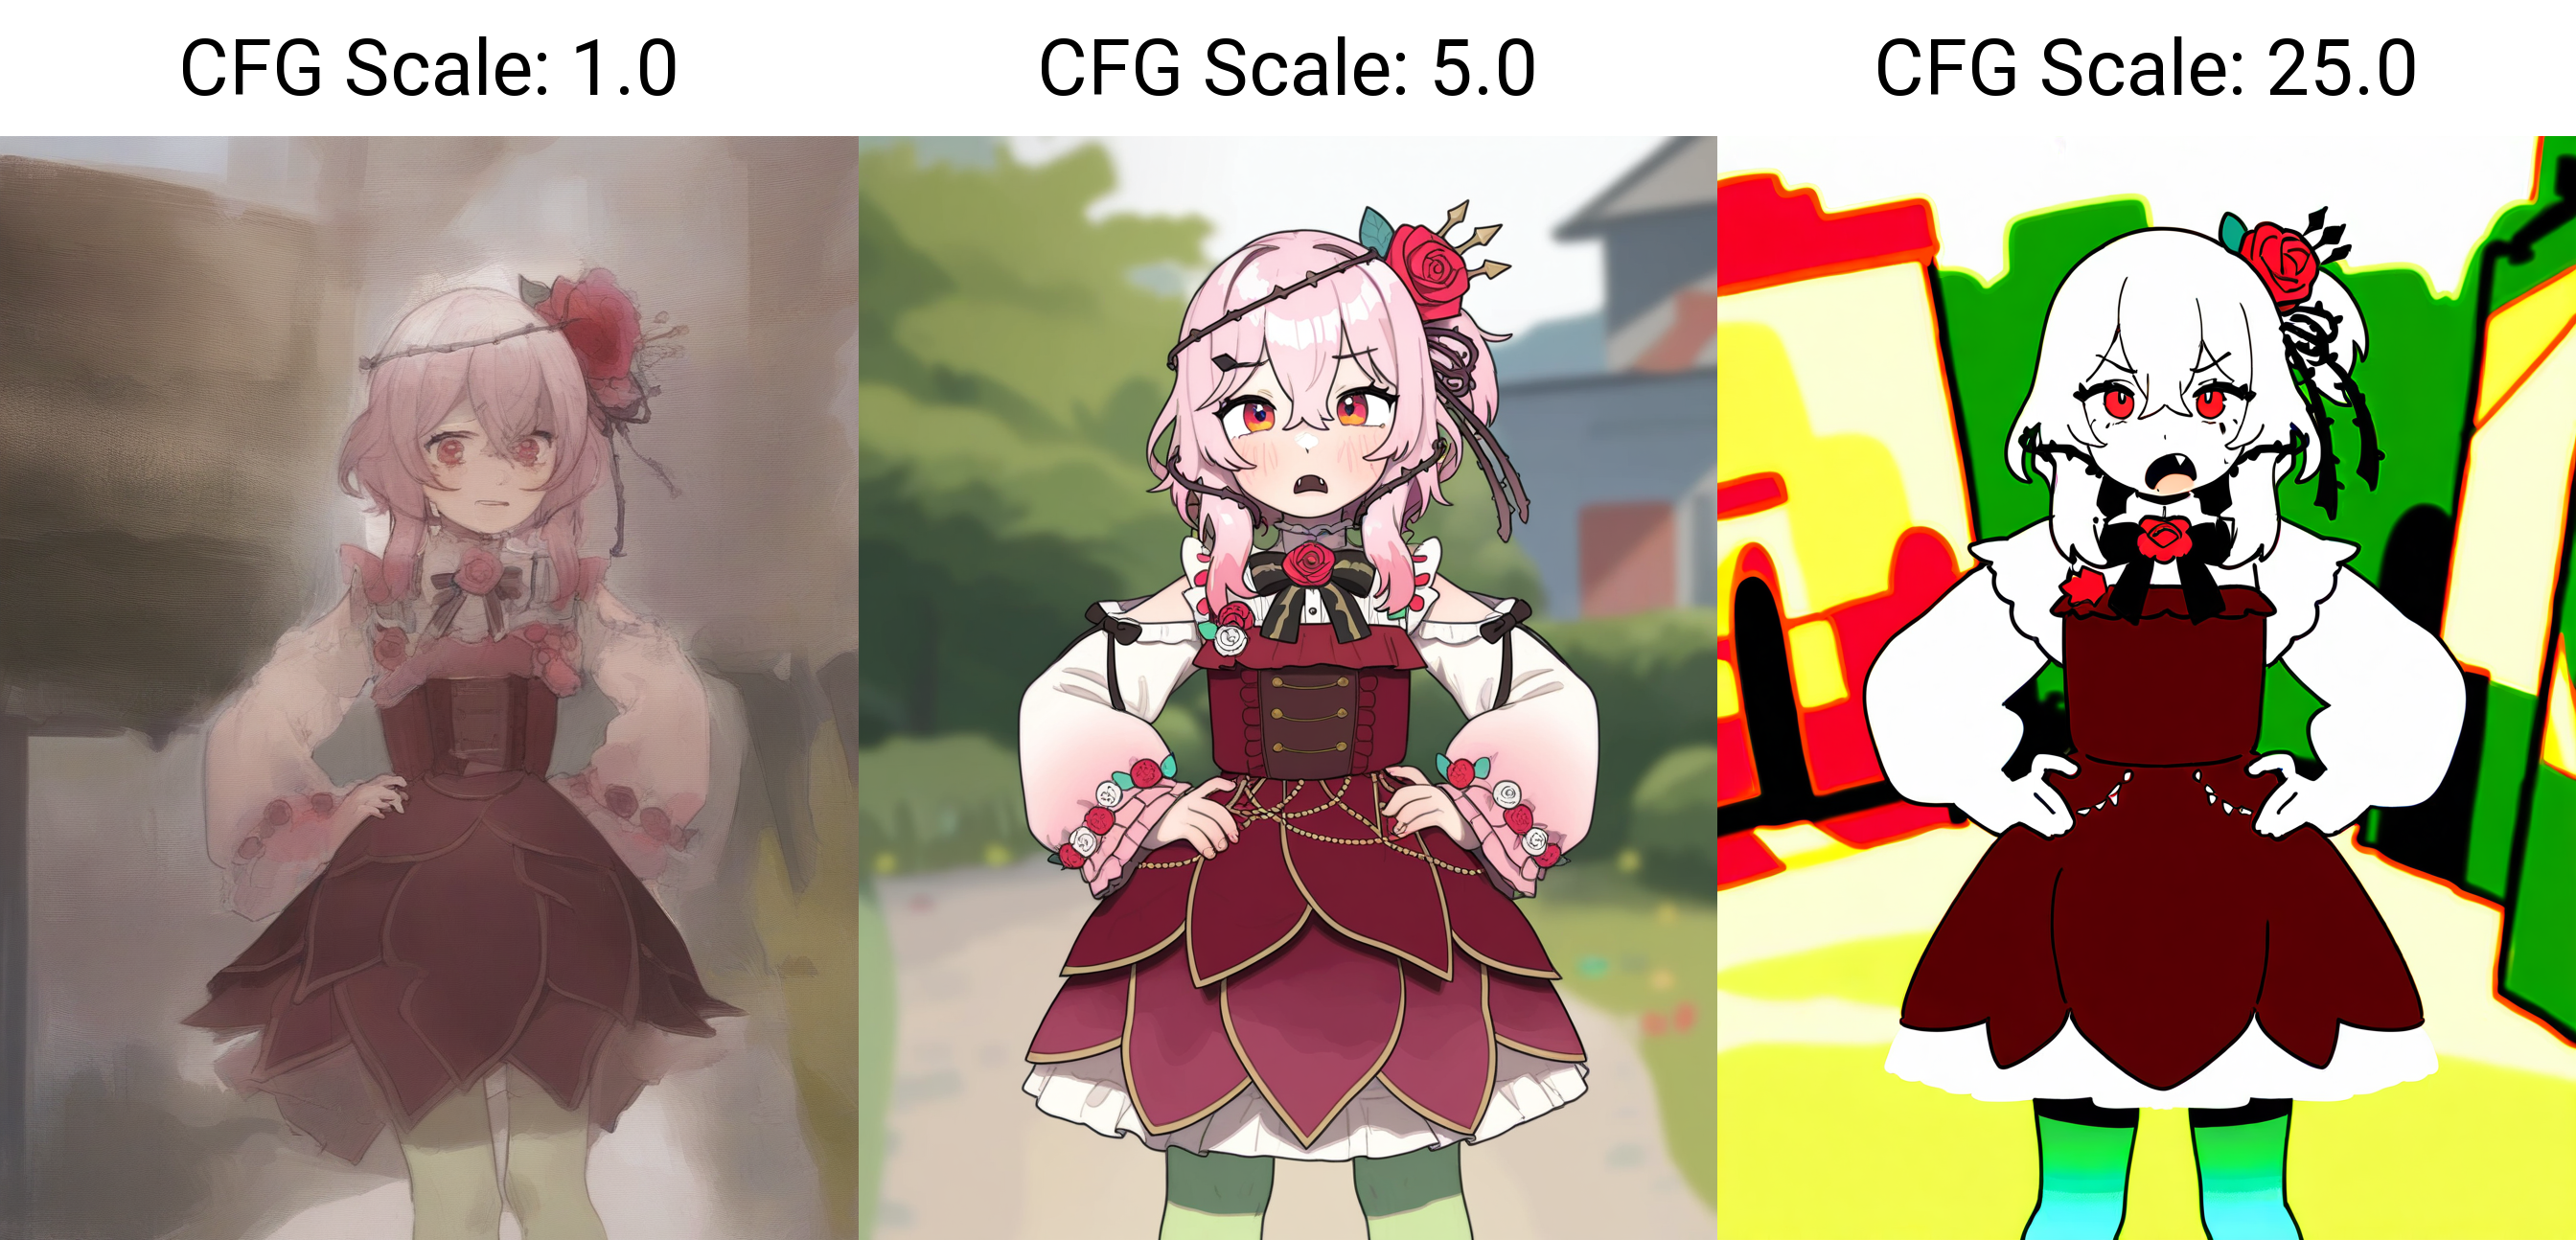
This can be very useful for testing.
Next let's discuss loras. I'll use this one as an example because it's funny. Move the downloaded file into webui\models\Lora
Go to the Lora tab below the prompt boxes and click the refresh button on the right. Click the lora and it will show up in your positive prompt.
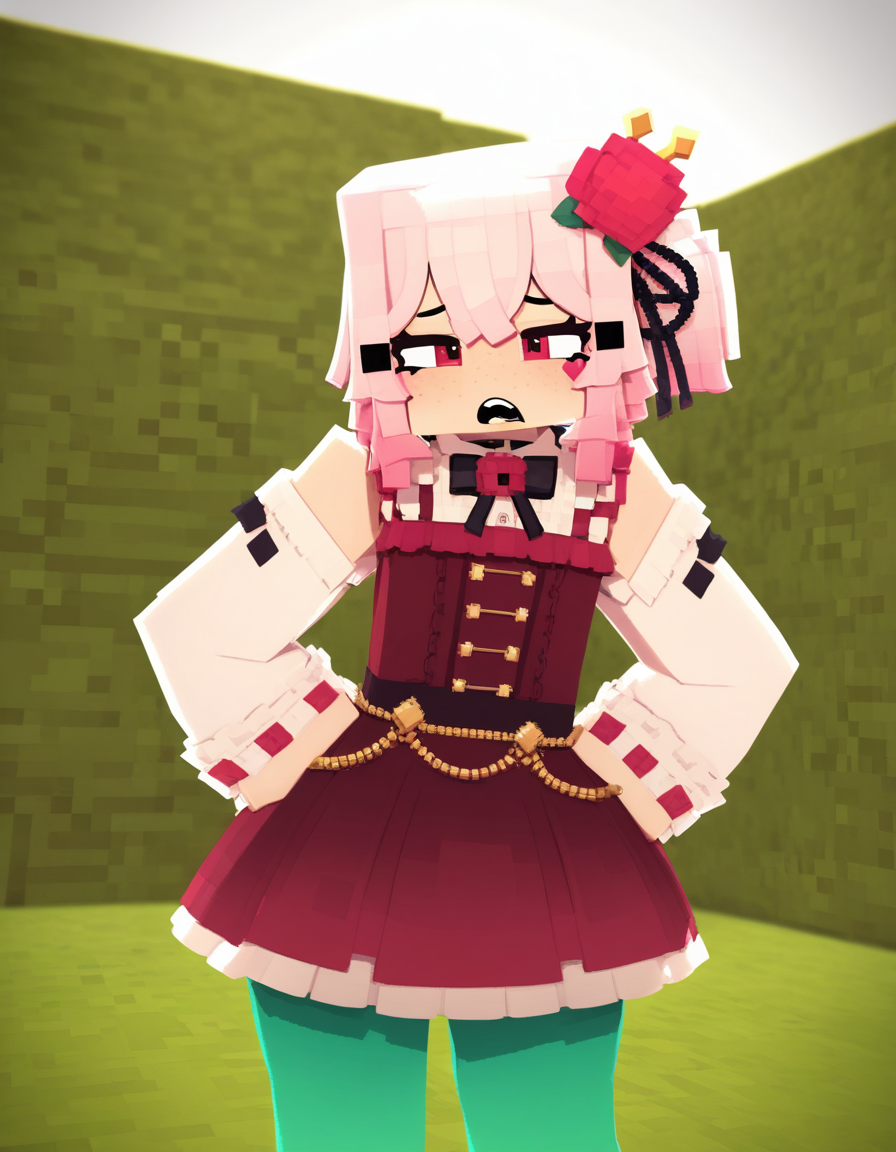
You can now generate Minecraft Rosemi porn with that new lora. You sick fuck. Also, you may have noticed a 1 on the lora's text in the prompt. You can adjust this number to be bigger or smaller to adjust the strength. Make sure you don't change anything else but the number as that will break it.
<lora:mcnsfwv9_8dim_noob:1> - ✔
<lora_mcnsfwv9_8dim_noob:1> - ❌
<lora:mcnsfwv9_8dim_noob1> - ❌
You can find loras on civitai or mega. For civitai set your search to this.
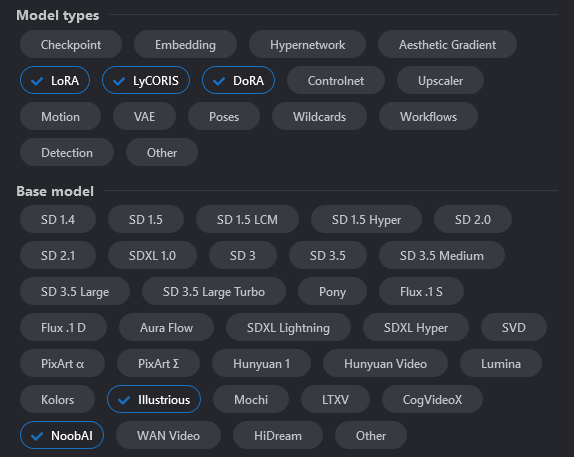
The model types are all types of loras and the base model is what models they work on.
NoobAI is an Illustrious based model so both NoobAI and Illustrious loras work.
Here are some megas with loras you may want to check:
https://mega.nz/folder/47Yj3ZIS#klaoBwVZI_u5DbjmCjkqRQ/folder/drxjGZIB (This mega is mine so if you need help with any lora, these are the ones I'm most likely to be able to help with.)
https://mega.nz/folder/dfBQDDBJ#3RLMrU3gZmO6uj167o-YZg/folder/sHInADyR
https://mega.nz/folder/pNVSmRwT#CdYtqeCFrNOOLmX6q-pLzA (note: any models described as PDXL or SD15 are for older models and likely won't work, stick to the ones with Illustrious or Noob in their names)
You can also find additional checkpoints on Civitai. You can use the same search as above but replace the model types with Checkpoint.
Here are some alternative models you may want to try out.
https://civitai.com/models/1347947/r3mix-illu01nai-v-pred
https://civitai.com/models/940235?modelVersionId=1449463 (Has additional training on vtubers specifically)
https://civitai.com/models/820208/obsession-illustrious-xl?modelVersionId=1494740
https://civitai.com/models/920709/cat-tower-noobai-xl-checkpoint?modelVersionId=1495826
Note that all of these models are vpred models. Vpred is a newer way of training models then epsilon-pred which allows a much more accurate color range. See this rentry for reference.
The first model I had you download was an epsilon-pred model along with the lora. Most UIs have updated with support for vpred without needing any settings changed, including forge.
Some loras trained on non-vpred models don't work as well on vpred ones but it shouldn't be a major problem. The main issue you'll face with using non-vpred loras on vpred models is desaturation.
If you want a non vpred model then try https://civitai.com/models/926443?modelVersionId=1166878 and https://civitai.com/models/1028575?modelVersionId=1455498 (Also has the vtuber-specific training)
The last thing I'll touch on is extensions. There are optional but can be useful.
Go to the Extensions tab, click Available and then Load from. You can search for extensions in the text box. Don't just go installing extensions willy-nilly. Some are old and either broken or are already natively implemented.
The first extension I'll recommend is 'Booru tag autocompletion'. This adds autocomplete to prompt fields so you can confirm that whatever tag you're using is how it's actually spelled easier.
Then 'adetailer'. This allows you to automatically upscale and detail faces, which are a small but highly detailed area and so often need more work.
Finally, 'Dynamic Prompts' allows you to randomize your prompt in a multitude of ways including wildcards. Wildcards are a text file like this that list prompts that will be randomly chosen from when entered in your prompt. That example wildcard lists boob sizes. You can enable a wildcard by putting it in your_forge_install_here\webui\extensions\sd-dynamic-prompts\wildcards and then activating it by putting __wildcardname__ in your prompt box. When you click generate it will automatically replace the wildcard with the randomly chosen prompt.
After installing extensions, click 'Reload UI' in the settings tab or exit and restart Forge to load them. It might take a while for everything to install so be patient.
Congratulations, you now have basically every tool you need. Many things on the UI have tooltips so if you're confused on something, try hovering over it and it might give you some tips.
Q&A:
- Q: What are embeds?
- A: Think of them like an older version of Loras. Some people still use embeds as a replacement for a negative prompt but it's quite rare these days. You don't have to worry about it. Hypernetworks are similar but even more deprecated.
- Q: What is ComfyUI?
- A: It's an alternative to the A1111-based webuis like Forge. ComfyUI is what I typically use and is much more complicated then Forge. It can be really confusing for a beginner but allows extra flexibility for advanced users. If you wanted to use video models for example then it would be good to learn ComfyUI.
Other guides for everything I didn't touch on here:
https://rentry.org/fluffscaler-inpaint (Warning for furries but it's easily the best inpainting guide out there)
https://github.com/AUTOMATIC1111/stable-diffusion-webui/wiki/Features (This is for the original UI forge is based on but the majority is the same or very similar. I would specifically recommend reading the Attention/Emphasis and Prompt editing sections)
https://rentry.org/comfyui_guide_1girl (Like this but for ComfyUI which is the un-comfy frontend I personally use. It's better for more advanced models.)
https://arcenciel.io/articles/1 & https://arcenciel.io/articles/3 (Lora training guides, one is aimed more for users of google colab but I would recommend reading either for a decent basic overview of lora training) (I use this trainer for training locally btw https://github.com/67372a/LoRA_Easy_Training_Scripts)