Bombergirl, the Legit Steam Deck Experience

Possibly an attempt to streamline guides from this guide as it's mainly made for Linux in general and can sometimes be confusing for those just wanting to run the game on Steam OS.
This guide is aimed for everyone not accustomed to Steam Deck and Linux, and this will mostly cover everything needed to get you started. If you're using other Linux distro, refer to the guide linked above.
KNOWN BUG
Apparently there's an issue with the latest version of Bottle which will cause the game to not launch at all. If you're affected, the solution can be found here.
What you need
- Bombergirl (preferrably one you've installed on your PC)
- Bottles via Discover
- Google Chrome via Discover, run it first and set it as default browser
- (Optional) Flatseal via Discover
All the steps require you to be in Desktop Mode, and playing the game can only be done there. Program such as Discover and Konsole comes preinstalled on the Deck. Also, please consider reading Extra mainly the Wi-Fi part as you need it to get a more stable latency. If you're fine to being called Kusolag then feel free to skip it.
Installing and Configuring Bottles
- Install Bottles from Discover.
- Launch Bottles, go to preferences and install the latest version of Wine GE in the runners tab. Bombergirl will require at least Wine 8.0+ to work.
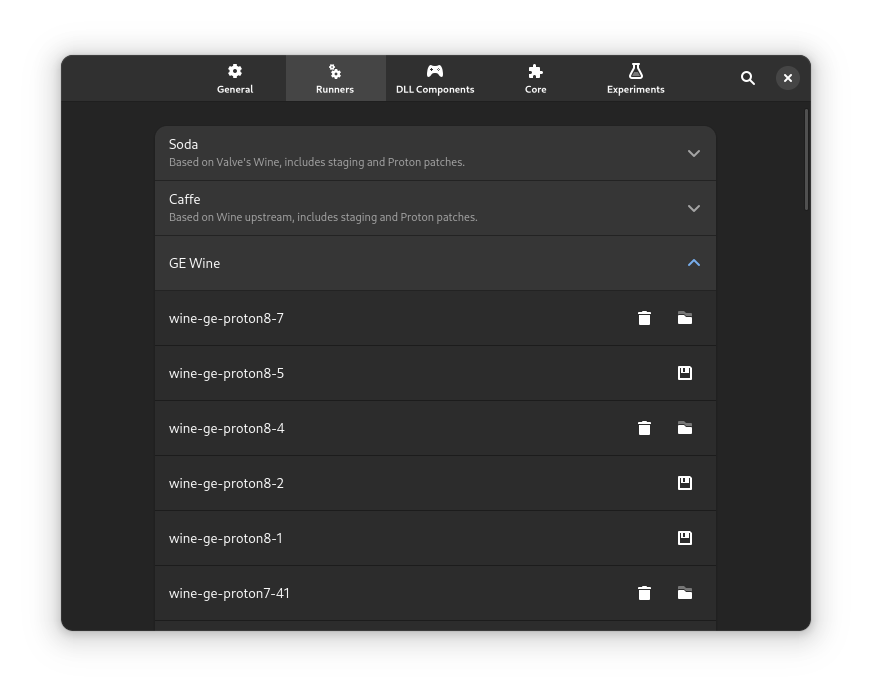
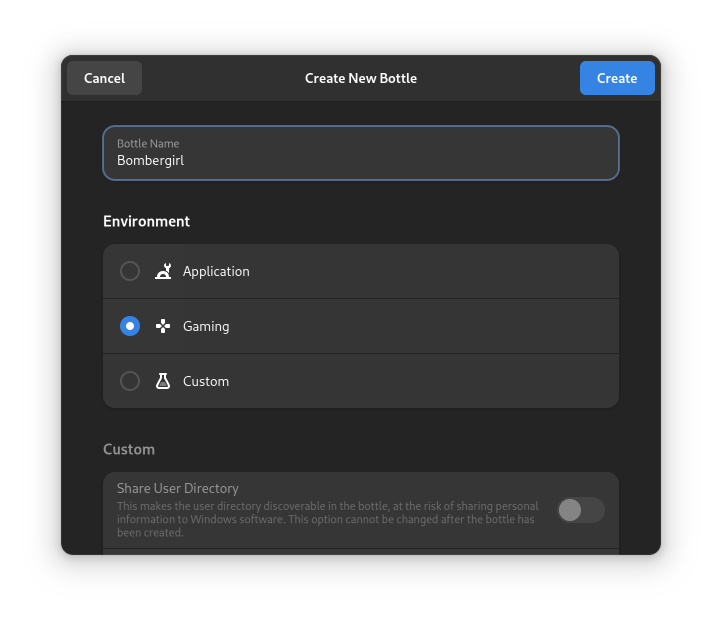
- Create a new gaming bottle and name it Bombergirl. The name of the Bottle environment can be anything, but of you do change the name you need to make some changes under desktop shortcut written in the guide.
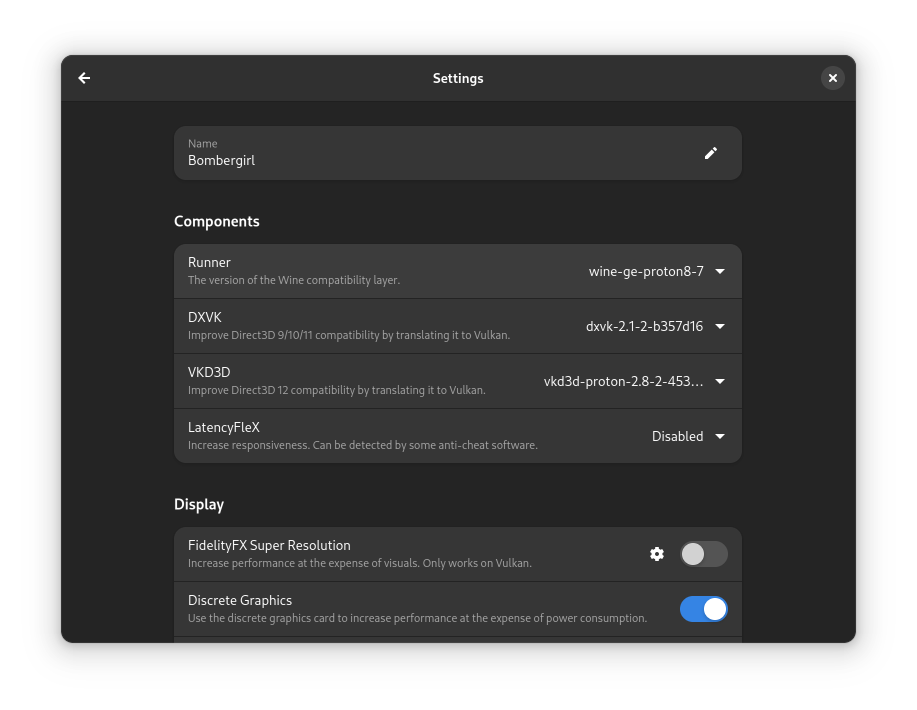
- Go to the new bottle settings and change the runner to Wine GE.
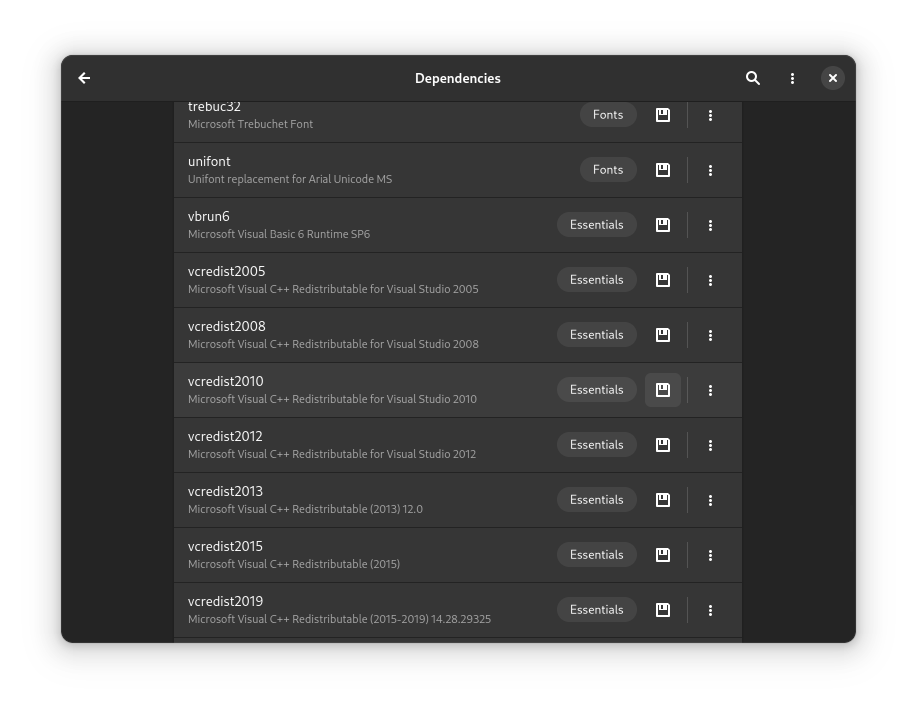
- Leave settings and in the dependencies menu install vcredist2010 and cjkfonts. It will take a while so go grab a coffee.
Installing Bombergirl
- Copy an already installed copy of Bombergirl from your PC to Steam Deck. You can do so by using a USB Drive. While the Linux guide tells you to use
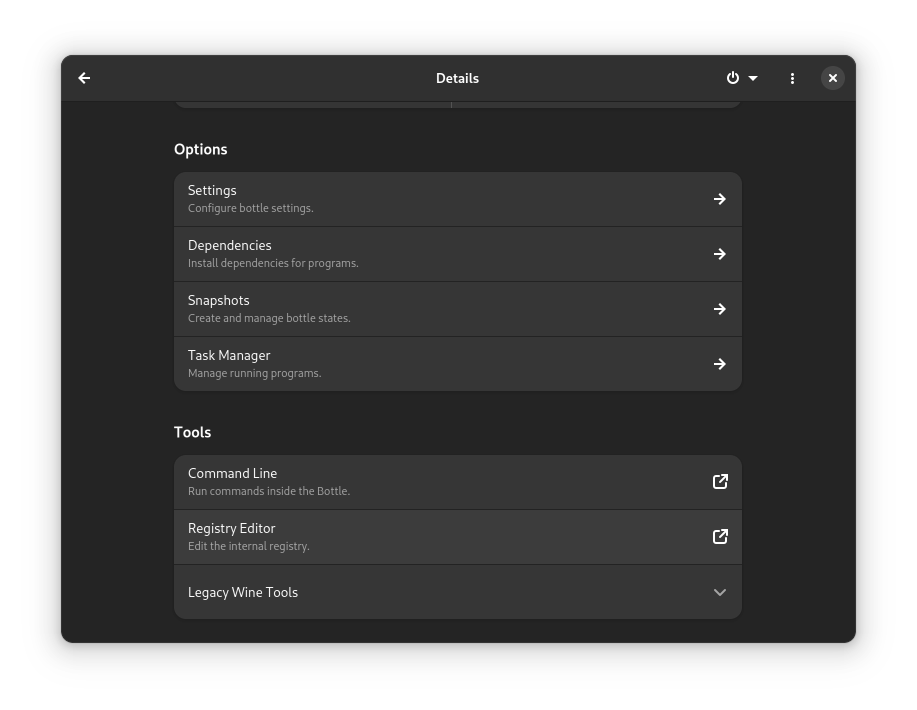
msitools, this is incompatible with Steam OS. If you can't procure the file yourself, use this and extract it. - Go back to Bottles and launch the registry editor inside Bombergirl bottle.
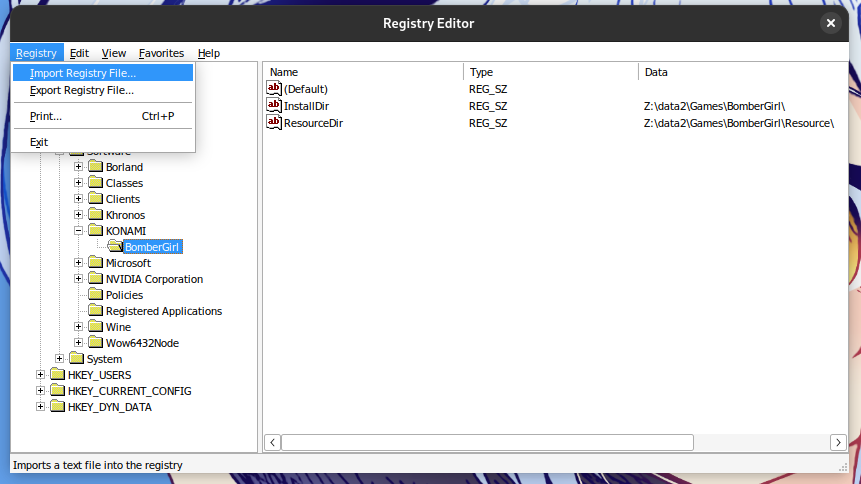
- Copy the text below, edit the paths to the installation directory and the Resource folder, save it as a .reg file and import it in regedit.
-
In Bottles, click on the Add Shortcuts... button and look for
launcher.exein/BomberGirl/launcher/modules.Additional note
If for some reason you can't find any executables, clear the Filter by removing the
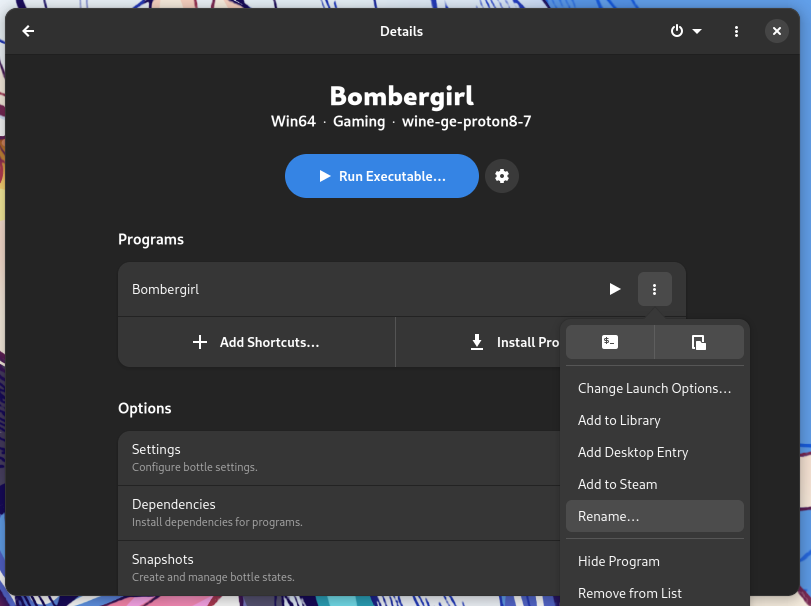
Windows インストーラパッケージ. - Click on the three dots menu next to the shortcut you just created and rename it
Bombergirl.
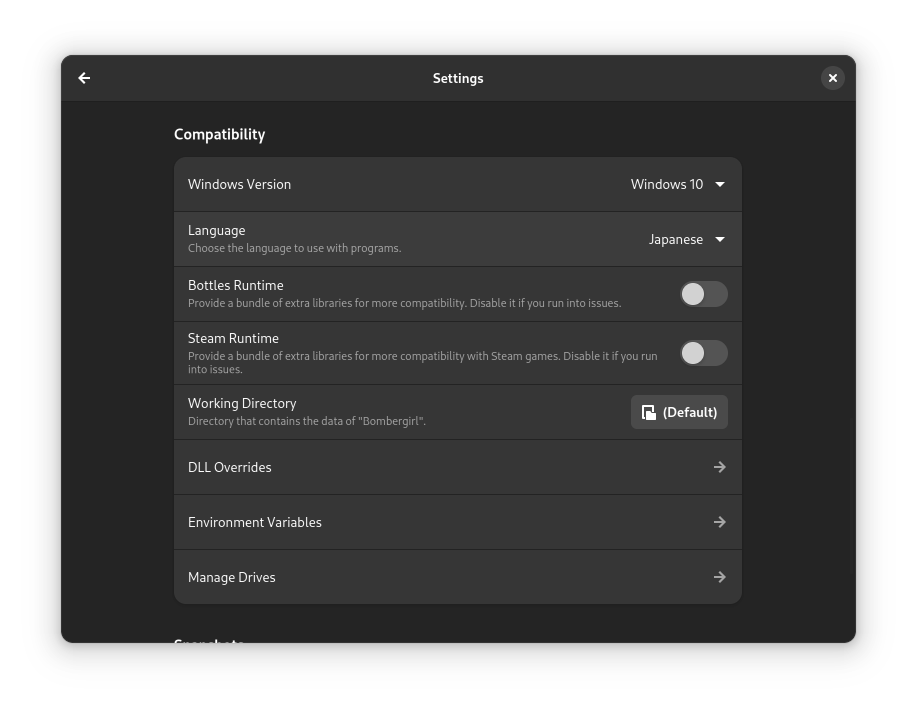
- Go to settings, scroll down to the compatibility section and change the language to Japanese.
- Here's the important part, copy this to Konsole (do not run it yet), replace path with the directory you pasted Bombergirl on. Read next part first if you're unsure what to do with the path.
-
Change
pathinto where the game is located. For example, if you put it on an SD Card then it's usually/run/media/mmcblk0p1. With that, it should look something like this. Now this is safe to run.
Optional
If you have FlatSeal installed, you can run the program, choose Bottles, and scroll down to Filesystem. From there, check the registered directory on Other files. If it's already added, then it's good to go. This is used to make sure the directory is properly registered. Additionally, you can use this to add the directory easily compared to using Konsole.
Creating a file association for the launcher and running the game for the first time.
-
Create
bombergirl.desktopfile in~/.local/share/applications/with the following content.
Additional information
In this context,
~is usually the name of your user. If you used the default account set by Steam Deck, it should be calleddeck. In order to access the folder, you will need to open Dolphin, the built-in file manager / explorer. Then, selectHomefrom the left side bar and from there you can direct yourself to the folder location.For the next part though, you don't want to replace
~sign todeck. Konsole will sort it out for you.In case if you made a different environment name for the Bottle, change the name after
-bunderExec=. The name after-pis used for the shortcut name.
For example, if you have the Bottle name as General and the shortcut name as Bonga, you'd want to do it like this:
Exec=flatpak run --command=bottles-cli com.usebottles.bottles run -b General -p Bonga "%u" - Run
update-desktop-database ~/.local/share/applicationsin Konsole. - Be sure to have Google Chrome installed through Discover and set it as default browser. Then, visit http://eagate.573.jp/game/konasteapp/API/login/login.html?game_id=bomber-girl and try to launch the game after logging in with your account.
- If you did everything right, the launcher will open. You can then launch the game or update when prompted.
- That pretty much covers everything, If you want to play the game again, you can open Bombergirl bottle and press the play icon next to Bombergirl shortcut.
- Alternatively, you can add it as a Desktop Entry and put it to Desktop for easier access. This can be done through the three dots icon next to the play button. Do note that you need to enable special permission through Konsole by typing
flatpak override com.usebottles.bottles --user --filesystem=xdg-data/applicationsand then restart Bottles if you have it open.
Extras
- In order for the controller to work, hold the sandwich button (☰) until there's a noise indicating you've switched from desktop mode to gamepad mode control. Sometimes, there will also be a notification on bottom right indicating you've switched mode.
- Do not ever touch the screen with more than one finger. Doing so will break any sort of touch input for the game. Only way to fix it is to restart game.
- One of the issue you might encounter is that Bombergirl runs on a pretty poor latency (up to 3x the actual latency you should've gotten). This is caused by Valve enabling Wifi Power Saving On by default. To disable this, head back to Gaming Mode, press Steam Button and go to Settings. From there, head to System and enable
Enable Developer Modeto On. Next, go back a step and scroll down until you find Developer tab. Scroll the list until you findEnable Wifi Power Management, disable it and restart Steam Deck. - Without a keyboard, taking a screenshot would be considered impossible due to the fact Steam doesn't let you bind PrntScrn key.
- The workaround to that is to bind one of the unused NUMPAD key to the rear button and then bind that to Spectacle (bind it to
Launch Spectacleaction as by default it will launch the program and also take a screenshot). Spectacle is Linux' dedicated screenshot program, available in your programs list. - Additionally, you can enable
Save file to default folderso the image will be stored under/home/deck/Pictures/.
- The workaround to that is to bind one of the unused NUMPAD key to the rear button and then bind that to Spectacle (bind it to
- Due to how the launcher works, it will never run in Gaming Mode.
- While Google Chrome is the most recommended browser for this, feel free to try out other options available. Do note that Firefox doesn't work.
- Game will run fine on SD Card, I've tested everything and it runs as well as it is on my main Windows PC. You can still move the game folder to internal SSD if you wish to.
- If you ever need to monitor performance, you can do so by installing
mangohudthrough Konsole. The command you need to enter isflatpak install org.freedesktop.Platform.VulkanLayer.MangoHud. When asked, select Flathub (user) and 22.08. Once done, restart Bottles, select Bombergirl bottle, and head to setting. From there, scroll down until you find Monitor Performance, and enable it.
FAQs
Q. I got an ERROR with 5-1601-0016 as the code. What did I do wrong?
A. Make sure you set the directory in the registry correctly. The error was caused by incorrect path.
Q. I happened to find an English Patch for Bombergirl. Is it possible for this to be applied?
A. Sadly, no. This was due to DXVK conflicting with the injector.
Big thanks to the creator of Bombergirl on Linux guide for making all of these possible. This guide is mostly a copy-paste with some adjustment so credit to the original creator.