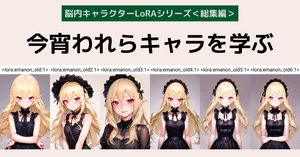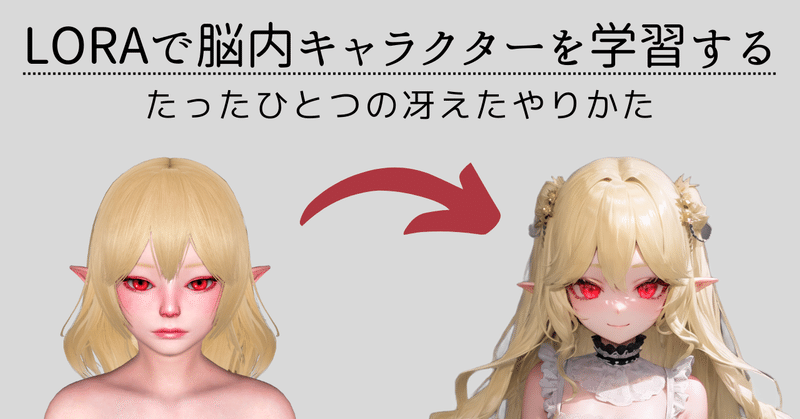
The Only Brilliant Way to Train Brain Characters with LoRA
Original Japanese Note by Emanon-chan Translated with Chat GPT.
Well, it's not really the only way, but I'll summarize the steps for creating the LoRA character that suddenly came to mind and seems effective.
I'll assume you understand the basic steps for creating LoRA. Also, this discussion focuses on using a tool capable of creating 3D models (in this case, Honey Select2) to train brain characters, so it may not be very helpful if you want to train characters that are not originally designed as characters or those with a different purpose. However, it seems that by training a model that only produces specific art styles, we can create a LoRA character with reduced artistic influence, which would offer versatility.
Overall Workflow
- Creating LoRA models that resemble the Honey Select2 art style (3D aesthetics)
- Merging the above LoRA models to create a combined model
- Creating LoRA models using the merged model
Purpose of this Method
When characters created in Honey Select2 are used for training, their strong 3D aesthetic becomes a learned differentiator. To avoid incorporating the 3D aesthetics as a variation, an alternative approach is followed by training models that generate only Honey Select2-like artwork. The intention is to prevent the emergence of 3D aesthetics as a learned variation.
Step 1: Preparing Art Style Training Materials
The character you create here doesn't need to be overly elaborate, but it is believed that characters with significant differences from the brain characters you want to train would help recognize the necessary elements as variations. Once the character is completed, take a screenshot. If you have the MOD environment set up, you can take a screenshot with a transparent background using the F11 key. Here are the images prepared by the author. They are all nude. Multiple images are provided to capture different angles (rotating as needed to capture all sides while keeping the face visible):
- "Face Only (close-up): 1 image"
- "Shoulders and Up (portrait): 11 images"
- "Bust Shot (upper body): 18 images"
- "Groin and Above (cowboy shot): 8 images"
※ These images are taken from different angles to capture the character from various perspectives while ensuring the face is visible.
※ These images will also be used as normalized images later.
※ The images are cropped to a square shape (1024x1024), and transparent areas are processed into opaque white. It's debated whether white is the best color for this purpose.
 Something like this, but I can't show all because they are nude
Use the above materials to train with the "DreamBooth, class+identifier" method. Other methods should work fine as well, but since there is no need to add captions, you can name the folders as you like. No special training settings were applied. It follows the normal LoRA settings.
resolution=512, num_repeats=10, epoch=10, dim=64, alpha=32, lr=1e-4, text encoder lr=2e-5
With the above steps, the LoRA model trained in the art style of Honey Select2 will be completed. It should be a LoRA model capable of generating the same character on a white background, so it is recommended to perform a check before proceeding.
Step 2
Merge the above model with a preferred model using an intensity of 1.0. The sd-scripts provide a merge function, but you can also use web UI extensions or other methods. Although detailed verification on model selection has not been conducted, it is suggested to choose the parent model (if using a merged model that sums Model A and Model B, select Model A) if using a merge model. Specific model names are not provided, so choose as you like.
Once again, it is recommended to check at this stage because the model should now be capable of generating the same character on a white background only.
Step 3
Create the character you want to train. This step is crucial. Pour all your passion into Honey Select2.
Note that it is better to slightly exaggerate the expression for the purpose of training (even if the balance is slightly off in the game). Once the character is completed, take a screenshot and apply the same processing as Step 1. Ensure that the composition and angles of the images match Step 1 to avoid unnecessary differences.
 Blonde Elf is the best!
After preparing the images, add captions. The method is not specified. The author uses the Tagger in the web UI with the swin-v2 model, threshold set to 0.5, and the "Escape brackets" option checked to create a text file. Then, organize the captions following the steps below:
- Remove tags for "elements to be memorized" (such as hairstyle or eye color).
- Remove unnecessary tags (to prevent unrelated tags from being associated, e.g., "Don't add Flandre Scarlet just because it's blonde-haired and red-eyed.")
- Organize the composition information (add the correct composition tag, such as "portrait," to all images).
- Add the "realistic" tag to all images (believing that it absorbs the 3D feel).
- Add the "nose" and "lips" tags to the corresponding images (continuation of the 3D feel).
- Add a tag for invoking the captions at the beginning of all images.
The author uses a combination of the Dataset Tag Editor in the web UI and the external tool BooruDatasetTagManager. This is for reference.
Once the captioning is complete, prepare a downsized version of the data. The quality is expected to improve, but there are different opinions, so do as you prefer. The author prepared a downsized version by reducing the original data to 384^2. The caption file is reused from the original data. For the original data, set num_repeats to 10, and for the downsized version, set num_repeats to 2.
Finally, it's time for the actual training. Only the dim and alpha parameters are changed from Step 1. Set num_repeats based on the image size. Use the following settings: resolution=512, epoch=10, dim=32, alpha=16, lr=1e-4, text encoder lr=2e-5.
Here comes an important point: Use the art style training materials used in Step 1 as normalized images in this step. Set num_repeats to 1. These images were strongly trained on the
model, making them suitable as normalized images. By using these normalized images, the unwanted influence on the art style when using LoRA can be significantly reduced.
In Conclusion
All the steps are now complete. All that's left is to examine the completed LoRA. Personally, I believe around epoch 8 to 10 should yield good results. But please confirm it with your own eyes!
However, it's not appropriate to end the explanation without any images, so let's finish by sharing some images generated using the LoRA created with this method. I'll provide the actual images generated using t2i, with dimensions of 512*768, high resolution scaled by 1.5, and saved as JPEG due to the specifications of the note. Blonde Elf is still the best!
 No 3D feel, the floral background is lively
 No problem with the "looking back" pose
 The scenery of an otaku
Additional Note on June 1, 2023
I have gained a better understanding, so I am writing a new article. Please check it out for the link to related articles.