/akg/ Newcutie Guide
- /akg/ Newcutie Guide
- FAQs
- Downloading/Installing the game
- Reroll
- Gacha
- Recruitment
- Leveling/Upgrading operator
- Squad
- Operator class and subclass
- Clearing stage, normal and challenge mode
- Farming resources
- Shop/Store
- Base (BETA)
- Annihilation missions
- Stationary Security Service
- Contingency Contract
- Integrated Strategy
- Record Restoration
- Archives
- Some useful tips
- Changelog
FAQs
1. Is this game F2P friendly?
Generally yes, the game is balanced around lower rarity operators so you can clear contents comfortably with 4* or 5* operators. You can also borrow support units from friends to help carry your ass. But if you want a specific 6* operator you will have to save up a lot.
2. Is the gacha generous?
Getting 6* is not hard. You can say the game is "generous" about this part. BUT getting a specific operator is a whole different matter.
On average, you get a 6* every 35 rolls (or maybe somewhere around 40~50 rolls). But to get a specific 6* you may have to spend hundreds of rolls without getting a single one. On CN, they added hard pity recently to it's somewhat better over there. Those changes will come to global in a few months.
With the current amount of limited banners we're getting (4 per year), F2P(true) players will have to save up for limited banners only if they don't want to miss out on those operators.
Of course if you don't care about not having some operators, limited or whatnot, then it's not too bad. Or you can be a luckgod and get everything with minimum rolls.
3. Do I need to reroll?
No. Only reroll if you want a specific operator. Or if you're a brainlet and want a strong starter to carry you early game.
4. How do I get *insert operator's name here*?
If they're available in current gacha pool, you can either
- Reroll
- Save up until they are available in shop and buy them (see [placeholder])
- Roll when they shows up on Standard banner (dual rate-up, not really recommended)
- Pray for spook
If they're welfare (free) operator, you can wait until their event has a rerun, or until it's added to Record Restoration
5. I'm running out of LMD/EXP!
Your main source of LMD/EXP is your Base (BETA), so make sure to have it up and running as soon as you can.
Or you can farm CE-X maps for LMD and LS-X maps for EXP. It's HIGHLY RECOMMENDED to farm the highest map you can clear, as it's more sanity efficient.
6. I can't clear this one map!
Make sure your squad is well leveled. Understand what your operators can do, check your enemy info, pattern, timing, pay attention to tutorial and stage mechanic. Use the right operator for the job (E.g. sniper to kill drones, caster to kill high DEF enemies). This is a strategy game so activate those neurons.
Worst case scenario you can guidefag, but don't abuse guides, try to learn something from them so you can make your own strategy in the future.
7. I'm out of sanity!
Just wait(tm). Sanity recovers at a rate of 1 point per 6 minutes, or 10 per hour, and capped at 135 at player level 120 (max level). You can go play game modes that doesn't require sanity (IS, SSS).
Or touch some grass.
8. Is it too late to start now?
No. You miss out on some limited operators though. You can save up roll to spark them later on future limited banner or pray for spook.
Some limited collab operators are gone forever though (e.g. Ash, Tachanka, Blitz, Frost)
9. Which server to play?
Most of /akg/ play on Global EN server.
Global is divided into EN, JP, KR, TW.
EN, JP and KR have the same schedule.
TW is way behind.
CN server is around 6 months ahead of Global.
10. I'm a brainlet. Where do I find guides?
These channels have good stage guides or simply interesting clears you can watch for fun:
https://www.youtube.com/@oyuki/videos
https://www.youtube.com/@GF_Saihate/videos
https://www.youtube.com/c/ILoveAmiya/videos
https://www.youtube.com/@sorarachannel/videos
https://www.youtube.com/@Kokokbeluk/videos
https://www.youtube.com/@u0bikiemuk0t
https://www.youtube.com/@Doctor-Banana
https://www.youtube.com/@zpkf199
https://www.youtube.com/@Mechachromes
11. Why are they all JP guides? I want English guides!
/akg/ has a profound hatred for English guide makers because they are "bad". So I'm not gonna put them here. If you want to know why, go ask. Beside, popular ones like K*** or E*** can be found with a simple YouTube search.
12. I'm F2P (true). How many rolls can I get per month?
Just do some >math
Daily missions: 100 Orun/day x 30 days = 3000 Orun / month
Weekly missions: 500 Orun/week x 4 weeks = 2000 Orun / month
Annihilation: 1800 Orun/week x 4 weeks = 7200 Orun / month (Assuming that you have unlocked the maximum weekly orun cap from annihilation)
Commendation Certificates/Green certs shop: 600 Orun / month + 2 Headhunting Tickets (Assuming that you only buy out the first tier)
Daily login: 1 HH ticket / month
So a total of 12800 Orun and 3 HH tickets, which equal to 24 rolls.
This doesn't count rolls you get from other sources like event or gold cert shop. So you might look forward to saving 30 rolls per month (or more) as a F2P (true) player.
I'm not F2P and I almost never keep track of my rolls income so this is just an estimate and I can't say with certain that it's 100% correct. You should ask around in the thread or google it.
12. Do I have to clear all Daily Missions and Weekly Missions?
Might as well ask "Should I play the game?". Do it. They're easy and give lots of free stuffs. There are lots of missions BUT you don't have to clear every single one. You only need enough missions to to gain enough "seals" to claim rewards.
13. Where do I farm *insert material name here*?
Just click on it and read the description. To farm efficiently, consult the farming spreadsheet or Penguin Stats.
Downloading/Installing the game
- Global: Android | iOS
- Japan: Android | iOS
- Depend on your region, the game might not show up in your app store. Use third-party app like QooApp (android) to download. Otherwise you have to create an app store account with US region.
- To play on PC, use emulator such as BlueStacks, Nox, LDPlayer, MuMu, Google Play Games (This one has good performance but is still in beta and lacks feature such as keyboard shortcut. It's also region locked but can be bypassed by using an US region Google account)
- Arknights isn't very demanding on resources
yet, but if the game crashes on your emulator, make sure to have at least 4GB RAM allocated. - If the game hangs on "Downloading resources" screen, try restarting until it finishes downloading. Or use another emulator. If you're using LDPlayer, change emulator settings to use 2 CPU cores only and it should download properly.
Reroll
1. Do I need to reroll?
Not really. The game can be cleared with whatever you get by playing normally. As a newcutie, you get some free 3* operators, 2 free 5* operators, a guaranteed 6* from the newbie banner. Having good starting rooster can certainly make your life easier in the beginning but it's not mandatory. Only reroll if you really want a specific operator or if you're a brainlet and need meta operator to carry your sorry ass.
2. How to reroll?
If you have decided to reroll anyway, here's how to:
- Start the game and chose to login as Guest.
- Play through the tutorial until you're at the home screen (read the battle tutorial at least once, please)
- Check your mail (top left), you will receive 3800 Orundums. Also click the Getting familiar with Rhodes Island button (top) for some extra orundum.
- If you want to roll on banners other than the newbie banner you will have to clear some story maps to get Originite Prime (OP) to exchange for Orundum (normally this isn't recommended). Every banner other than newbie banner needs 6000 Orundums for a 10-rolls.
- If there's a limited banner going on, you will get a free 10-rolls headhunting ticket.
- Now you have some options:
- Roll on the newbie banner: The 3800 Orun you received is enough to do a 10-rolls on the beginner banner.
- Roll on the current standard banners. Most of the time there are 2 banners running:
- Solo banner: Only has a single operator as rate-up. This banner usually features a new operator and is tied up with current running event.
- Dual rate-up banner: Has 2 operators on rate-up. Contains every released operators except limited operators and new operator who is currently having solo rate-up banner
- Roll on the limited banner: Only available when there's an event with limited operator banner. This banner has every released operators AND limited operators.
3. Who to reroll for?
SilverAsh, Mountain, Thorn, Surtr, Mlynar, Exusiai, Eyjafjalla, Goldenglow, Kal'tsit, Mudrock
- Either clone your emulator instance or clear App Data (Settings > Apps and Notifications > Arknights > Storage and Cache > Clear App Data) to reroll. You also might have to reset advertising ID (Settings > Google > Ads > Reset Advertising ID)
- Whatever you ended up with, remember to BIND your account after rerolling
Gacha
1. Roll currency and how to get
- Orundum:
 The main roll currency. How to get:
- Event reward.
- Weekly annihilation mission reward.
- Exchange from Originite Prime (OP) bought in cash shop (whale/dolphin option)
- Doing operator Paradox Simulation.
- Buy in shop.
- Farming (not recommended for newcutie).
- Headhunting ticket:
 There are single roll ticket and 10-rolls ticket. How to get:
- Event reward
- Buy in shop
- Buy packs in cash shop (again, whale/dolphin option)
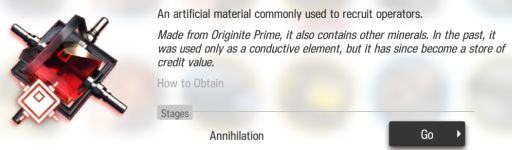
- Originite Prime:
 Also called OP.
- Can be bought in shop (with real money) or get from clearing maps (first clear only)
- They can be used to buy outfits, furnitures, refilling sanity, exchange to Orundum to roll etc
2. Is there pity?
Yes. 6* has base probability of 2%. If you have not obtained a single 6* after 50 rolls, the odds will be increased by 2% on each subsequent roll (4% at 51st roll, 6% at 52nd and so on) until it reaches 100%.
Do note that there is currently no hard pity on global version (JP, KR, TW, EN) so in the worst case you can blow all your stash and not getting the correct rate-up operator. CN version has updated the gacha system to alleviate this problem (added hard pity) but it will be awhile until it comes to global.
3. How to check pity count?
You can't check it in game. You have to keep track of your pity count manually. Only limited banner show your roll number.
4. Do we have spark?
Yes but only on limited banners. Need 300 rolls.
5. Getting dupes
Getting multiple copy of a operator will give you tokens to upgrade their potential. Operators start out at Potential 1 (Pot1). You need 6 copies to reach maximum Potential (Pot 6).
6. Banner
There are 2 type of headhunting: Standard Headhunting and Limited Headhunting
- Standard Headhunting
These are the one you will be most familiar with:- Single Operator banner: Solo rate-up, features a new 6* operator and a new 5* (4*) operator, often runs alongside event. When you get a 6* or 5*, there will be a 50% that they will be the featured operator.
- Double Rate-up Operator banner: Usually called "standard banner". Similar to Single Operator banner but features 2 released 6* and 3 released 5* operators instead. So when you get a 6* or 5*, they could be either one of the featured operators or a non-featured one (spook). This banner is updated/rotated every 2 weeks.
- Joint Action banner: Runs alongside Contingency Contract event, features 4 6* operator. When you get a 6*, they will be among those four.
- There are also "warm up" banners before the release of a new Main Story chapter. They work similar to Joint Action banner.
- Currently there is no hard pity or spark on Standard Headhunting banner. So there's a chance that you will blow your whole stash without getting the rate up operator.
- All Standard Headhunting banners share the same operator pool but don't have limited operators.
- All Standard Headhunting banners share pity count.
- Pity count doesn't reset between Standard Headhunting banner.
- Pity count only resets when you get a 6* operator.
- Limited Headhunting
This type of banner comes every 3 or 4 months.
There are 3 type of limited banners:- Anniversary banner: These run on anniversary occasion (e.g. 1st year, 1.5 year, 2nd year). Feature 2 new 6* operators: A limited 6* such as: Rosmontis, Skadi the Corrupting Heart, Nearl the Radiant Knight, W; and a new non-limited 6*.
- Chinese New Year (CNY) banner: These run on Chinese New Year. Feature the 6* Nian siblings (Nian, Dusk, Ling) and a new non-limited 6*.
- Collab banner: Feature collaboration/crossover operators such as Ash (from R6S).
- There is spark on Anniversary and CNY limited banner. You can spark at 300 rolls on Anniversary and CNY banner.
- When you get a 6* on Anniversary or CNY banner, they will have 70% chance to be the featured operators. Note that this is split between the 2 featured 6*. Which means there is a 35% chance to get one of the 2 rate-up operators.
- Anniversary and CNY banner don't share the same limited operators pool. But both include all operator from Standard Headhunting.
- Collab banner has a hard pity of 120 rolls. Which means you will 100% get the featured 6* after 120 rolls.
- When there is a new Limited banner, you get 1 free 10-rolls ticket when the banner starts and 1 free roll per day for the whole running period of that banner. All in all you get 24 free rolls every limited banner.
Recruitment
 Recruitment is another way to obtain operators beside rolling the gacha.
Recruitment is a good source of certificates and (mostly) 3* and 4* dupes.
Recruitment pool has less operators than gacha pool. But some operators can only be obtained from recruitment (e.g. Purestream, Lancet-2, Castle-3, Thermal-EX, Justice Knight)
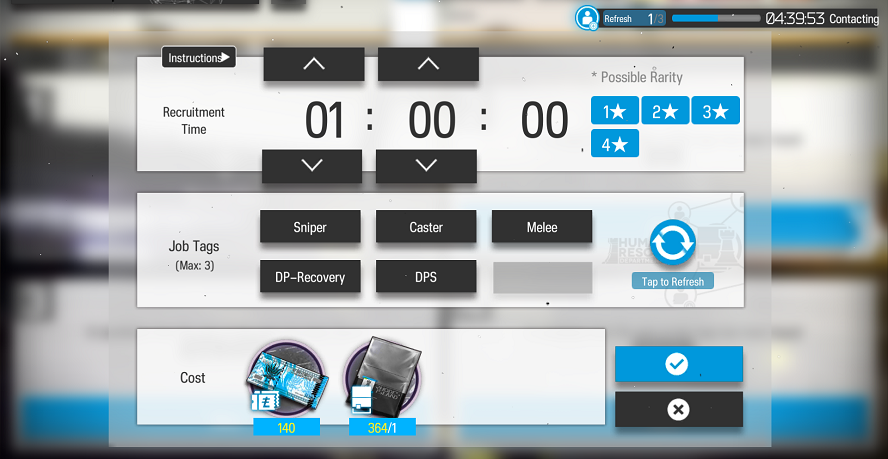
- How does it work?
- You're given 5 tags to pick. You can pick out a maximum of 3 tags among those. And then set a timer from 1-hour to 9-hours.
- Depends on your pick, certain operators in recruitment pool will be filtered out. Only those that fit your tag combination are left.
- If you don't like current tags, you can spend a refresh attempt to get different tags
- When the timer ends, you will obtain an operator that fits your chosen tag(s).
- Some chosen tags might be dropped during the recruitment period. If you picked conflicting tags, they will be dropped at random.
- Very rarely, you can get Senior Operator or Top Operator tag. Senior Op gives guaranteed 5* when chosen, and TopOp gives guaranteed 6*.
- Recruitment consumes LMD and Recruitment Permit.
- Recruitment Permit can be obtained from daily/weekly missions, event rewards, certificate shop, credit shop etc
- You can use Expedited Plan to instantly complete a recruitment. These can also be obtained from various sources like dailies, weeklies, events, shop etc
Recruitment tips
- ALWAYS set the timer to 9-hours on Senior/Top Op and do not pick conflicting tags.
- Upgrade HR Office in Base (BETA) gives more recruitment slot and refresh attempts.
- Picking more tags consume more LMD
- Lower rarity operators in recruitment pool will be excluded on longer timer. 1* will be excluded on 4-hours+ timer, 2* on 7h40+.
- "Robot" tag will give you 1* robot operators (Lancet-2, Castle-3, Thermal-EX, Justice Knight). Do not set timer over 3:50 if you want to recruit those operators
- If you want to recruit 2* "Starter" operators (e.g Noir Corne, Yato, Ranger etc). Do not set timer over 7:30
- Occasionally, new operators are added into recruitment pool. When this happens, all exist recruitment tags will be refreshed. So you can't save good tags for new operators.
- To check who are in recruitment pool or which tag combination give which operators, use Recruitment Calculator
Leveling/Upgrading operator
 Operator Files, where you can level, promote or check various important information about an operator
1. Leveling operator
Operator Files, where you can level, promote or check various important information about an operator
1. Leveling operator
You need LMD and EXP tickets to level up your operator.
- Maximum level:
- 1* and 2*: E0 level 30
- 3*: E1 level 55
- 4*: E2 level 70
- 5*: E2 level 80
- 6*: E2 level 90
2. Promoting operator
Promoting your operator to make them stronger, unlock level cap (more stats), unlock more talent (passive) and skill
- All operator start at Elite 0 (E0)
- At E0 level 50, 3* or above operators can be promoted to Elite 1 (E1)
- A E1 max level, they can be promoted to Elite 2 (E2). Different rarity has different E2 level.
- 3* operators can't be promote to E2. They stay at E1 55 max.
- 4* operators can be promoted to E2 at E1 60
- 5* operators can be promoted to E2 at E1 70
- 6* operators can be promoted to E2 at E1 80
You need LMD, material, Chip and Chip Pack (or Dualchip) to promote a operator
- Leveling and promoting high rarity operator (6*) cost A LOT of resources (LMD, EXP, materials) so plan carefully.
3. Upgrading skill
Beside leveling and promoting, you also need to upgrade your operator skill level. Otherwise they will not be able to reach their full potential in battle.
- 1* and 2* operators don't have skill
- 3* operators have 1 skill
- 4* operators have 2 skills
- 5* operators have 2 skills (except Caster Amiya who has 3 skills)
- 6* operators have 3 skills (Need E2 to unlock skill 3)
To level up skills, you need skill books and upgrade materials.
- Skill books can be farmed from Aerial Threat (CA) map. These are open on Tue/Wed/Fri/Sun. Farm the highest map you can clear.
- Skill books can also be obtained from event reward or shop. But your main source of them is from farming CA map.
- Material can be obtain from farming story maps, event maps, event reward.
- Maximum skill level is 7.
- If you're new and don't have many resources, you can stop at level 4 at first then raise them to 7 later.
- When you raise skill level, you raise them all simultaneously so don't worry that you have to level each skill separately.
4. Skill mastery
While maximum skill level is 7. You can raise them even further by doing mastery (Skill Specialization).
Only 4* and above operators can have skill mastery, up to level 3 (M3). You have to train those skills separately. This costs a lot of resources (skill books, materials) so only do this after you have a decent rooster.
Operator need to be promoted to E2 to be able to train mastery.
You also need a training room built in your Base (BETA).
- Don't focus too much on doing mastery as a newcutie. While some mastery give a major power boost to the operator, some only give a slight improvement. You should check which skill is worth doing first to avoid wasting resources.
- Many operators only need mastery on 1 or 2 of their best skills.
5. Module
Module is another upgrade to your operators. Some are great some are so-so. Check which module is worth unlocking, leveling first to avoid wasting resources.
To unlock module:
- Operator must be E2 at appropriate level (40 for 4*, 50 for 5* and 60 for 6*)
- Operator must have at least 100 trust
- You need to complete 2 module missions
- You need Module Data Block, materials, and some LMD
You can check all of those by clicking on module icon at bottom right of operator information page in game.
To upgrade module level:
- You need Data Supplement Stick, Data Supplement Instrument, materials and LMD
How to obtain Module Data Block
- Event reward
- Weekly mission reward
- Campaign mission reward
- Buy in shop
How to obtain Data Supplement Stick and Data Supplement Instrument
- Clear Stationary Security Service (SSS)
- Event reward
- Campaign missions reward
- Upgrade module level cost a lot so choose wisely
6. Potential
Getting operator dupes give you tokens to unlock their Potential (Pot).
All operators start at Pot1 when first obtained.
You need 6 copies to unlock maximum Potential (Pot6).
Unlocking Potential reduces deployment cost, gives a slight bump to stats and talent (passive).
High Pot isn't needed in 99% of contents. You can clear everything with Pot1 operators.
Potential only really matter on extreme content like max risk CC or some very specific strat, or to show off your waifu/husbando.
7. Operator record and Paradox Simulation
Operator records are basically short stories about operators. You can >read to understand a bit more about their circumstances, operator, motive etc. New operator records are added regularly.
Paradox Simulations are special stages which is unique to certain operators. Each stage has specific squad including the operator in question. You have to clear the stage to obtain Orundum. These simulations are also added regularly.
You can access both Operator record and Paradox Simulation on the operator information screen.
8. Trust
Trust is basically bond or whatever you might call it. Everyone start out at 0 trust. You can increase operator trust by clearing stages which consume sanity with them in the squad (they don't need to participate in battle).
When an operator trust increases, they will gain a slight stats boosts. This max out at 100% trust.
When an operator reaches 200% trust. They can keep the 100% trust stats bonus when being borrowed as support unit. If the operator isn't at 200% trust, they will have reduced stats bonus.
Squad

An example squad
A squad has 12 slots for 12 operators of your own, plus 1 support operator slot. So a maximum of 13 operators.
Support operator can be borrow from people on your friend list or random stranger. But if you borrow from a stranger, their skill level will be capped at level 7.
Typically, a squad consists of:
- 1 or 2 vanguards
- At least 1 anti-air sniper (e.g. Kroos, Jessica, Exusiai)
- At least 1 defender (e.g. Cuora, Beagle)
- At least 1 healer (e.g Hibiscus, Ansel, Perfumer)
- At least 1 caster (e.g. Amiya, Eyjafjalla)
- At least 1 guard (e.g. Melantha, SilverAsh, Midnight, Mountain)
- And may be a Support and a Specialist
There are many ways from a squad. You need to choose your operators depending on map, enemy line up, stage mechanic etc
Operator class and subclass
There are 8 main classes. I'll try to describe shorty what they do:
- Vanguard: Mostly deployed at the beginning of battle, generate Deployment Points (DP) so you can put down your other big guys.
- Guard: Main job is to kill things on the ground and win the battle for you. Some can also attack aerial enemies.
- Defender: Block enemies.
- Sniper: Kill flying enemies, far away enemies, neutralize threats that are hard to block or can't be blocked.
- Caster: Kill high DEF enemies aka enemy defender/tank
- Healer: Heal
or kill - Supporter: Buff, debuff, summon, commit war crime etc
or solo the whole stage - Specialist: Fast-redeploy (has very short re-deployment cool-down, can assassinate or stun/slow/debuff enemies), push/pull enemies into hole, lay traps etc
The above description is definitely not enough to explain what every classes do. Each main class has a bunch of subclasses. It will take ages to explain everything so check this spreadsheet here to understand what each subclass does.
Clearing stage, normal and challenge mode
1. Main Story stages
Main Story stages can be played anytime. You need to clear from the beginning of each story chapter to unlock subsequent stages and chapters. Currently we have 10 Main Story chapters.
2. Event stages
Event stages are available during event period only. They will be locked when the event ends. You can only access them again when that event gets a rerun or when it's added to Intermezzi or Side Story
3. Normal and challenge mode
 From left to right: Challenge Mode, Practice Mode, Normal Mode
For each Main Story stage, there is a Normal mode and a Challenge mode aka Hard mode.
From left to right: Challenge Mode, Practice Mode, Normal Mode
For each Main Story stage, there is a Normal mode and a Challenge mode aka Hard mode.
After clearing Normal mode with 3 stars rating. You can tackle Challenge mode.
Challenge mode imposes hash conditions on the stage to make it harder (enemy stats buff, restriction on friendly operators etc).
The same rule is applied to Event stages. Though for Event stages, they usually have a Normal stage group and an EX stage group. Normal stage group is tied with event story and only has Normal mode. While EX stages are extra challenge for players and they have both Normal and Challenge mode.
- Clearing Normal or Challenge mode will give you 1 Originite Prime. For F2P players, this is your main source of OP to buy operator skins.
- Since Main Story Chapter 10, you can pick Adverse Environment mode on map. Clearing a stage in this mode counts as clearing both Normal AND Challenge mode. So basically you only need to clear a stage once.
Farming resources
There are many resources to farm in game. They're mostly used to raise your operators, or buy thing from in game shop
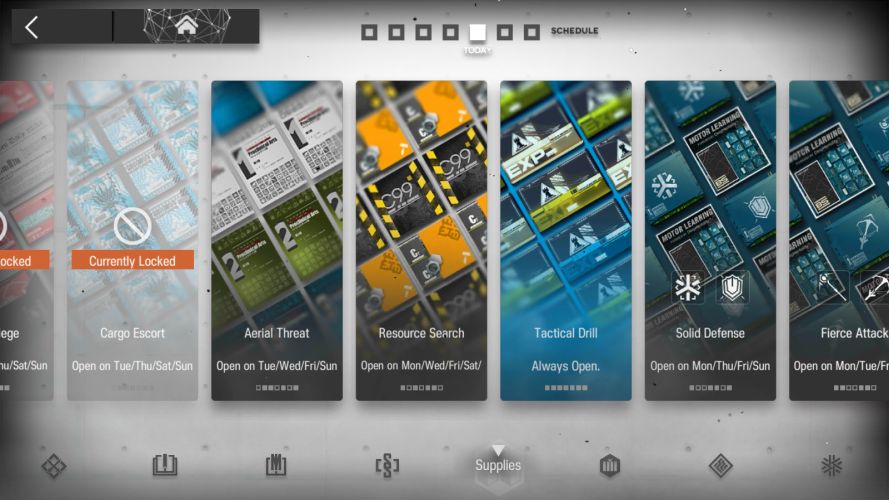
Supply maps where you can farm various resources
1. LMD
Money. Do I even need to explain more?
LMD can be obtained from:
- Trading Post in your Base (BETA). This will be your main source of LMD income.
- Farming Cargo Escort (CE) maps. These maps are open only on Tue/Thu/Sat/Sun.
- Event reward.
2. EXP
Experience points, EXP tickets, Battle Records, sex tapes etc. They're used to raise your operator level.
EXP ticket can be obtained from:
- Factory in your Base (BETA). This will be your main sources of EXP ticket.
- Farming Tactical Drill (LS) maps. These maps are always open.
- Event reward
3. Elite material
Materials, elite materials, growth materials etc. Used to upgrade your operator. Any kind of upgrade except level needs some materials.
How to get:
- Farming Main Story stages. This is the normal way.
- Farming Event stages. Event stages have better drop rate then Main Story stages. But each event only has 2 or 3 types of material worth farming. So check what you need and farm wisely.
- Event rewards.
- Buy from in game shop.
4. Chip and chip pack
You need Chips and Chip Packs to promote operator
They can be farmed from Supply stages. Those stages rotate on a schedule so remember to farm what you need when they're available.
Each class need the correct type of chips.
Chips are used to promote operator to E1
Chip Packs are used to promote 4* operator to E2
For 5* and 6* operators, you need Dualchip. They can be crafted in Factory, each Dualchip need 2 Chip Packs and a Chip Catalyst (obtained from in game shop, see Shop section).
5. Purchase certificate
Aka Red cert, red voucher.
Red certs are used to purchase stuffs in the Purchase Certificate shop.
They can be farmed from Tough Siege (AP) maps which are available son Sun/Mon/Thu/Sat.
6. Skill Summary aka Skill book
These are used to upgrade operator skills.
Skill summary can be farmed from Aerial Threat (CA) maps. They are available on Tue/Wed/Fri/Sun.
Skill summary can also be obtained from daily or weekly mission rewards, event rewards, credit store, cash shop packs etc. But you will certainly have to farm them.
7. Carbon stick
They're used to upgrade your Base (BETA). You will have to spend some time farming these things in the beginning. After you are done upgrading your Base (BETA), you won't have to bother with these anymore.
About farming
Except Chip and Chip Pack, ALWAYS farm the hardest supply map you can clear because it's more sanity efficient.
Most Event has maps to farm elite materials which are more sanity efficient than farming Main Story map. So plan and save your sanity for those.
Shop/Store
Where Closure squeezes you dry
1. Originium
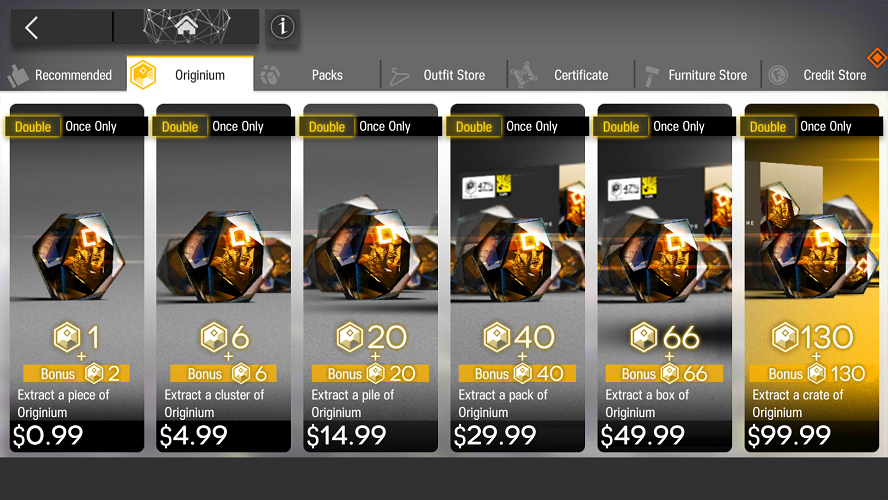 Buy Originite Prime (OP) with real money. There's a x2 bonus on first purchase. The x2 bonus will be reset once per year on anniversary.
2. Packs
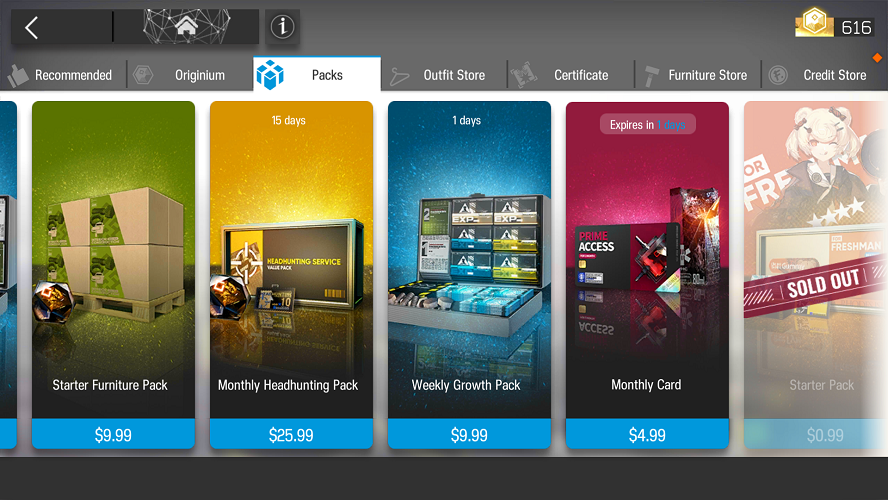 Buy various packs with real money. If you're willing to spend, check these out:
- Monthly Card: Give 200 Orundum and and Emergency Sanity Booster (restores 80 sanity) every day
- Monthly Headhunting Packs: 42 OPs and 1 10-rolls Headhunting Ticket. For buying rolls, this pack usually has the best value. You can only buy one per month.
- Special packs: They are sold during events. Big events like anniversary have packs with rolls, OPs and various resources. They usually have good value. There are also 5* picker, 6* picker packs.
If you're newcutie, there will be Enhancement Packs available every 5 level up to 70. They can be bought with OP. Buying them basically converts those OPs spent into Orundum AND give you extra resources. All in all they're decent buys unless you want to save those OP for something else (buying outfits for example)
3. Outfit shop
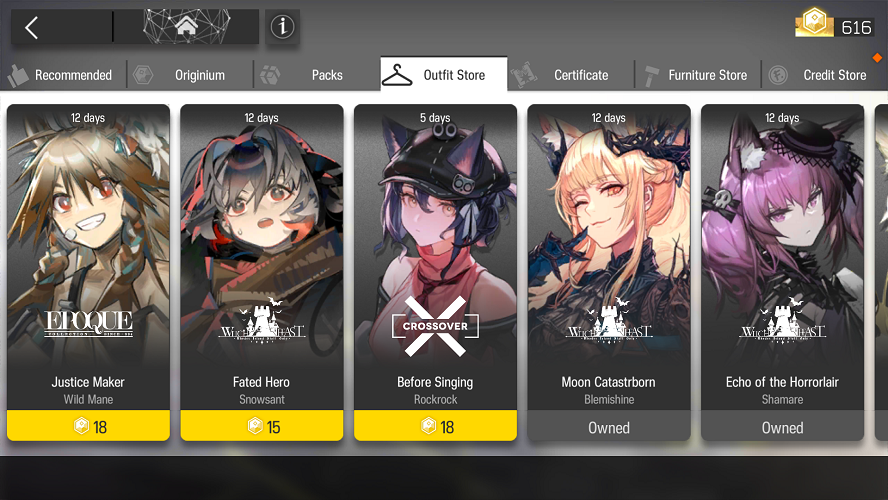 Outfits are skins. That's it. We call them outfits because calling them skins makes it sound like your operators are a bunch of skinwalkers.
New outfits are added and sold when new event drops, and some old ones will get rerun.
Outfits can be bought with Originite Prime.
4. Certificate
Probably the most important shop
When obtaining operators (via recruitment or headhunting), you will be rewarded with Commendation Certificate and Distinction Certificate.
You can check the exchange rules by clicking Rules button on the bottom left of Certificate shop.
Commendation Certificate
 Aka green cert shop. This shop resets monthly.
The 1st tier has good value so try to clear it out every month.
The 2nd tier has worse value but you if you have played a some time and have surplus green certs, spending some wouldn't hurt. Just make sure you have enough left to clear the 1st tier when monthly reset comes.
Don't bother with 3rd tier to be honest.
If you're some mega whale then you most likely wouldn't have to worry about running out of green certs. Just do whatever.
Distinction Certificate
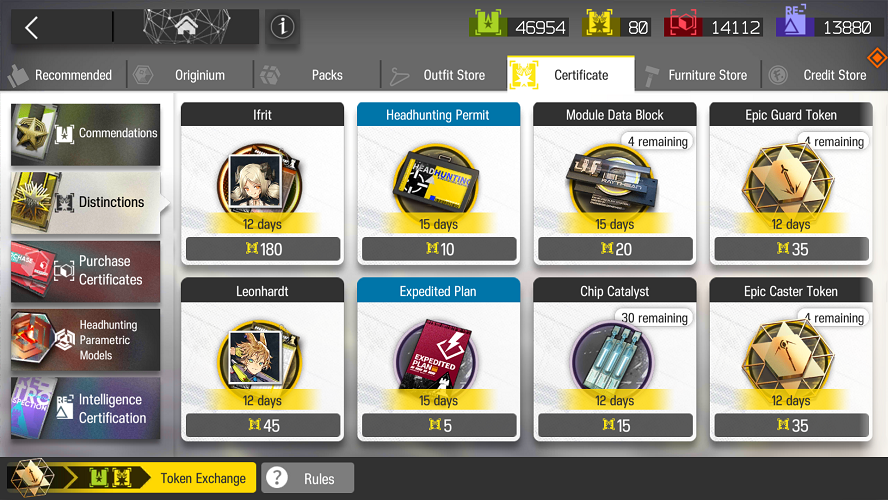 Aka gold cert shop. There are only 3 things worth buying in this shop: 6 operator, 5 operator and Headhunting ticket.
- Operator: This shop always has 1 6 operator and one 5 operator. They are the one currently featured on rotating standard banner (double rate-up). 6 operator costs 180 gold certs. 5 operator costs 45 gold certs.
- Headhunting tickets: Has several tiers. You can get a total of 38 rolls by buying everything, which costs 258 gold certs. Higher tiers have better value.
- You can find out which operators will be in shop when looking at a standard banner: The 6 operator who is in their E0 form and the middle 5 operator.
- Unless you're really desperate, only buy Headhunting tickets when you have enough gold cert (258) to buy all tier.
Purchase Certificates
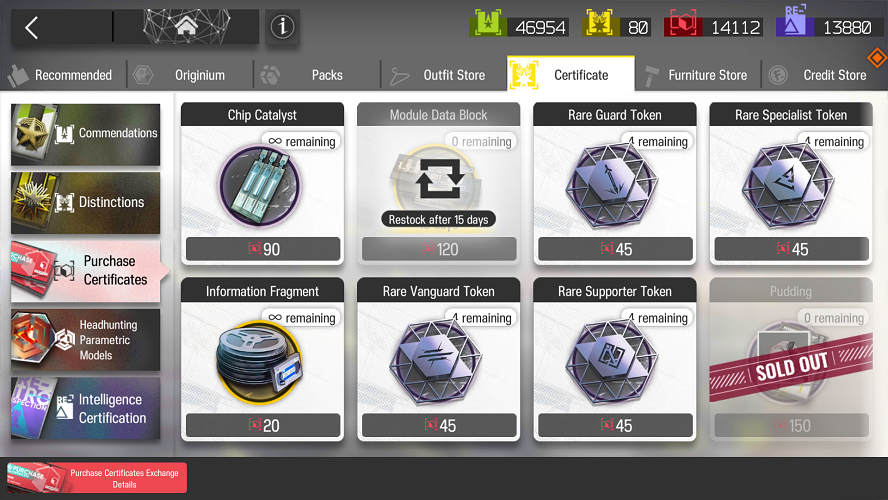 Aka red cert. You obtain red certs from farming AP maps (daily and weekly missions give them too but the amount is negligible).
There are various things to buy here"
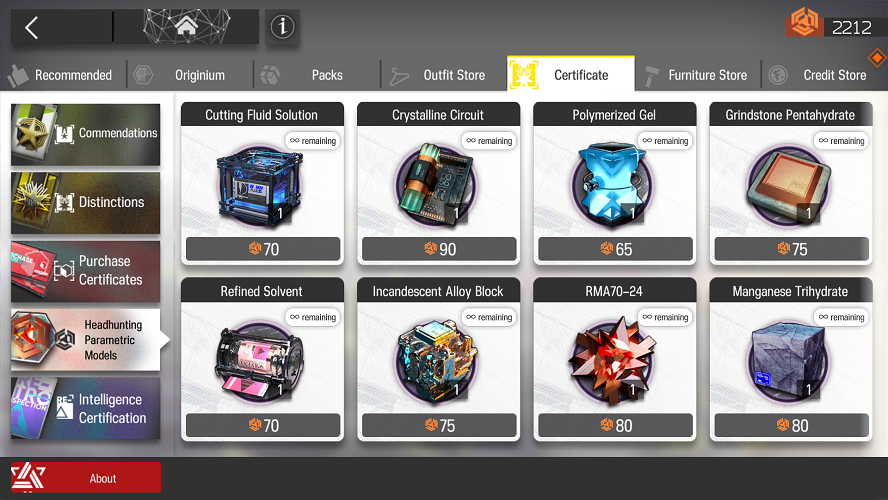
- Chip Catalyst (Chip Glue): This is the only way to obtain them beside some specific event rewards. Chip Catalyst is need to craft Dualchips which are required to promote 5 and 6 operators to E2.
- Module Data Blocks: There are 4 available and they will be restocked at the beginning of each month.
- Operators: There are some operators you can buy here: Breeze, Ethan, Honeyberry, Pudding. Among those, Ethan and Honeyberry are very good. These operator are not available anywhere else so try grabbing at least one copy. You can buy 6 times to max out their potentials but it costs a boat load of red certs (especially the 5*).
- Token: These generic tokens can be used to unlock operator potential without having to roll for their dupes. The only ones really worth buying are 6 token and MAYBE 5 ones but as a newcutie you'd better spend your sanity somewhere else.
- Information Fragment: Who even buy these? But if you actually need some, go ahead.
- Be careful when buying, don't misclick and blow all your certs on chip catalyst or something.
Headhunting Data Contract Shop
The spark shop. Only available during limited banner. See next section:
Headhunting Parametric Model
 On a limited banner, each roll you made will gain you 1 Headhunting Data Contract (1 for a single roll, 10 for a 10-rolls).
You can use Headhunting Data Contract to spark an operator on the Headhunting Data Contract Shop.
When a limited banners ends. Remaining Headhunting Data Contract will be converted in to Headhunting Parametric Model at the ratio of 1:6.
You can then use Headhunting Parametric Model to buy goods in this shop.
Intelligence Certification
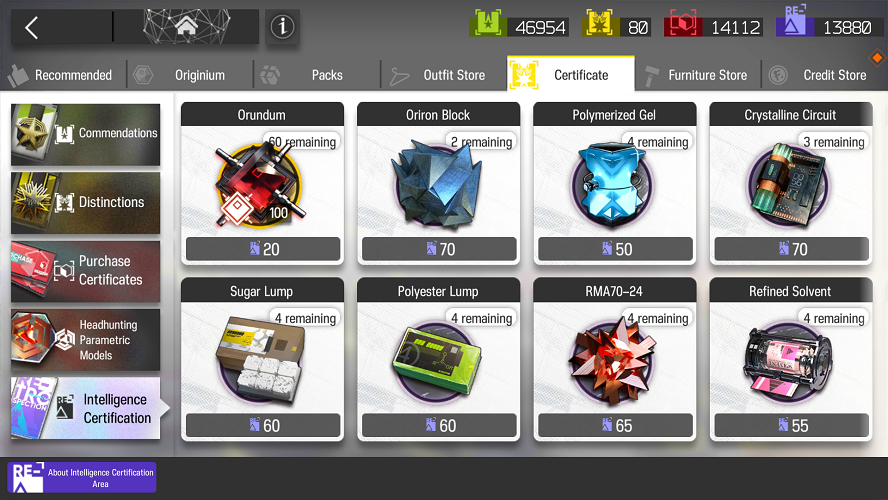 This mostly concerns oldfags and event reruns.
When an event gets a rerun. Old players who have cleared the event once won't be able to gain some rewards like in the first run. Those rewards will instead be converted into Intelligence Certificates.
Intelligence Certificates can be used to buy goods in this shop.
5. Furniture store
Furniture are used to decorate your dorms in Base (BETA).
Furniture can be bought with Furniture Parts which are obtained from Events, daily/weekly missions, credit stores or crafted from carbon sticks.
You can also buy furniture with OP but it's not recommended.
6. Credits store
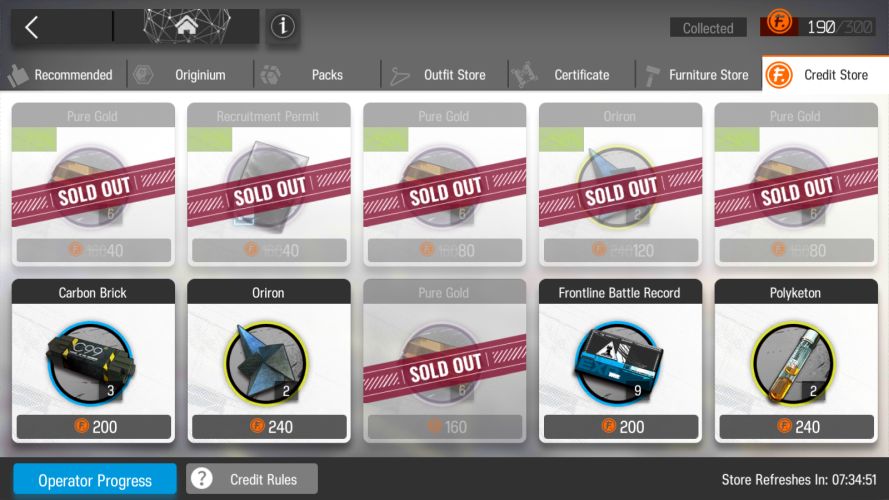 This shop is reset daily and sells some useful stuffs like EXP, furniture parts, materials, skill summaries etc. Some items will randomly have a discount.
There are also operators to buy: Gavial, Courier, and Dur-nar. You can get them after spending a certain amount of credits in the store. They are useful but not shop exclusive and can be obtain from else where.
There are several ways to gain credits:
- You gain some every day on daily reset based on your Dormitory ambience. With fully maxed dorms and ambience, you get 200 credits per day.
- One per day, you gain 30 credits from borrowing a support unit from your friends, if one of your support units is borrowed, you get 20 credits.
- From reception room, credits are awarded every time you
- Obtaining a clue
- Sending/Receiving a clue from friends
- Visit a friend who has a clue exchange session going on (this is capped out at 300 credits per day)
- You own clue exchange session ends
- Everyday your credits will be reset to 300 if you have more than that amount so make sure to spend them before daily reset comes.
Base (BETA)
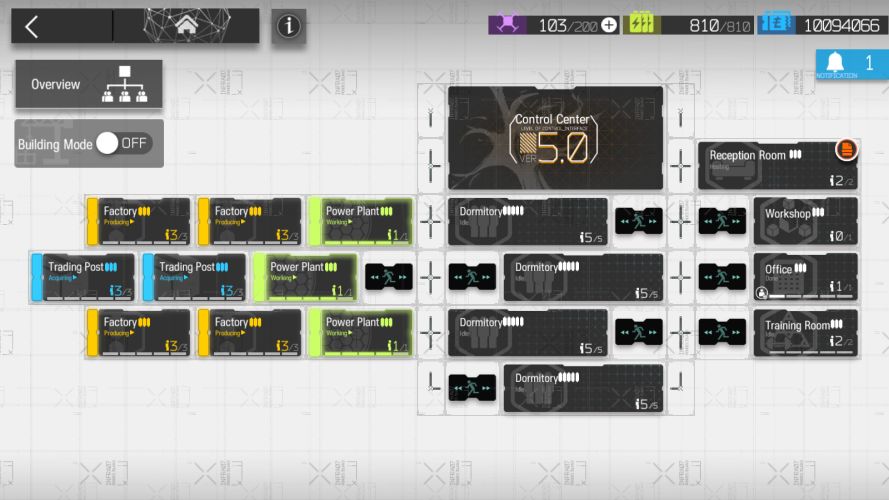 It's your home.
Don't forget, you are here forever.
You can assign operators to various facility here to produce LMD, EXP, gold bars (to trade for LMD), training mastery, crafting, clue searching etc
Working consumes operator's Morale. When an operator's Morale reaches 0, that operator is "fatigued" and can't work anymore. You have to put them in the dorm to let them rest and recover Morale.
1. Control Center
Place operators here to provide various buffs to other facilities, reducing morale consumption so your slav workers can work longer before having to rest in Dormitory.
You can assign 5 Base Assistants: 1 leader and 4 sub. They gain trust bonus twice per day. Leader gets the largest bonus.
You can view production result from the last 3 days in CC
It's recommended to assign operators with useful skills in the CC. But even if you don't have those, just place some random ones in here and they still can provide Morale consumption reduction effect on the Base (BETA).
2. Dormitory
Place operators here to recover Morale after they have spent time working in other facility.
You can decorate your dorms with furniture to increase Ambience. The higher the Ambience, the faster your operators recover Morale. Maximum Ambience is 5000 per dorm at dorm level 5.
Having maximum Ambience in your dorms will award more credits on daily reset. A fully upgraded dorm with 5000 Ambience gives 50 credits per day.
3. Power Plant
Provide power for the Base (BETA). You can't build more or upgrade facilities if your power plant can't provide enough power.
Place operator in power plant to help recover drones.
Drones can be used to build, upgrade facilities, or speed up production, trading post.
Make sure to use your drones. They recover over time and have an upper limit.
4. Factory
Factory produces EXP, gold bar, dualchip (to E2 6* operators), originum shards (used to trade for Orundum in Trading post).
This is your main source of EXP.
Place operators with production skills here to increase productivity or capacity.
Factory has capacity limit. You can queue production past the capacity limit. But when the limit is reached, production is halted. So make sure to collect products regularly.
5. Trading post
This is your main source of LMD income.
You can trade gold bars for LMD, or Originium shards for Orundum.
Trading post gain "Order". when an order is acquired, you can then trade them in to gain LMD or Orundum.
Place operator with trading post skills here to speed up order acquisition efficiency or increase the order limit.
Trading post and Factory work best when fully upgraded (level 3).
Level 3 Trading post gives the best order value.
Level 3 Factory let you produce better Battle Records (EXP)
6. Reception
In here, you can find, send, receive Clues.
Place operators here to perform Clue Search. Operators with clue search bonus can help speed up the progress.
Acquired Clues can be send to your friends to gain Credits. You can also receive clues from people on your friend list.
Upgrading this facility increase the cap of your friend list and gives you more support unit slots.
When you have all 7 Clues. A 24-hours Clue Exchange Session can be commenced. You friends can visit your base to gain Credits. And you are awarded Credits after the session ends.
7. Workshop
You can craft various products here:
- Building materials: Carbon brick, carbon block etc. They're need to build and upgrade your base.
- Skill summaries: You can craft higher level Skill Summaries from lower level ones.
- Elite materials: You can craft high tier elite materials here. You need them to promote/upgrade operators.
- Chip: Produce a specific type of Chip or Chip Pack from other Chip/Chip Pack
- Recycle furniture: Extra, unneeded furniture can be recycled into furniture parts.
Upgrade this facility to unlock more crafting recipes
8. Human Resources Office
Upgrade this facility to unlock more Recruitment Slot and give more chance to refresh recruitment tags.
At maximum level, you get 4 recruitment slot and 3 refresh changes.
Assign operator with HR skill here to speed up the progress of acquiring tag refresher.
9. Training room
Use the training room to upgrade skill mastery beyond level 7.
Beside the operator who is doing mastery training, you can assign an operator with trainer skill to speed up the progress.
Operator base skill
- The game has pretty good tutorial on the Base (BETA). Make sure you read it carefully.
- Every operator has at least one base skill. An operator's base skill can interact with another operator's base skill and have various effects.
- To understand more about operator base skills and how to effectively utilize them, take a look at this spreadsheet
Base (BETA) setup
- This prefers to the layout of the left side of your base (the one with trading post, factory, and power plant)
- The 2 most common setups are 243 (2 TPs, 4 Factories, 3 PP) and 252 (2 TPs, 5 Factories, 3 PP)
- As a newcutie, 252 setup might be better since you're always in desperate need to LMD and EXP.
- After that you can keep going with 252 or switch to 242. Do note that you can't fully upgrade dorms and the right side of your base if you use 252 setup
- While you can make changes to the left side facilities and dorms, upgrading the right side of the Base (BETA) is a one-way road. You can't downgrade them later.
- The 243 vs 252 debate never ends.
Annihilation missions
 They are your main source of Orundum. Currently, you can get a maximum of 1800 Orundums every week from Annihilation.
An Annihilation mission will spawn 400 enemies. You have to eliminate every single one (400/400) to obtain maximum rewards.
You have 10 Life Points. If you leak 10 enemies, the mission is over.
Even if you fail the mission halfway through. Rewards will still be calculated and given out. You also get some sanity refunded depending on your kill count.
Clearing an Annihilation mission perfectly once without borrowing a support operator will let you auto the stage or use skip ticket on it to save time.
Clearing an Annihilation mission for the first time will give you a hefty rewards.
There are Permanent Annihilation mission, Rotating Annihilation mission and Annihilation Simulation.
You can only obtain Orundum from Permanent Annihilation and the currently active Rotation Annihilation mission.
- Permanent Annihilation mission are always available. Clearing them will always reward Orundum. Of course you can't go over the weekly limit cap. There are 3 maps:
- Chernobog
- Lungmen Outskirts
- Lungmen Downtown
- Rotating Annihilation mission is changed every few weeks. A new mission will be added and the old one will become inactive and get added to Annihilation Simulation mission group. Clearing an active Rotating Annihilation mission rewards Orundum.
- Annihilation Simulation are old Rotation Annihilation maps that have become "inactive". Clearing them will not reward Orundum but you still can get first time clear rewards.
- Trying doing these mission as soon as you can. Especially the 3 permanent missions. Not only they give you a lots of resources, they also increase your weekly obtainable Orundum cap.
- Clearing an Annihilation mission for the first time always give rewards. So make sure to check them out.
- If you fail an Annihilation mission, simply force shut down the game before the battle ends. No sanity will be consumed and you can try again.
- If you can't auto the latest Rotation Annihilation as a newcutie, stick to the 3 permanent maps. They're less sanity efficient but a lot easier.
- On the Annihilation map, mission that give Orundum will have a red highlight under its icon.
Stationary Security Service
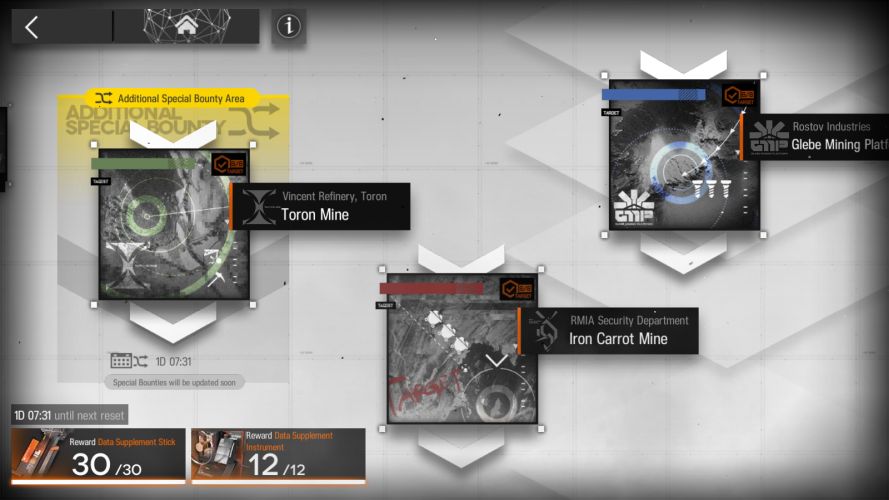 Or SSS for short.
This is where you farm Data Supplement Stick and Data Supplement Instrument to upgrade operator modules.
The maps here are on a rotation schedule. The "active" map or Special Bounty Area will give extra rewards.
You gain a maximum of 30 Data Supplement Stick and 12 Data Supplement Instrument per rotation.
You pick an initial squad, or Deck, at the beginning. After clearing a stage, you can pick 2 more operators to add in your Deck.
This game mode has relay, or stacking, mechanic. Basically you deploy operators on top of each other, the newly deployed operator replaces the current one and gain a buff based on the class of the replaced operator.
Each map has 8 stages. They don't cost sanity.
You lose nothing when failing a stage and can restart whenever.
- Play the tutorial.
- Don't worry about failing. You gain rewards as long as you clear a stage. So if you're newcutie and weak, repeatedly farming the earlier stages can also work.
- Clearing every stages of a map give a medal. Clearing every stages of a map WITHOUT failing and restarting any stage give a trimmed medal (you can leak, just don't fail the whole stage)
- On an Special Bounty Area map, 1 full clear (8 stages) and another half run (4 stages) are needed to obtain maximum rewards (30 Data Supplement Stick and 12 Data Supplement Instrument)
Contingency Contract
Or CC.
Run for 2 weeks every few months.
There are 7 daily maps and 1 permanent maps.
You can pick various "Risks" to make the maps harder, from moderately to ball-busting hard.
Daily maps are rotated every day with different set of risks.
Permanent map is always available.
Both daily maps and permanent map have various challenge missions you can clear to gain CC currency.
CC currency can be used to buy various goods in the CC shop.
CC shop has 2 sections: Permanent and Seasonal. Permanent shop is always open. While seasonal shop will be unavailable when current CC ends.
- Doing CC maps costs nothing except your irl sanity.
- To obtain maximum rewards you have to:
- Clear Risk 8 daily map every day (including the daily challenge mission).
- Clear Risk 18 permanent map. Also do all the challenge missions.
- Play and unlock more risks on the permanent map. Doing this will reward you supply crates when CC end which contain various materials.
- Clearing Risk 18 permanent map during week 1 will reward trimmed CC medal.
Integrated Strategy
 Also called IS, roguelike.
You gain various rewards by playing this, including LMD, EXP, materials, welfare operator etc. It doesn't reward Orundum though.
It costs nothing but your time and irl sanity.
It's a permanent game mode and won't go away ever so feel free to tackle this at your leisure.
There's a lot to say about this but tbqh I'm really fucking tired at this point already.
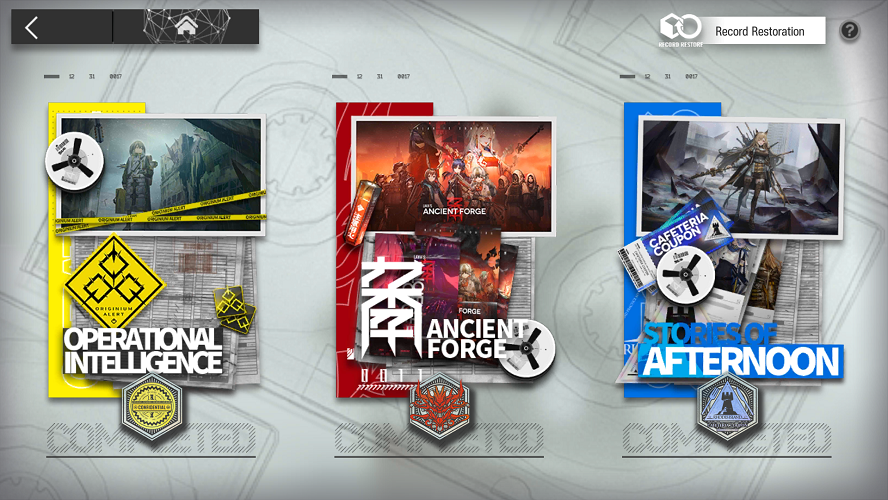
Record Restoration
Feature to help newcutie.
Record Restoration allows players to obtain event rewards that they have not yet earned.
Major events will be added to Intermezzo/Side Story section of the Terminal. You will have to clear the stages of these events to obtain enough stars to unlock corresponding rewards.
If you have missed an event welfare operator or some event exclusive furniture parts. This is the way to get them
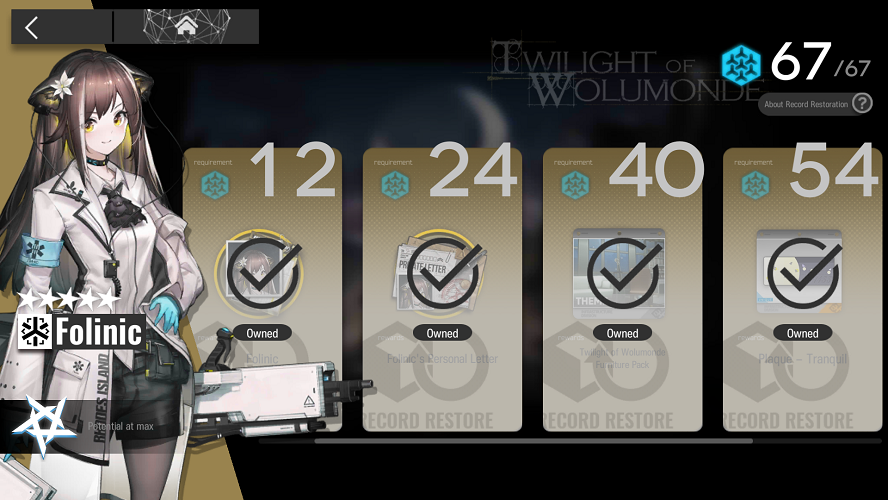
Mini story events will be added to Intelligence>Special Operation section of the Archives page. You will have to spend Information Fragments to unlock them.
Archives
Accessible from the home screen
 Let you check the relationship network, enemies info, read old event stories, manage your medals (achievement), or view current available skins.
Some useful tips
- READ and UNDERSTAND: character info, stage info, enemies info, stage mechanic etc
- Don't skip tutorial
- Don't skip tutorial
- Have your base up and running early. Base provides passive LMD and EXP income which are very helpful.
- 6* are strong but they're expensive to raise and some only perform best at E2. It's better to have a somewhat functional team first then focus on raising your strongest 6*.
- 3* are decent early game but don't invest too much into them.
- Try having an E2 4* as soon as you can. So you can borrow E2 support unit from friends to carry your newcutie ass.
- Check out the /akg/ resources rentry for useful links, tools and tutorials.
Changelog
15.04.2023: V.1
15.04.2023: Add Recruitment and Record Restoration section. Thanks anon for the suggestion. Add FAQ #10, #11, #12. Add some images.
17.04.2023: Add FAQ #13.
Reply to OP post in /akg/ thread if you want something fixed/changed/added. OR shoot an email at puzzleton@protonmail.com