V100MAXXING — A Retard VRAMlet's Guide to Infinitely Scalable Compute
Note:
You're impatient. You have a little bit of money and want to goon with (INSERT BIG MODEL) in the fast lane. If you thought Miqubox was too slow to be worth the VRAM because the P40 does only >183.7 GFLOPS FP16, or CPUmaxxing was too expensive for what you get from it, This guide is for you.
Table Of Contents
Preface
To quote CPuMAXx:
There are three ways:
- Stack GPUs for sweet, sweet GDDR bandwidth
- UMA richfag (Appleshit)
- CPuMAXx NUMA insanity
Of which we will be doing the first. However, unlike Miqubox or X090Fagging, we will be doing it properly.
Hardware
Note:
Want more nuanced info than this guide provides? Check out the V100MAXXING rentry for more nuanced and finer details into the setup itself.
Components
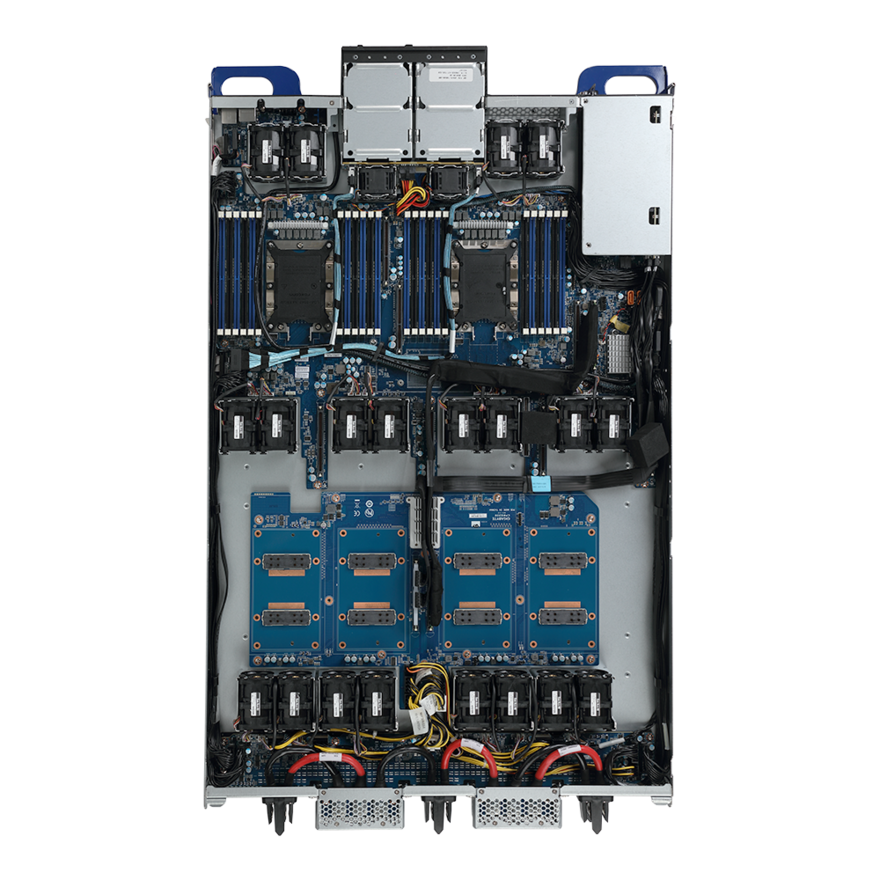
Gigabyte T181-G20: Core 4 Solutions IT hardware has a warehouse full of these things, $1300 each. They will be the barebones server backbone for this entire project.
This rack unit conforms to Openrack specifications and expects external 12V power. You will need a custom solution, which can be done cheaply.
V100-16GB-SXM2: The GPU used here. Core 4 Solutions IT hardware has a ton of them for $200, but this is slightly overpriced and you should buy them for around $150.
Xeon Gold 6132: $20-30 CPU. You don't need two, but probably should get two anyway. The cost is inconsequential.
DDR4-2133 RDIMMs: $90-120 for 96GB or about double for 192GB. Ideally get at least 12 DIMMs to populate every channel across both sockets, but we don't particularly care about memory bandwidth here.
Storage of your choice: I recommend NVMe SSDs, but you can pick whatever you want to store your models.
SXM2 Vs. PCIe
The difference between them should be clear. SXM2 is an HPC-centric form factor for Nvidia Tesla GPUs. Most importantly it gives access to the NVSwitch, which provides a 300GBps NVLink interconnect between the V100s, which you would not get if you were using PCIe or adapters. If you're running tensor parallel, which you will, this is the best thing you could ever have.
The Setup
This machine costs roughly $2000 per complete node for 64GB of VRAM, coming out to $475/GPU, and provides batched inference performance twice that of 4090s. In reality two 4090s would actually be slower because no NVLink, with only 48GB VRAM, and also would cost $3200.
Software
If you want to use Proxmox to do GPU compute across multiple virtual machines, you will need to use a local licensing server to bypass the Nvidia vGPU license. I use this one by GreenDamTan, it works nicely.
If you don't care, you don't need any shittery. Just the Nvidia Tesla driver will do. Your inference backend will be either Aphrodite or vLLM, as these support tensor parallel. I recommend Aphrodite dev branch, as it uses a Triton implementation of FlashAttention V2 supporting V100 tensor core shapes just like vLLM.
Hardware, Continued
The whole idea of V100MAXXING is for it to be affordable and scalable. The more you buy, the more you save. Fortunately, Nvidia has given us GPUDirect RDMA to do this with. The T181-G20 has two PCI-E 3.0 expansion slots, which you should fill with either 40Gbps or 100Gbps GPUDirect supported NICs if you plan on running multi-node.
Power
Unfortunately, the server this build uses requires external 12V power. Fortunately, there are multiple ways you could resolve this issue:
The Easy Way:
This is the most expensive method. Find an OpenComputeProject rackmount power supply unit, and some distribution busbars to accompany them. You may need to modify your rack so it will attach correctly, but if you're going to be mounting these in a rack you needed to do this anyway, as these units are slightly wider than typical racks.
The DIY Way:
Buy some dell/whoever server PSUs, particularly ones that have good PCB pads to solder to. Using battery wire ($20 is all you need) solder one exposed end of the battery wires to the PSU's +12V and GND PCB pads. The other ends of the battery wire should have ring terminals ($5-10) crimped on, which can then be attached into the server's power distribution board.
The Hard Way:
This is probably the cleanest solution. Figure out the pinout of the proprietary 14 and 18 pin power connectors into the motherboard and modify the pinout of existing adapters to match. If you're not willing to solder or pay out the ass, do this one.

