Removing diffusion gunk
What
Diffusion images have an imperceptible (sometimes visible) coat of noise that permeates the entire image. You can check for this by amplifying values on the RGB channels (e.g. Image > Adjustments > Curves on Photoshop). This noise is random, bloats file size, and makes it very easy to tell an image was AI generated. It does not resemble JPG block compression either, which has a visible square shape.

When checking human drawings this way, brush strokes and shading stand out, e.g. blushing, and unshaded areas are flat. This aligns with an ordinary lineart - coloring - shading process. This is the look we want to approximate.

The Goal
Getting rid of this cum residue over the image, without compromising on any detail. Only these artifacts need to go; we don't want the image to be altered in any perceptible way.
Fortunately, the noise is so faint that this is easily achievable.
How
To do this, we just have to run the image through two OpenCV filters: edgePreservingFilter followed by bilateralFilter.
You can use these settings from my testing:
edgePreservingFilter
flags = 2
sigma_s = 128
sigma_r = 0.01
bilateralFilter
d = 256
sigmaColor = 8
sigmaSpace = 60
You can safely increase edgePreservingFilter's sigma_r value to 0.05 if the image is a simple one to more aggressively tune out the noise. The difference is very subtle and shrinks the file size even more.
You can try lowering bilateralFilter's sigmaColor to around 4 or even 2.5 if you notice a gradient getting nuked. A lower value is more sensitive to color changes. Remember you can piece back a final image from multiple settings (see Compositing), so experiment.
You can lower bilateralFilter's d value to 128 to speed up processing. Note that it won't be as good if you do so.
edgePreservingFilter will glitch out if the input image is above 4K. If you need to process very large images, split them inhalf (2 or more images) and merge them back. The alternative is setting flags to 1, but it is a cheaper method that isn't as good.
OpenCV Python Script
Reads in.png and applies the filters, then shows a comparison. Saves the result to out.png. I don't recommend relying on the comparison from this script as different images require different values to highlight noise, so do it manually instead (see below, "Inspecting")
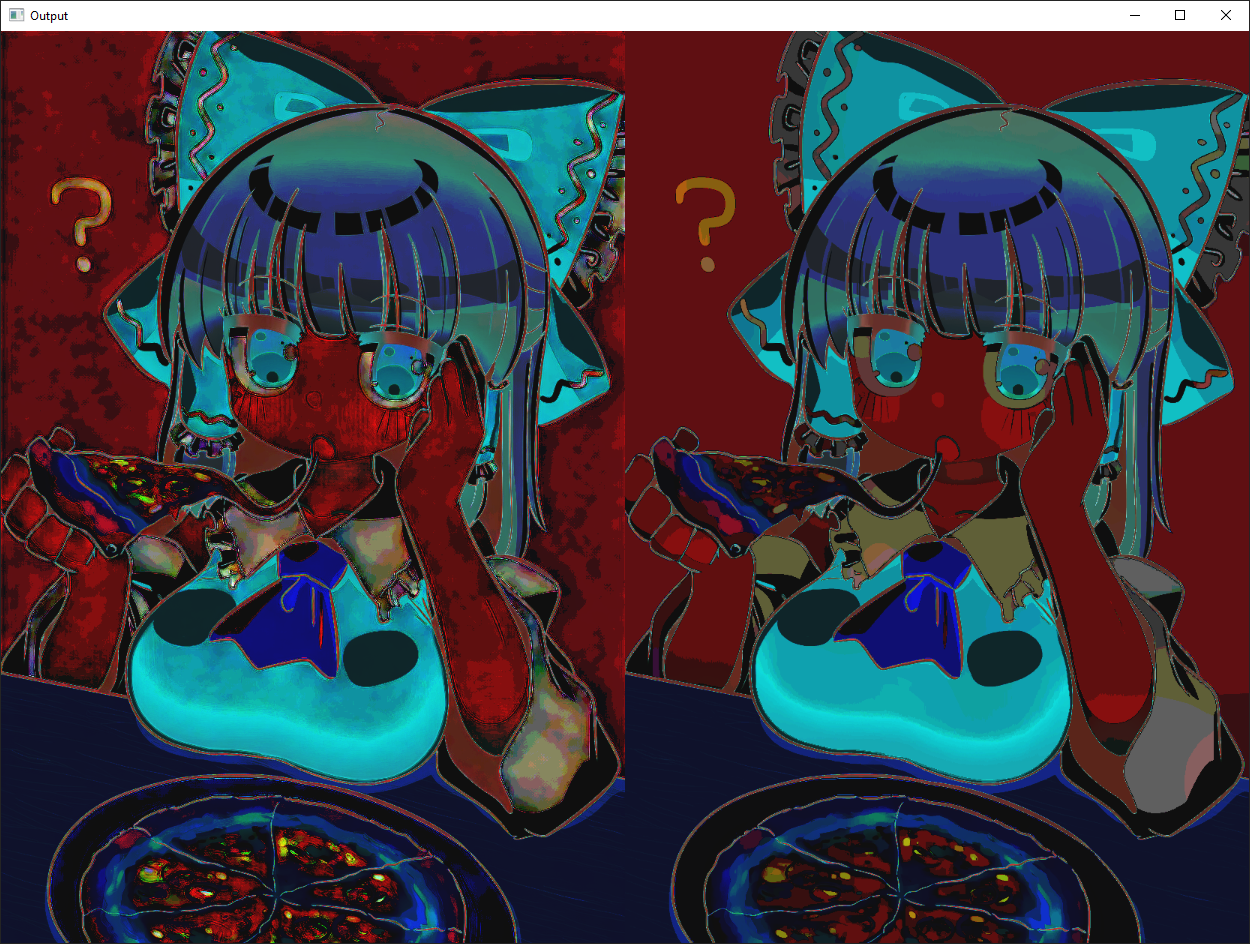 Image used: https://files.catbox.moe/vhfdoc.png
In ComfyUI
You can do the above directly from within ComfyUI with OpenCV nodes. I use https://github.com/geroldmeisinger/opencv-comfyui
The node setup looks like this:
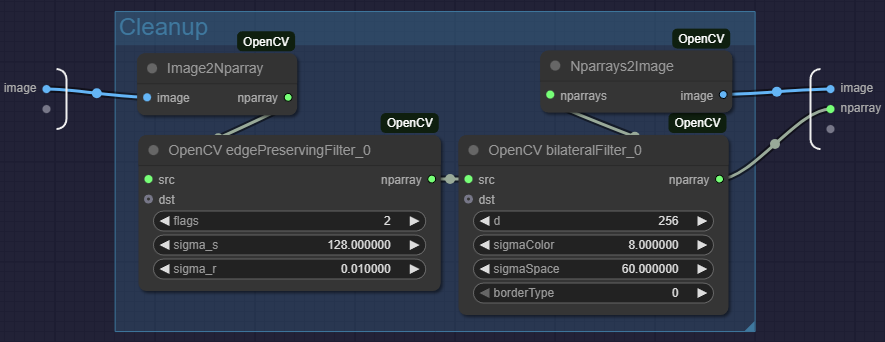
Increase "Float widget rounding" in settings if ComfyUI starts rounding decimals.
Inspecting
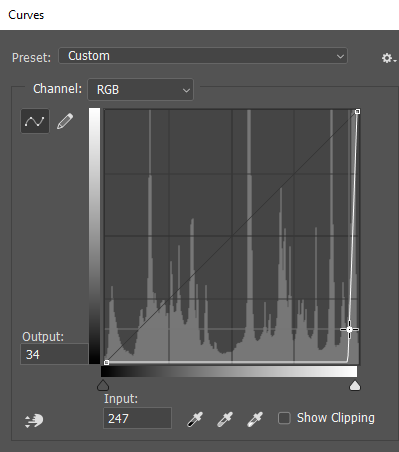
As stated above you can use the Curves tool in Photoshop/Photopea to look for traces of noise or see the changes. Simply start adding points with ridiculous values. You can start by creating a point in the middle and dragging it to the bottom right as shown.
In Photoshop, you can also export adjustments done with the Curves tool as a LUT that you can then load and apply in ComfyUI, which is great for previewing quickly.
Why
The most obvious benefit is you save more than 50% on file size, especially on images with simple shading. Not that anyone was going to check, but it also makes the image look a lot less like AI under the microscope. I recommend you try it out for yourself.
Ultimately, I hate the fact that this shitty cum tissue crust exists on AI pics. This is the method I have found for myself.
Here is a comparison shot to emphasise how close the end result is to the reference image. The file size went down to 1.95MB from 3.79MB. If sigma_r is increased to 0.05, it goes down to 1.53MB. All that noise amounts to half the file size! This lets you perform upscaling without ending up with a ridiculous file size.

If you look closely there are some subtle differences with the settings from above, for example the white gradient on the eye.
For those that care: You can either refine the settings further (for example, fiddle with sigmaColor), or generate multiple outputs of varying intensity and composite the details you care about back into the image. But this is entering pedantry territory.
Refining even more
Background
If your image has a solid background then you may notice "banding" depending on how much noise the input had. You can take things even further by cleaning that up too.
There is very little reason to do so other than aestheticism and autism, as on the practical side this only shaves a few dozen KBs.
All you have to do is make two layers with your image, apply a curve on the one on top, set opacity to 50% and start paint bucketing the bottom layer with "Contiguous", "Anti Aliasing" turned off and "Tolerance" set to 1. Aim for the color bands. Check if you are happy with the results when done.
Or set Tolerance to 3 and click once...

Compositing
Depending on the noise's visibility and the settings used, the filter may butcher more than is desired. This is not acceptable (unless somehow you prefer it that way, as it can look like a pencil brush was used).
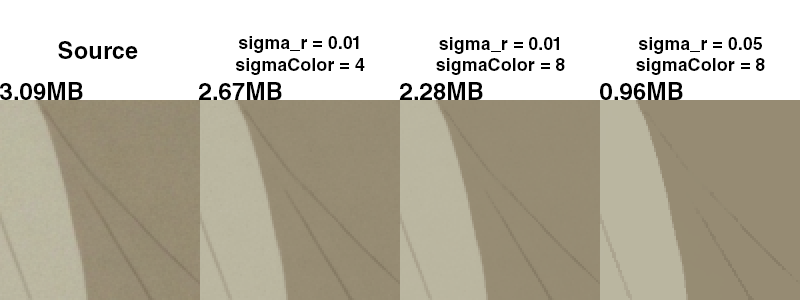
In this instance, the noise is too prevalent for the lower settings to work properly, but higher settings butcher the line's gradient.
Instead of trying to find a perfect balance, you can get the best of both worlds by compositing.
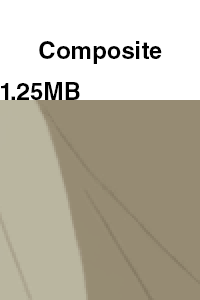
Here you can use Canny edge detection to generate a B&W mask of every edges in the image. Use magic wand on the mask and cut away anything that isn't an edge from the lower settings image, that you can then overlay on top of the higher settings'. Above is the result.
Use an eraser when you aren't dealing with edges/lines.