Notes
As a reminder if you want to see a card completely, visit https://www.carddass.com/dbh/sdbh_ugm/cardlist/ with a translate add-on or utility, can copy the card text and paste it to google translate or DeepL. Also as extra utility, here's the link to the avatar abilities if you're curious, remember to have a translator on standby if you're not fluent in Japanese, https://www.carddass.com/dbh/sdbh_ugm/play/avatar_ability.php And Dimps-sama, if you are reading this, pls WM2, I get to make 50 decks in 36 hours, you get a tax right-off if it bombs if that's how it works in Japan, and your devs can have a simple dev cycle that shouldn't be too painful, everyone wins. H1 -> MM2, let it happen. Also if you wish to buy SDBH cards, good luck with your native customs, https://jp.mercari.com/ is way to look up SDBH cards to personally own them, note its best to search with the card number ("UGM6-055" for UGM6-055 Vegeta (Xeno) as an example), and that if you try to go for big name cards like UGM7-SEC3 Goku Black, it can go into hundreds of dollars but other cards are relatively cheap.
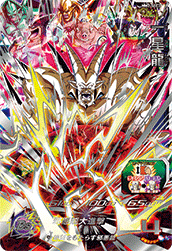
Darkest Dragon Reborn
First a premier on the abilities for Omega Shenron. If you were to die on any round where you had 90%+ HP at the start of the game, he gives you a revive, then at the end of the round he heals you 1k HP per enemy attacker. Then R2 onward when an attacker, he sucks balls to gain 4k HP/GRD/PWR/fixed DMG, and gains a burst for his 4 HE super attack that reduces enemy DMG reduction by 50%. If you have a Goku, or Goku (GT), this card won't heal you (note this doesn't stop Goku (BR), Kid Goku, Goku (SH), any Gogeta in the land, or Goku Black). This is a BS with a guaranteed revive on any round you have 90% which is great, a thing you could do on most other revive cards is play around them by doing nominal damage (and thus playing around many of the cards alongside it too) R1, and then going for the throat r2 when the deck is much, much weaker. Then compared to UGM10-SEC3 Kid Goku, he is always there, so the enemy has to always respect it until you drop off the 90% HP threshold, which is harder when you have the decently potent healing here. But still, it won't always be on when you need it, chip doesn't work against UGM10-SEC3 Kid Goku, you just have to predict an opponent's aggressive push, here, if you're 2-3k off of your max HP, than you won't be getting a revive anymore. That said unlike the others, he also has presence beyond the revive, the healing is HGD9 Gohanks (Future) but guaranteed, which is not bad even if in the more cutthroat lands of MM2, he comes with 4k HP and fixed DMG R2 onward, which is more than the CAAs from the alternatives.
BS Aggro Variant


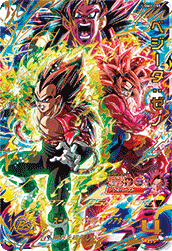

| Card | Why |
|---|---|
| MM2-SEC3 Omega Shenron | So a thing to note, we would like the healing so no Goku or Goku (GT) for the deck. His revive is both nice defense but also allows us to utilize cards that want us at low HP, and then his healing is nice for Cell since it can help top off our HP if the enemy tries to do chip so that Cell can do as much fixed DMG as possible. |
| MM1-SEC2 Cell | First he grants 6k max HP and steals half the PWR of the hit enemy R1 when he goes through the transform rush to, then in the PLBP as Super Perfect Cell he halves enemy STA, disables Miracle Perfects, and deals fixed DMG if you can win his CI, maxing out at 10k if you're at 100% HP but then doing less DMG the more damage you've taken. With Shenron we should have a decent enough baseline that he'll do alright if not help sustain the 10k for more than just R1, the minimum is 2k and then there's a moment where he deals 5k. |
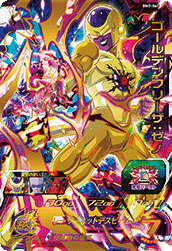
| BM7-060 Golden Frieza (Xeno) | If you have over 50%, Frieza is half a bar of STA and 5k PWR to the team, below half health he is 2 bars of STA and 10k PWR. He's here to act as deterrent from the opponent just trying to rush down Cell since if they don't go for the kill, this and Cooler will pop off and start being a thorn in their side but otherwise is just some, even if light, STA generation for the team. |
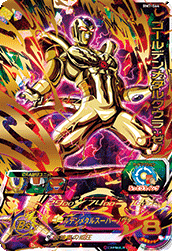
| BM7-064 Golden Cooler (Xeno) | For his math, above half health he lowers enemy STA by half a bar and reduces their GRD by 2k, if below half health it's 2 bars and 5k. This can help disrupt the enemy and make them slower, more likely to have supporters if they are low on STA, the GRD disruption doesn't matter to this deck outside of maybe throwing off some interactions like with UGM1-SEC Goku, where he cares about having high GRD and if he's on par with everyone else, he may not work as the opponent intends, but that's incredibly niche, it also doesn't help that it's not enough to counter act most forms of GRD generation, whether its UGM2 Gohan (SH) or UGM9 Future Gohan in Black, 2k is a lot less than 6k/10.5k, and 5k doesn't break even against the former. |
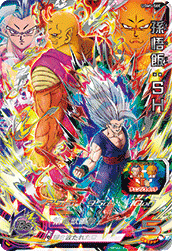
| UGM5-SEC Piccolo (SH) | He gives you 2x PWR/PWR LV for the co-op group, 1.5k PWR LV per enemy attacker in the round, and even a bar of STA, in general he just helps everyone hit really hard alongside being fast to make sure we don't get outspeed by other aggro decks. |
| UGM6-055 Vegeta (Xeno) | While this could be considered sort of a flex spot, I wanted an answer to high GRD/DMG reduction so here he is again. When he attacks, he disables enemy GRD for the round, R2 he becomes Gogeta (Xeno) and disables DMG reduction too. Is greatly disrupted by block bursts since he can't grant the pierce if he can't attack. One thing to note, cry because he has Soul Burst as the super attack and it's one of the few blunders for the Heroes team, the super attack is a neat concept but lacks oomph, of course he's saddled with this when UGM6-SEC Gogeta (Xeno)'s right there and his super attack is absolute Eye-candy. |
| HA | Due to UGM6-055 Vegeta (Xeno) we do need a HA, can mess up a bit of the max HP math, with the six aforementioned we have 17k and then there's the 10k from Omega and Cell, so we functionally have ~40k HP which is a lot, before we get to apps and whatnot. As for the HA, sadly the best one is EL based, EL GoD HA because Cell and Golden Cooler aren't enough STA disruption on their own for BM7-SEC. Cell is half, which half of 4 is 2, still more than 1, Golden Cooler is good but he disrupts their speed and is too early to affect BM7-SEC Goku when he's getting boosted by various PLBP effects. With this she acts as a punish for having attackers alongside Piccolo (SH) with the fixed DMG she offers, as well as supporters with the STA damage, add on top of this a CAA that stuns and she's pretty good for the deck. If you don't fear BM7-SEC Goku, than you could do something like BS Female Saiyan for big fucking damage, BS Kai for 7k PWR LV to help with R1 aggression and potential extra STA generation and CI disruption on the enemy or BS GoD HA for more GRD destruction while having the fixed DMG. |
Alternatives
| Card | Why |
|---|---|
| UGM8-059 Gogeta (GT) & UGM8-059 Glass in Black & BM8-SEC3 Masked Black / UGM8-SEC Gogeta (Xeno) / UGM5-063 Aeos (heavy PWR disruption) | So this is a three card core, initially the first idea I had but it felt too derivative of another BS aggro deck I had. Gogeta (GT) is PWR LV boosting for the team as well as STA generation when a supporter, but disables your HE generation from abilities, ok. Glass in Black is STA disruption and DMG reduction pierce, former is increased if there's an enemy with less than 100 PWR, and then the latter's enabled by not being able to generate HE by abilities, fulfilled by Gogeta (GT). For the PWR, the three main options I thought of were Masked Black, Gogeta (Xeno), and Aeos. Gogeta (Xeno) is the repeatable, reliable one even if he's a HR, does it every round to three enemies with highest PWR, just note that he's expensive on the wallet. UGM5-063 Aeos does it via god meteor and offers some extra sealing based on the round, while it's telegraphed, the fact it is can be a benefit for UGM5-SEC Piccolo (SH) and may lead to Gohan (SH) being an attacker for a round, and then there's Masked Black, who sets the PWR/GRD/STA of enemies within the same attack area as him to 1, as long as you have 50%+ HP, which with Shenron's healing shouldn't be too hard to achieve as long as you can hit someone with Black (far from a guarantee). If you want an EL, MM2-053 Frieza is a repeatable Tambourine Tamper if the enemy has Goku/Goku (GT) as an attacker, reducing their PWR by 3k per enemy attacker in the PLBP which is in time for Glass in Black as well as some STA disruption. |
| Immortal Body | It's mostly a funny thing, if you have less than 10% HP, than you heal for 30% of your max HP. If you are revived, you'll have less than 10% HP meaning this alongside Omega Shenron could bring you back to a decent pool of HP, not enough for a revive without other healing, there is a BS in HG8-52 Garlic Jr and UMP-73 Merged Zamasu, which is just really funny, but the former has a burst and a revive unit with shitty members, the latter has a bad double attack but is Pirate Zamasu with a UM6-SEC3's super attack so who knows, you could meme with it for a win. Heard it's hard to do good CIs if you're too busy giggling over what's in front of you. |
| BM6-062 Demon Goddess Robel & UM12-SEC4 Gogeta (UM) | So UM12-SEC4 is just conveniently poised to flip the bird on the common duo of UGM8-SEC Vegito and UGM8-031 Chilled. In the PLBP, he gains 4k PWR/GRD, this round only, per enemy attacker, over 10k easily, sometimes over 20k, a lot, but it's this round only meaning it resets, and Gogeta (UM)'s base GRD? 1k. Now the opponent could still get Gogeta hit by using Gogeta (Xeno), a baseline of 8k is not small at all, but that's no STA disruption, that's no GRD shredding since it doesn't stop the 20k+ GRD in the PLBP, and as Gogeta can be stunned, you're not even getting the extra multiplier that usually comes with the fusion. BM6 is here to make sure Gogeta (UM) is targeted, a very solid defensive core that you could use to prevent the rest from being stunned by co-op attacks while also mitigating damage so Shenron can keep healing. The summon also doesn't need a HA and while the PWR itself is temporary, Piccolo (SH) can still double the temporary PWR to give it some permanence (doesn't touch GRD though). |
| BM4-SEC3 Gohan (Future) / UM9-033 Pan (Xeno) | More reliable STA recovery in the BS form, former acts as UM8-068 Great Saiyaman 3, where at the start of the round if an ally is on critical STA, than he full restores their STA, and unlike BM12-SEC Goku, PUMS13-SEC Goku, or UM9-SEC Goku (GT), we still can have Omega Shenron's healing. Gohan also appreciates having an Adult Trunks or Trunks (Future) on the team so he can deal 2.5x DMG, and he offers increased Miracle Perfect chance on the BS CI at the cost of its speed being increased as well, this could be useful to win more CIs, there are decent Adult Trunks/Trunks (Future) cards to have, HGD9-44 is a house of a card after all. Bit more on the fun side rather than outright cut-throat but the original lag machine hasn't seen play really and this is a way to give him some time in the limelight. As for UM9-033 Pan (Xeno), her capsule is rng dependent but can either greatly increase your attackers Miracle Perfect chance (perhaps to UGM9-045 Pan levels, meaning 50%) or disable the enemy's MP chance, we already have Cell for the latter so RNG on the former, beyond that when she attacks, she gives the co-op group two bars of STA, reliable even if she does nothing else but STA generation. |
| HGD4-19 Demon King Piccolo & MM2-072 Vegeta | So MM2-072 Vegeta is 5k PWR/GRD and STA generation to the team if you have an attacker with negative DMG reduction, HGD4-19 Demon King Piccolo is a BS that lowers his at the end of the round when an attacker to proc Vegeta, which is very good by how much he does alone, the only hiccup is that Vegeta's not a BS, instead an EL/Elite, and that you might want some form of retargeting just so that HGD4-19 Piccolo doesn't get targeted. If you want to lean more into this and less like a small core, you could also incorporate UGM2-SEC2 Gogeta as well for 80% DMG reduction and doubling everyone's PWR at the start of the game to help offset Piccolo making himself more vulnerable. |
Omega Shenron, Dimps, Where's the "Once only"?


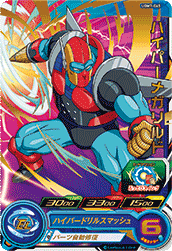

MM2-SEC3 Syn Shenron + Rildo optimization (Syn + 3; Aeos + PWR to 1 card (or) card to disable UGM1-SEC)
| Card | Why |
|---|---|
| MM2-SEC3 Omega Shenron | As the title suggests, where's the "Once Only"? Omega Shenron can repeatably revive you as long as you can generate enough HP to proc him after revive. Now the simplest way of doing this is with five Hyper Meta Rildos, there are five with Auto-Repair where you heal for 20% of the DMG taken at the end of the round, meaning 5 of them is 100% DMG taken, always keeping you at max HP with or without revive. The main issue, and what this deck will try to do, is optimize it because that's 6 cards to only be able to win via time if you have the R5 app that does 20k fixed DMG, 1 flex slot to try and do anything. So the idea of the deck is to best insulate against most forms of revive seals, sadly you can't seal them all. There's a SH Macarita that flat out stops revives on the enemy, UGM3-068 Vegito (Xeno) lowers your healing, UM10 SKoT does it if they win the PLBP, which is something you're not entirely incentivized to win since the Rildos do fuck all besides healing. |
| The Hyper Meta Rildos (BM2-035 / UGM7-045 / HGD6-47) | So firstly, these are the three because they have CAAs that can help do damage to win games if they're an attacker. The other two, HG1-58 and HG10-42 have a burst and lock-on respectively, really bad here. So the idea here is that we can take away a couple of Rildos to tech against common ways to seal revives so that way we only use to shit like Macarita + UGM3-068 Vegito (Xeno), both of which are cards with little application elsewhere, or maybe an app which means another app wasn't used in its place. |
| (3 free slots) | Will get more down below, after a small segment on math, but this is where you would place contingencies if able to make sure revives will go through. |
I'm Sorry
So let's do some math here to understand how much leeway we have. Now note we don't need to worry about if we are revived since we'll lack the defense to prevent overkill, .6 of damage cap is over 60k HP, .6 of 30k (such as from UGM9-SEC2 Vegito) is 18k HP, which is within acceptable thresholds for a revive, the math is to showcase how we interact with chip, trying to kill us from 80% or less HP instead of the 90%-100% range.
- If the enemy has one attacker, Omega Shenron heals 1k, and assuming we have 20k (avg for 7 card deck, assuming no HP boosting from Omega), than the enemy has to bring us below 18k. We can represent the threshold by the following math equation, with x = damage dealt, y = your team HP, and z = number of enemy attackers: .6(x) + 1k(y) = .9(z), 60% of DMG dealt + 1k per enemy attacker is healed, and we need that to be equal to 90% of our HP for Omega Shenron to stay up, assume x is 20k, .6(x) + 1k(y) = 18000 ==, and with one attacker, ==.6(x) + 1000 = 18000 --> x = 17000/.6; 30000, if the opponent, with one attacker, deals ~28.4k damage in the round, we are in the loop. For seven attackers, it'd be ~18.4k damage for us to be in the green.
- For chip, we take the aforementioned formula, apply it for 10% of our HP, note that if they deal less than 1k(y) DMG for any number of attackers, Omega heals it all up full stop. Assuming the same variables and max HP as before, this time we have it calculate: .4(x) = .1(z) + 1k(y), we're now calculating for the DMG the opponent will have to deal to break past 10% of our HP, .4(x) = 2000 + 1000 -> (x) = 3000/.4; 7500, this lets us know how much it'll take to break the point, if they deal 7.5k DMG, with one attacker, we'll be at the 90% threshold after healing, any more damage, such as 8k, and they'll have done enough chip to get us out of revive range. 8k on a lone attacker is not easy. To actually start dealing damage to us, they'd need to deal over 2.5k DMG with one attacker, merely for chip that sticks, we'd still be in revive range at the end of the round, note that this will decrease if you were to remove a Rildo because than more damage is coming through, and thus they need to do less to break through our healing.
- For the other big number that's important, seven attackers, at that point they'd need to do .4(x) = 2000 + 7000 -> (x) = 9000/.4; 22500, they'd need to do 22.5k DMG to do it with seven attackers, at that point we're already fucking dead because our maximum was 20k, so seven attackers is easy win, for the rest of the numbers, and a tl;dr, a table below all assuming we have 20k max HP, note that a higher max HP means it'd take more damage for the threshold, good for one attacker but bad when it comes to multiple attackers (just going to 20k + 4k from Omega, seven attackers can do a number of damage to break through the barrier, and isn't just mathematical overkill 100% of the time).
- tl;dr
| Number of Attackers | Minimum damage they'd need to deal to actually deal damage |
|---|---|
| 0 | ???? |
| 1 | 7.5k, possible with something like Bardock or lone attacker, note they only need to do this for one round and then they're free for the rest of the game. To cause you to revive with full HP they'd need to deal ~28.4k HP. |
| 2 | 10k, could be possible with UGM8-SEC3 Bardock but still finicky for some decks, for overflow it's ~26.7k |
| 3 | 12.5k, relatively possible and safe, for overflow it's 25k |
| 4 | 15k, technically they could do this without killing us but still risky; overflow is ~23.4k |
| 5 | 17.5k, technically they could do this much without killing us but really hard. |
| 6 | 20k, we win |
| 7 | 22.5k, we win |
Free Slots
So this is pretty much here for contingencies, making sure we can handle most 'good' options and, again, this deck does auto lose to UGM3-068 Vegito (Xeno), SH7-43 Macarita, UGM5-063 Aeos (on the final round), any Keysword lock / freeze attack lock, etc.
| Card | Why |
|---|---|
| UGM1-SEC Aeos | Aeos in particular disables enemy summons (BM12-SEC Gogeta (BM) and UGM8-036 Frieza (revived)) as long as you have 3+ HE to have destroyed. |
| UGM9-064 Dark King Demigra / UGM5-060 SKoT | These are the answers to UGM1-SEC Aeos' time Prison because while it does disable summons, she also disables revives if she has an ally with less than 100 PWR, at which point these cards are here to guarantee that it's disabled. Demigra has bonus points for making you take 2x DMG as long as you have few HE meaning that it's easier for the enemy to kill you and thus proc your revive + healing. |
| UGM8-058 Cell (oh fucking Zamasu) | When strategy's decided, halve the DMG dealt of all enemies that can use super attacks. Then if they can't use their super attacks, they'll have it sealed (such that HE generation in the CIs won't re-enable it), and if no enemy can use their super attack than the enemy can't use summons. This is the only card besides Aeos that disables summons R1, which is disabled if you try to use Dark King Demigra / SKoT, meaning you'd need HE generation for Aeos and destruction for Cell. |
The Full Deck


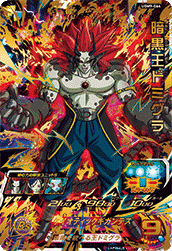


| Card | Why |
|---|---|
| MM2-SEC3 Omega Shenron | His revive isn't once only so why not make a deck that can use it whenever? |
| BM2-035 / UGM7-045 / HGD6-47 Hyper-Meta Rildo | Our three Auto Repair cards, they're not good but it's good enough. If you really wanted to use good cards you could replace this with a BM8-065 Cell + BM6-062 Robel + UGM10-GCP1 Bulma core but note that Cell would actually have damage mitigation which can have implications, he steals GRD and PWR, and only heals for 50% of DMG dealt during CIs, not 60% from everything. |
| UGM9-064 Dark King Demigra | He makes it where allies that can't use super attacks take and deal 2x DMG while also granting STA restoration, let's go face roll aggro, revives restore STA any way. More importantly he makes it where Aeos can't seal our revives. |
| UGM8-058 Cell | Makes it where the enemy can't use summons if none of their attackers can use super attacks, this is important because he does it R1 where as no card not named Aeos does too. Something to note is that disabling enemy super attacks will greatly reduce their DMG dealt, this is only needed if you fear not only BM12-LSEC Gogeta (BM) but also UGM1-SEC Aeos. Otherwise you can free up this slot for MM2-071 Broly for even more DMG while making sure you can't use super attacks, and Kid Buu can be something else entirely, perhaps some form of stun. |
| BM9-045 Kid Buu | He destroys both teams HE and to increase his own PWR/GRD, even if a supporter which means, when registered first, he makes sure everyone has 0 HE so no one can use super attacks for both Demigra and Cell's enjoyment. Good luck with your memes. |