Sketch Tutorial

Hello! I put this together to spread the knowledge I have on drawing. I'm still relatively new to this, so make sure to further look into more art tutorials online in case you're interested in these topics.
First of all, I strongly encourage practicing with a pencil and paper or a simple black drawing tablet. You can get plenty of stuff done with a mouse and a stabilizer, but sketching is best done with a pen.
I’ll separate this into three segments:
Shapes
The simple cheat to drawing anything is to break down everything you see into simple, digestible shapes. Everything has geometry, everything has a readily available shape to it. You can warm up by drawing a bunch of circles, triangles and squares first if you want to feel more confident.
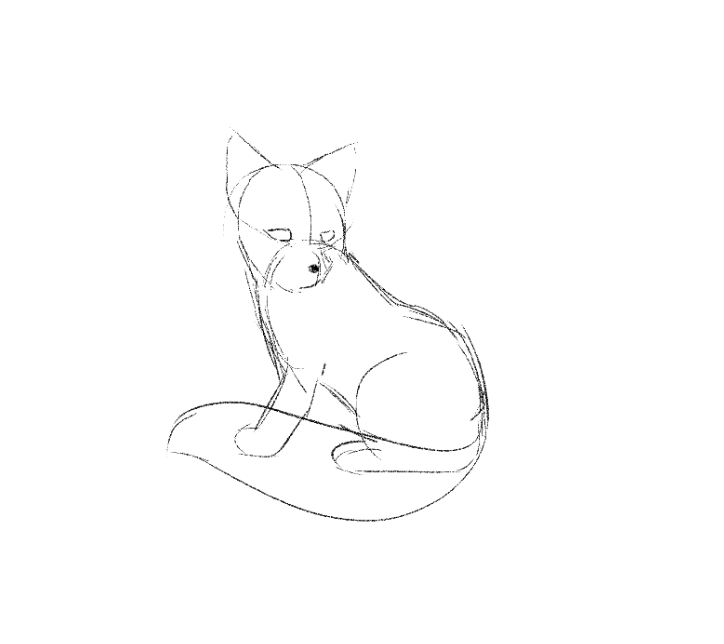
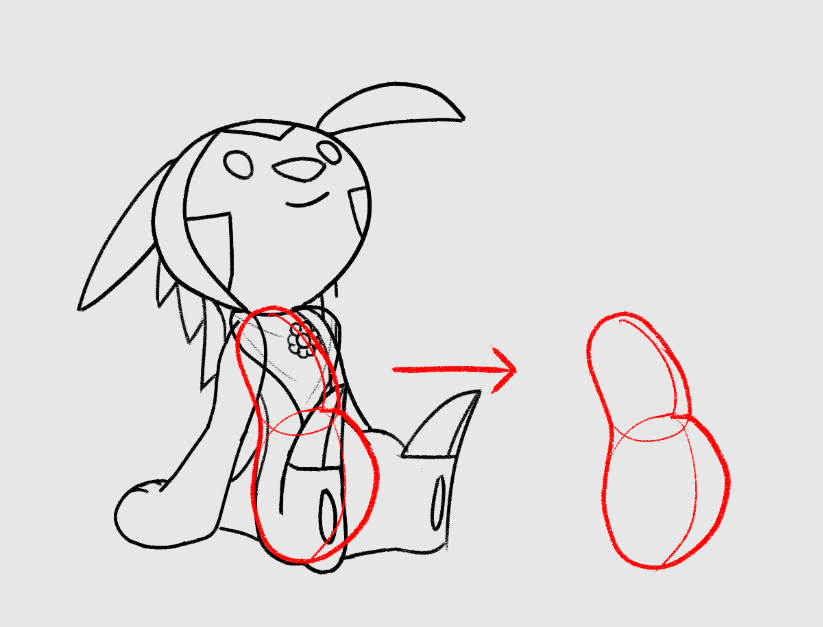
Let's try to figure out the shapes of this fox:

Remember, we're not trying to draw the entire fox, but rather the shapes inside its outline:
https://files.catbox.moe/z3y7au.mp4
Once you visualize your outline, you start the contour by brushing with light strokes.
https://files.catbox.moe/rs2stt.mp4
The above sketch was made by upping the smoothness in Photoshop (stabilizer in aggie.io)
Do not worry about getting it perfect at first. Nailing an outline right away is quite difficult and requires a lot of practice, so don't worry if you don't get it immediately on the first stroke. Brushing over previous strokes will help you get some leeway in the shape.
Get your shape done at a leisurely pace. Don’t fret over the finer details—at this stage, you get the chance to relax and experiment until you find some footing in your silhouette.
Once you're sure you got everything right, that’s when you do the outline over it. With the sketch you've made, you can start to pencil the finer details. It’s all a matter of slowly flowing the shapes and easing yourself into a desired outcome.
Needless to say, googling for basic sketches and general anatomy drawings helps a ton in nudging you in the right direction. This is why model sheets are so useful since they inform the proportions and depth of characters.


Which brings us to the next section:
Depth
Keep the depth of your subject in mind by lightly brushing crosses over it. As a general rule of thumb, the “face” of a curved shape is always marked by a cross.

Play around with a cross and you’ll play around with the angle and axis of a shape. This is useful, for instance, in determining how a face should look.
Of course, it’s not going to be as easy with every subject. Try to warm up by drawing simple cubes and spheres in different positions.
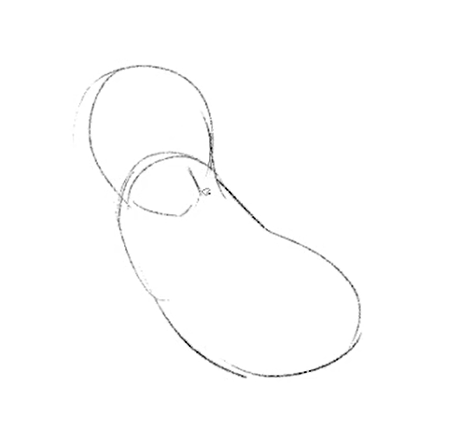
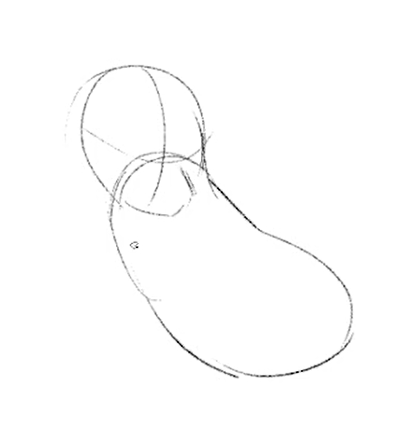
One cool thing you can do is to google and practice beans

An easy way to visualize dynamic torsos is to translate them into a bean shape. You can get a lot of mileage out of it whether the pinch point is located on the front or in the back.
Gesture
This final section covers a very intuitive aspect that all of you have down to some degree. In fact, I already tacitly covered this subject at the beginning, but keeping this in mind is the secret to an organic drawing.
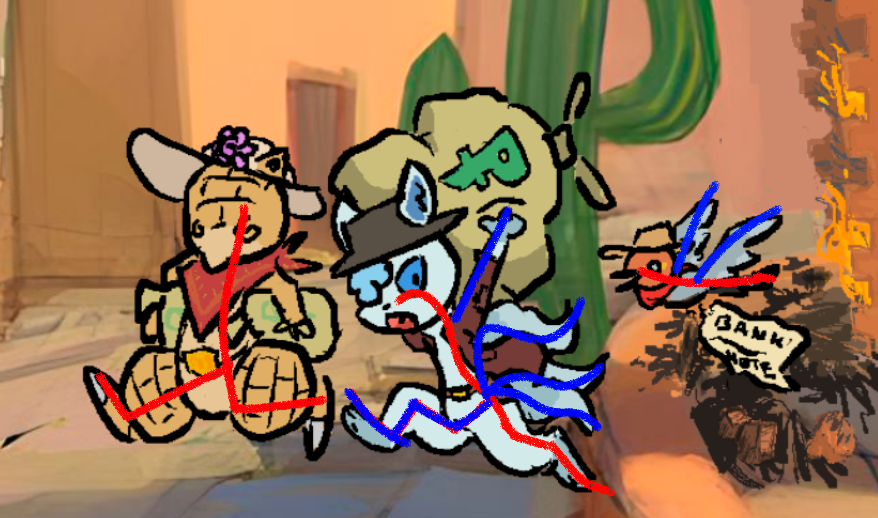
What do these pictures share in common?


We’ll get back to it in a bit. Let’s talk about gesture drawing.
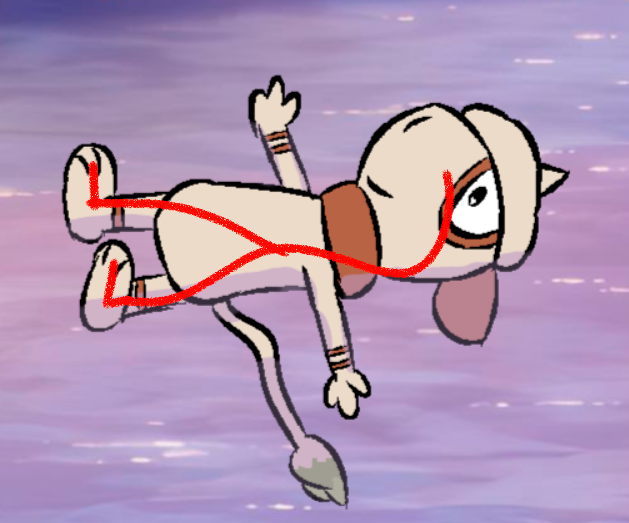
Please don’t let the humons scare you, we’re looking at a pretty universal concept that is handy to showcase with our own anatomy:

Notice how while there are shapes you can point to, these sketches are made using mostly long curved lines rather than strict geometry.
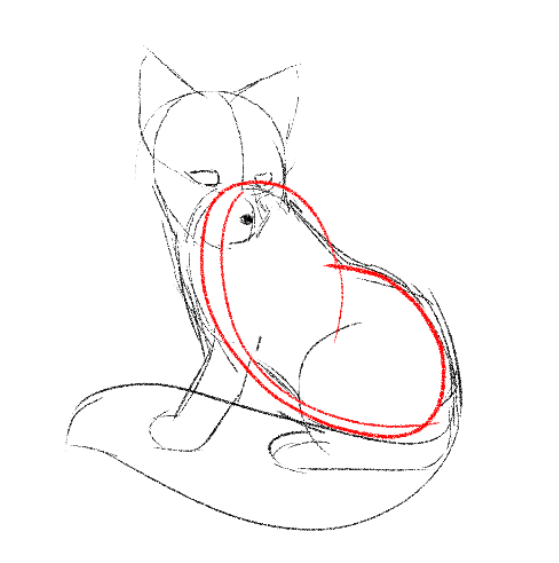
Every object in space conveys a sense of directionality that grants us an insight into their movement and purpose. These directions coming from objects in space are what we call lines of action:
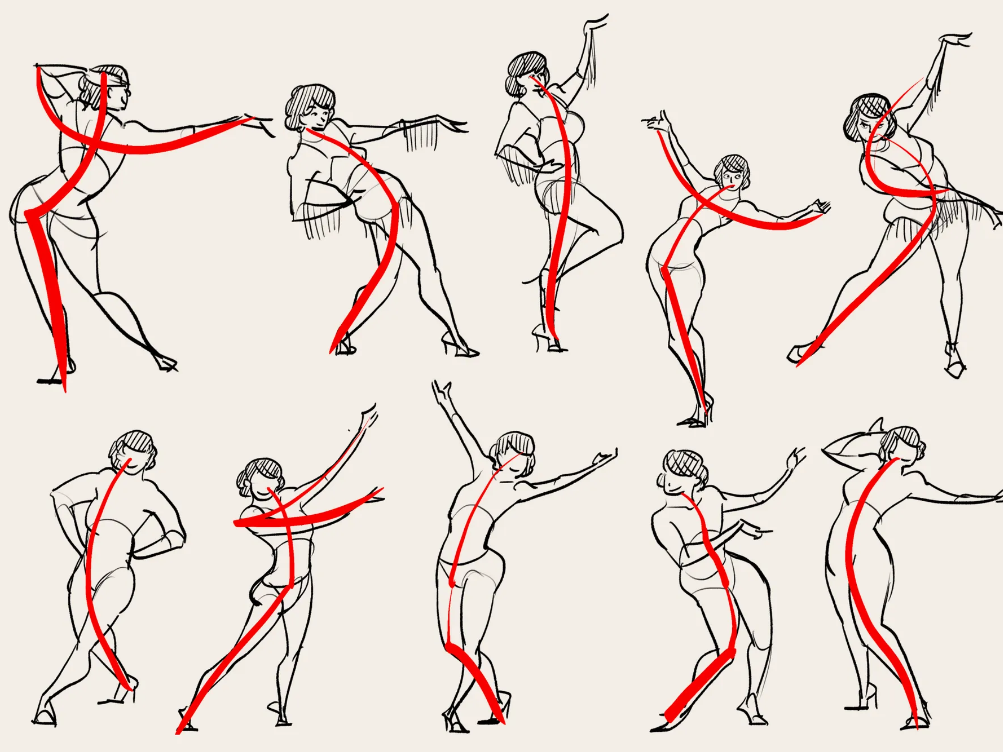
The human sketches shown here all strongly showcase the practice of gesture drawing. The red lines convey the main line of action, which is the strongest indicator of the directionality being performed by a model. Any other identifiable lines that contribute to the overall composition are secondary lines of action

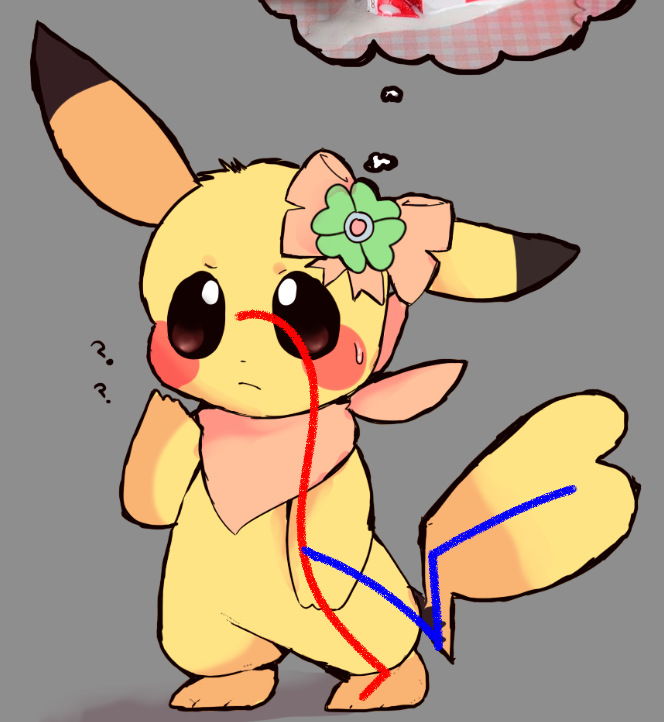
As you can see, spines are often a common line of action. Though clearly not invariably so in drawings that aren't full body sketches. It's all about composition:

While knowing that objects possess simple shapes and depth is a crucial step in order to draw a dynamic pose, the awareness on how to flow its components into it is also part of the equation. Keeping gestures in mind is one such way to achieve that goal.
If we go back to the second video I posted, you can see I started out by focusing on the line of action that caught my eye first:

This is the secret to drawing tails as well: they are not so much shapes as they are big lines of action coming from the spine.
Quick tips:
- If you’re using a drawing tablet, try to make it a habit to keep your screen leveled and positioned according to it. ie: ideally get the tablet on a stable surface in front of your screen.
- Move your elbow more. If you want to draw a circle, for instance, you’re going to get a lot more precision motioning your entire arm rather than just your wrist. It especially helps for wide strokes.
- 3D references are very useful resources, but be wary when using them. Features conveyed on a 3D plane may not easily translate to 2D and viceversa (think Goku's hair for instance). Preferrably use 2D references.
- Selection tools, Lasso and Transform (Ctrl+T in Photoshop) are your friends as well as Ctrl+Z.
- Look out for art that you like and ask yourself: Why do you find it appealing? Which techniques is the artist using in said drawing? Nine times out of ten you'll find an available learning source in the stuff you like plus some googling. Art timelapses are a great way to learn the basics, for instance.
And that's about it! Don't be afraid to experiment with your models!