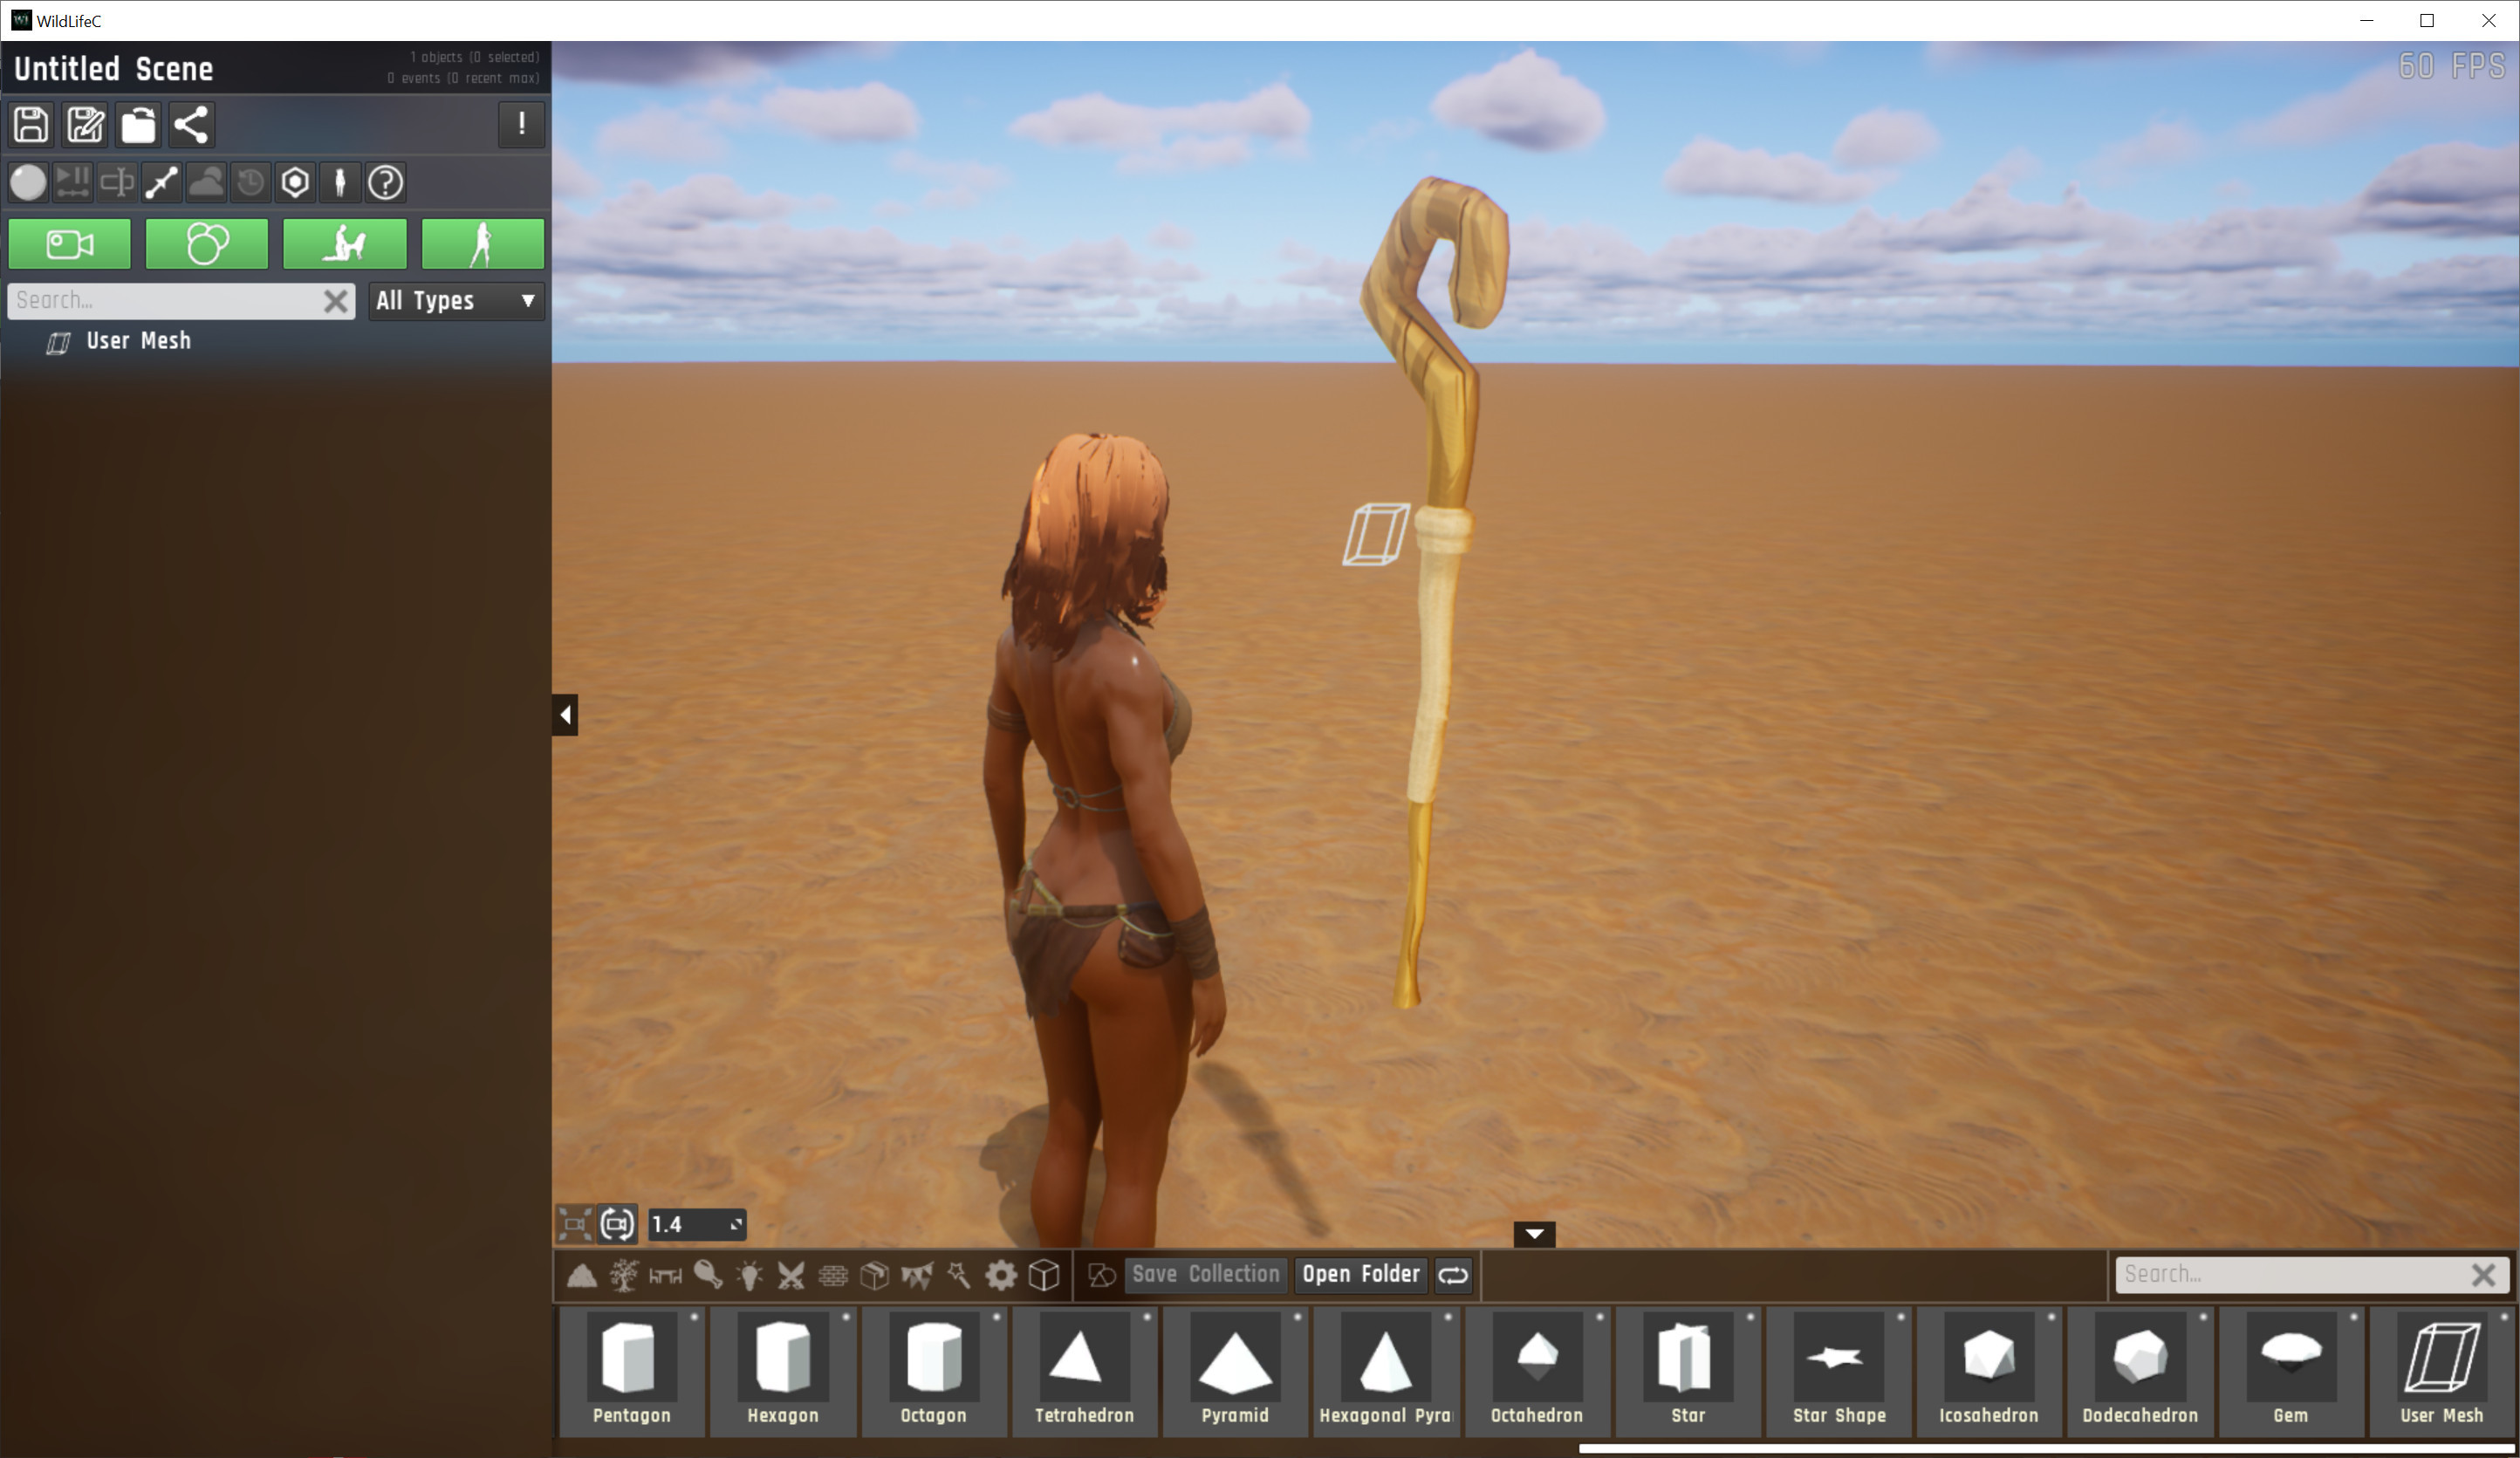
💡 Short guide: Importing custom models into Wild Life
Step 1: Get custom model in .fbx or .obj format
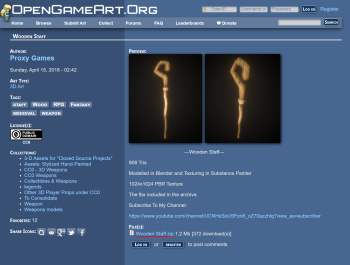
For demonstration we will use a model called "Wooden Staff" uploaded by "Proxy Games" to OpenGameArt:
https://opengameart.org/content/wooden-staff
Download the .zip from OpenGameArt:
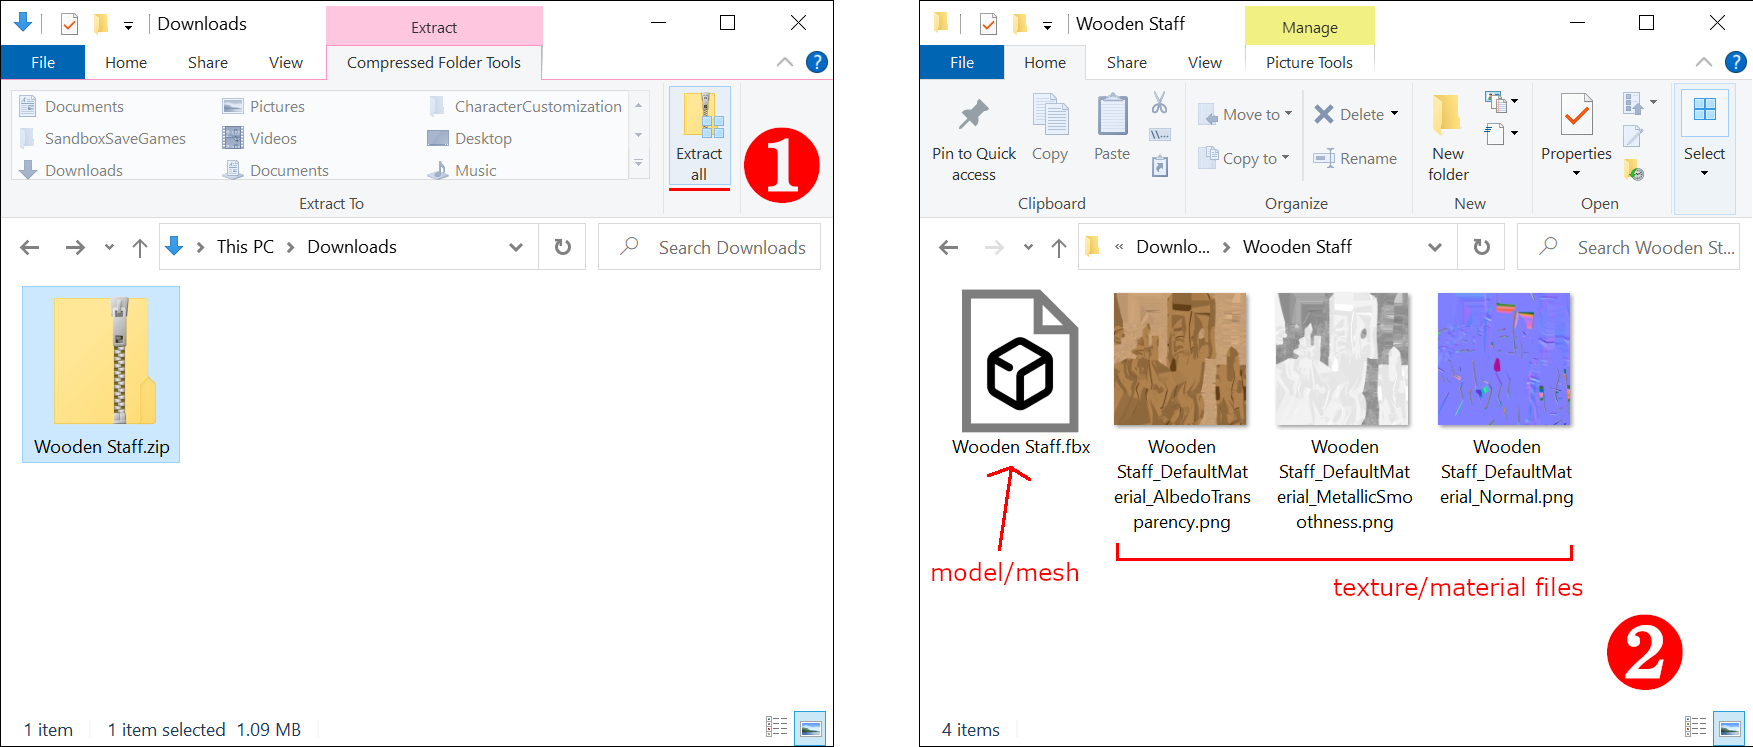
Then extract the .zip (❶) and take a look at the extracted files (❷):
Step 2: Import model
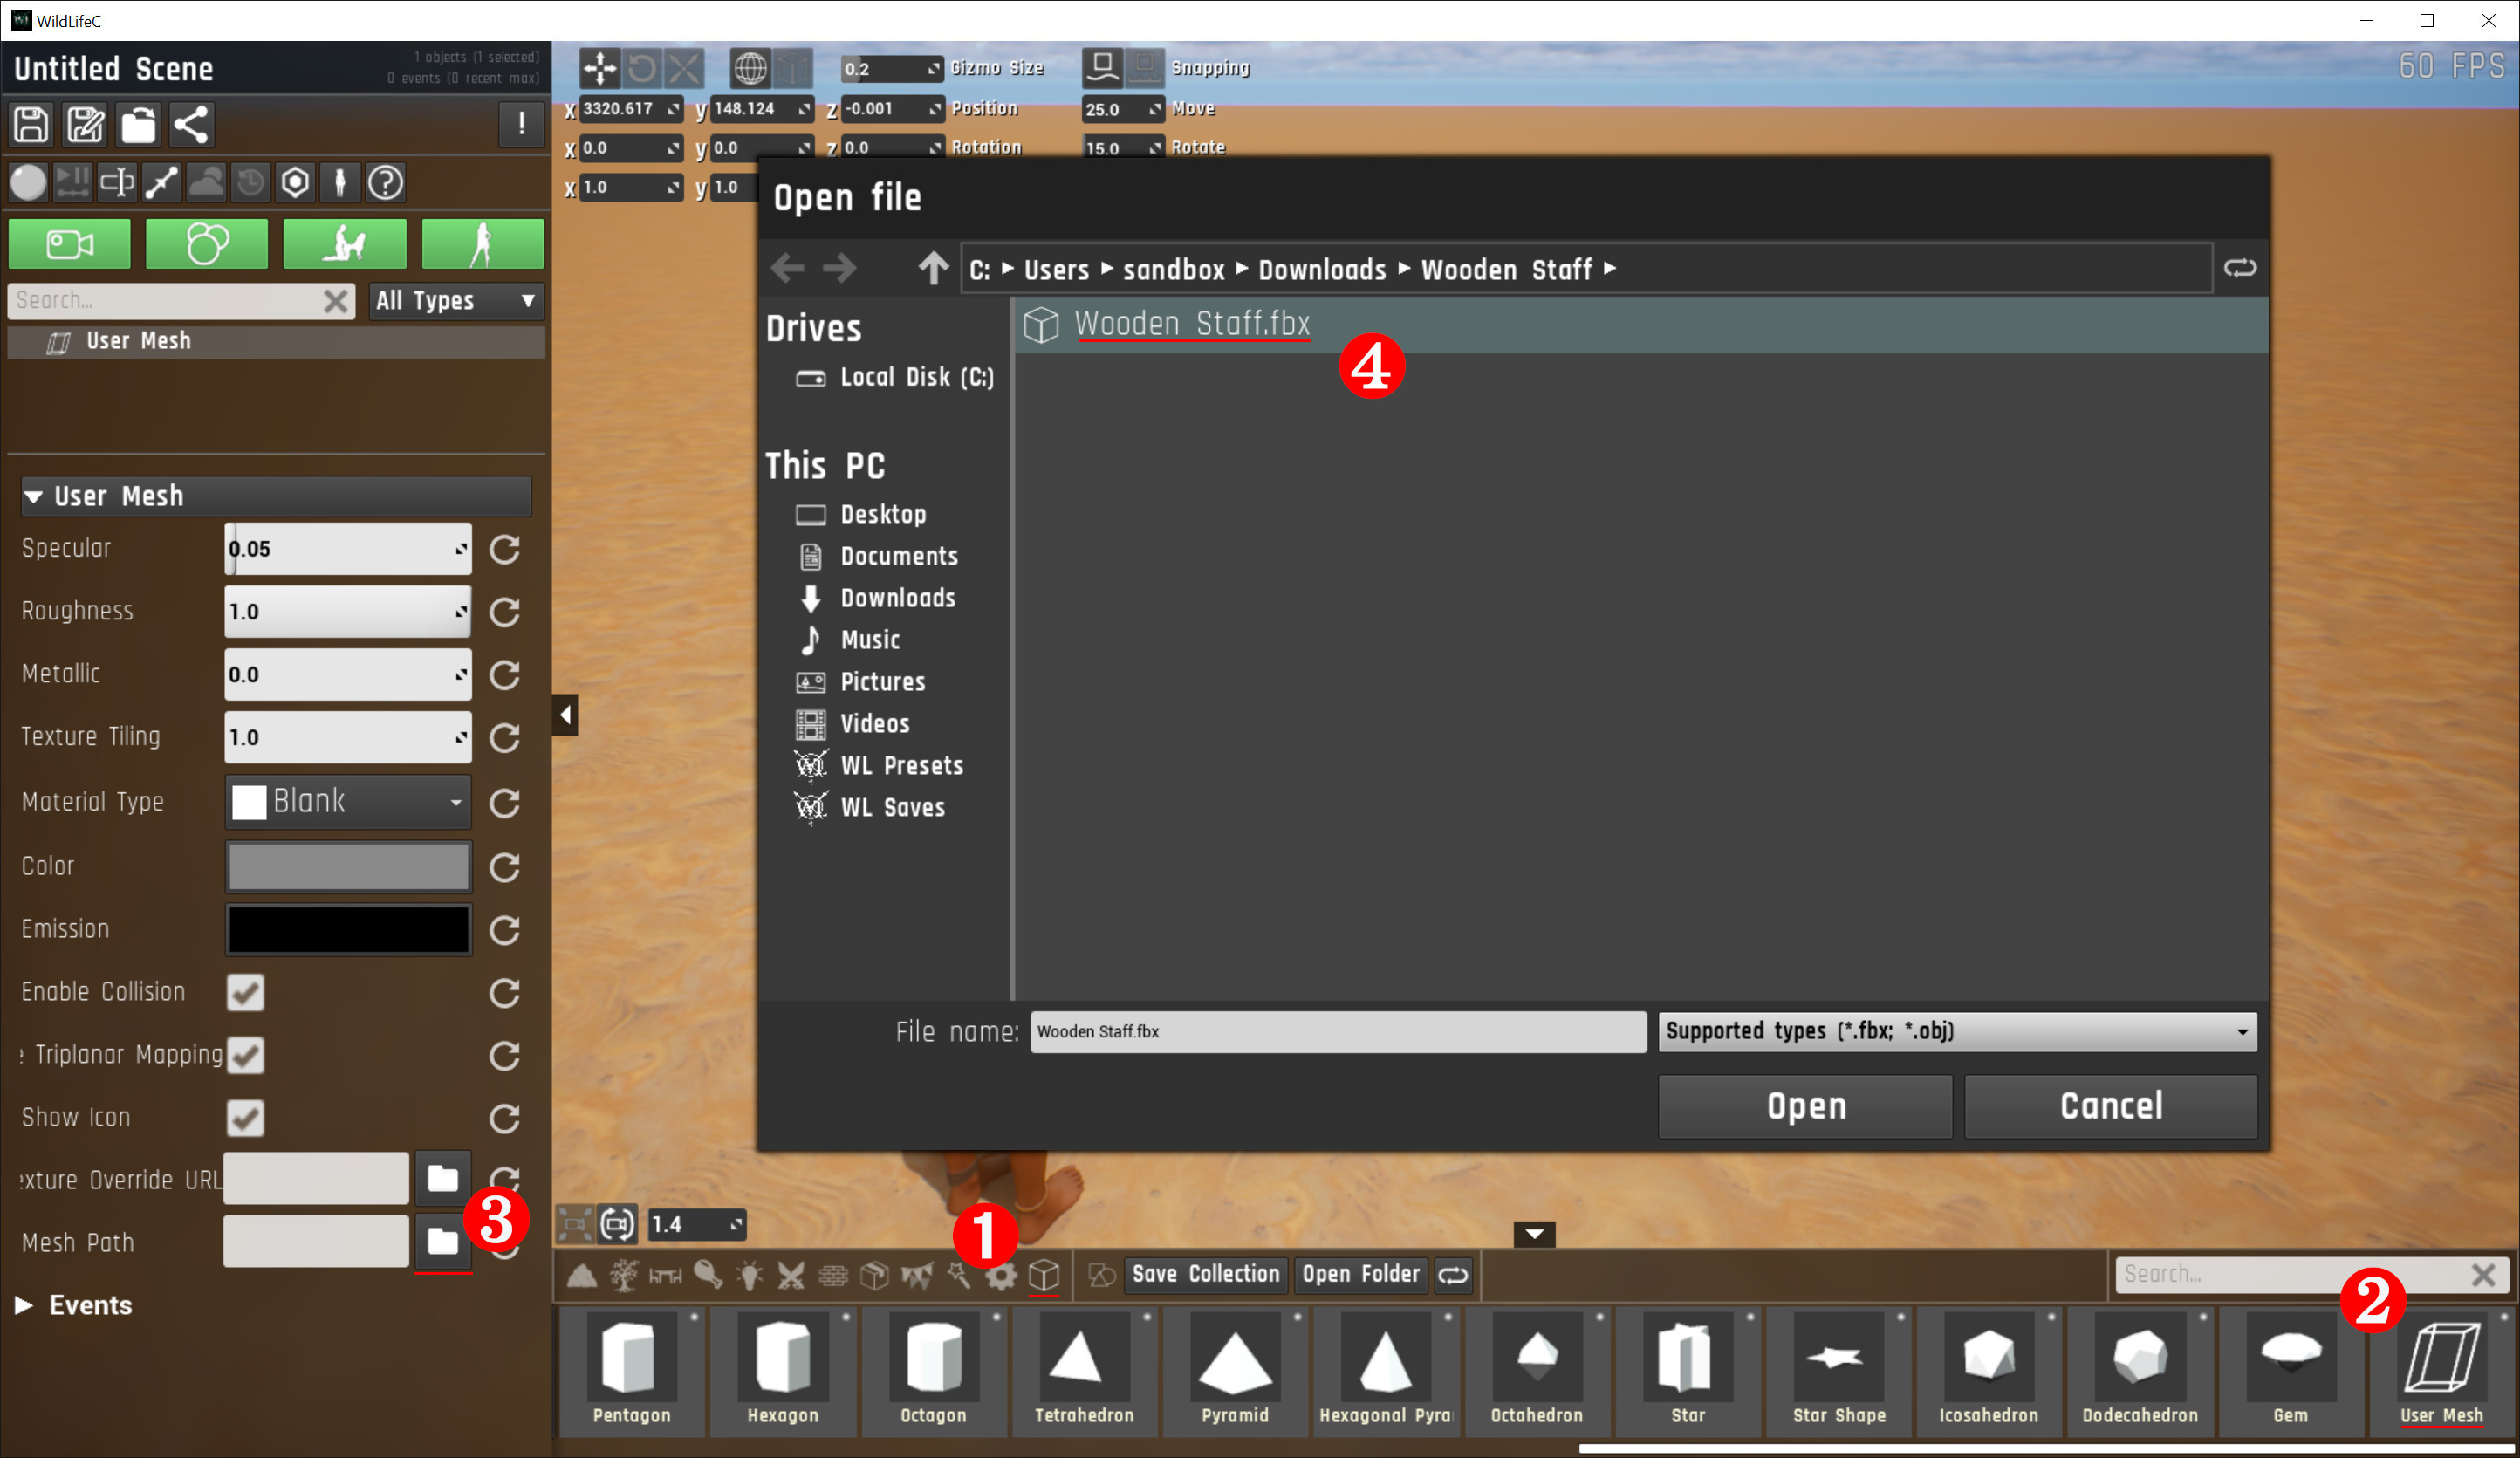
In the Wild Life sandbox: Go to the shapes/prototypes category of objects (❶) and find the "User Mesh" object (❷). Click and drag the User Mesh object onto the scene (like you do for any other kind of prop). Then in the properties of the User Mesh prop: Find "Mesh Path" (❸) and select the .fbx file that you extracted in step 1 (❹).
The model should now be imported into the game (note that the import step can take a long time for high-poly models), but its texture is still missing — we fix that in the next step!
Step 3: Import texture
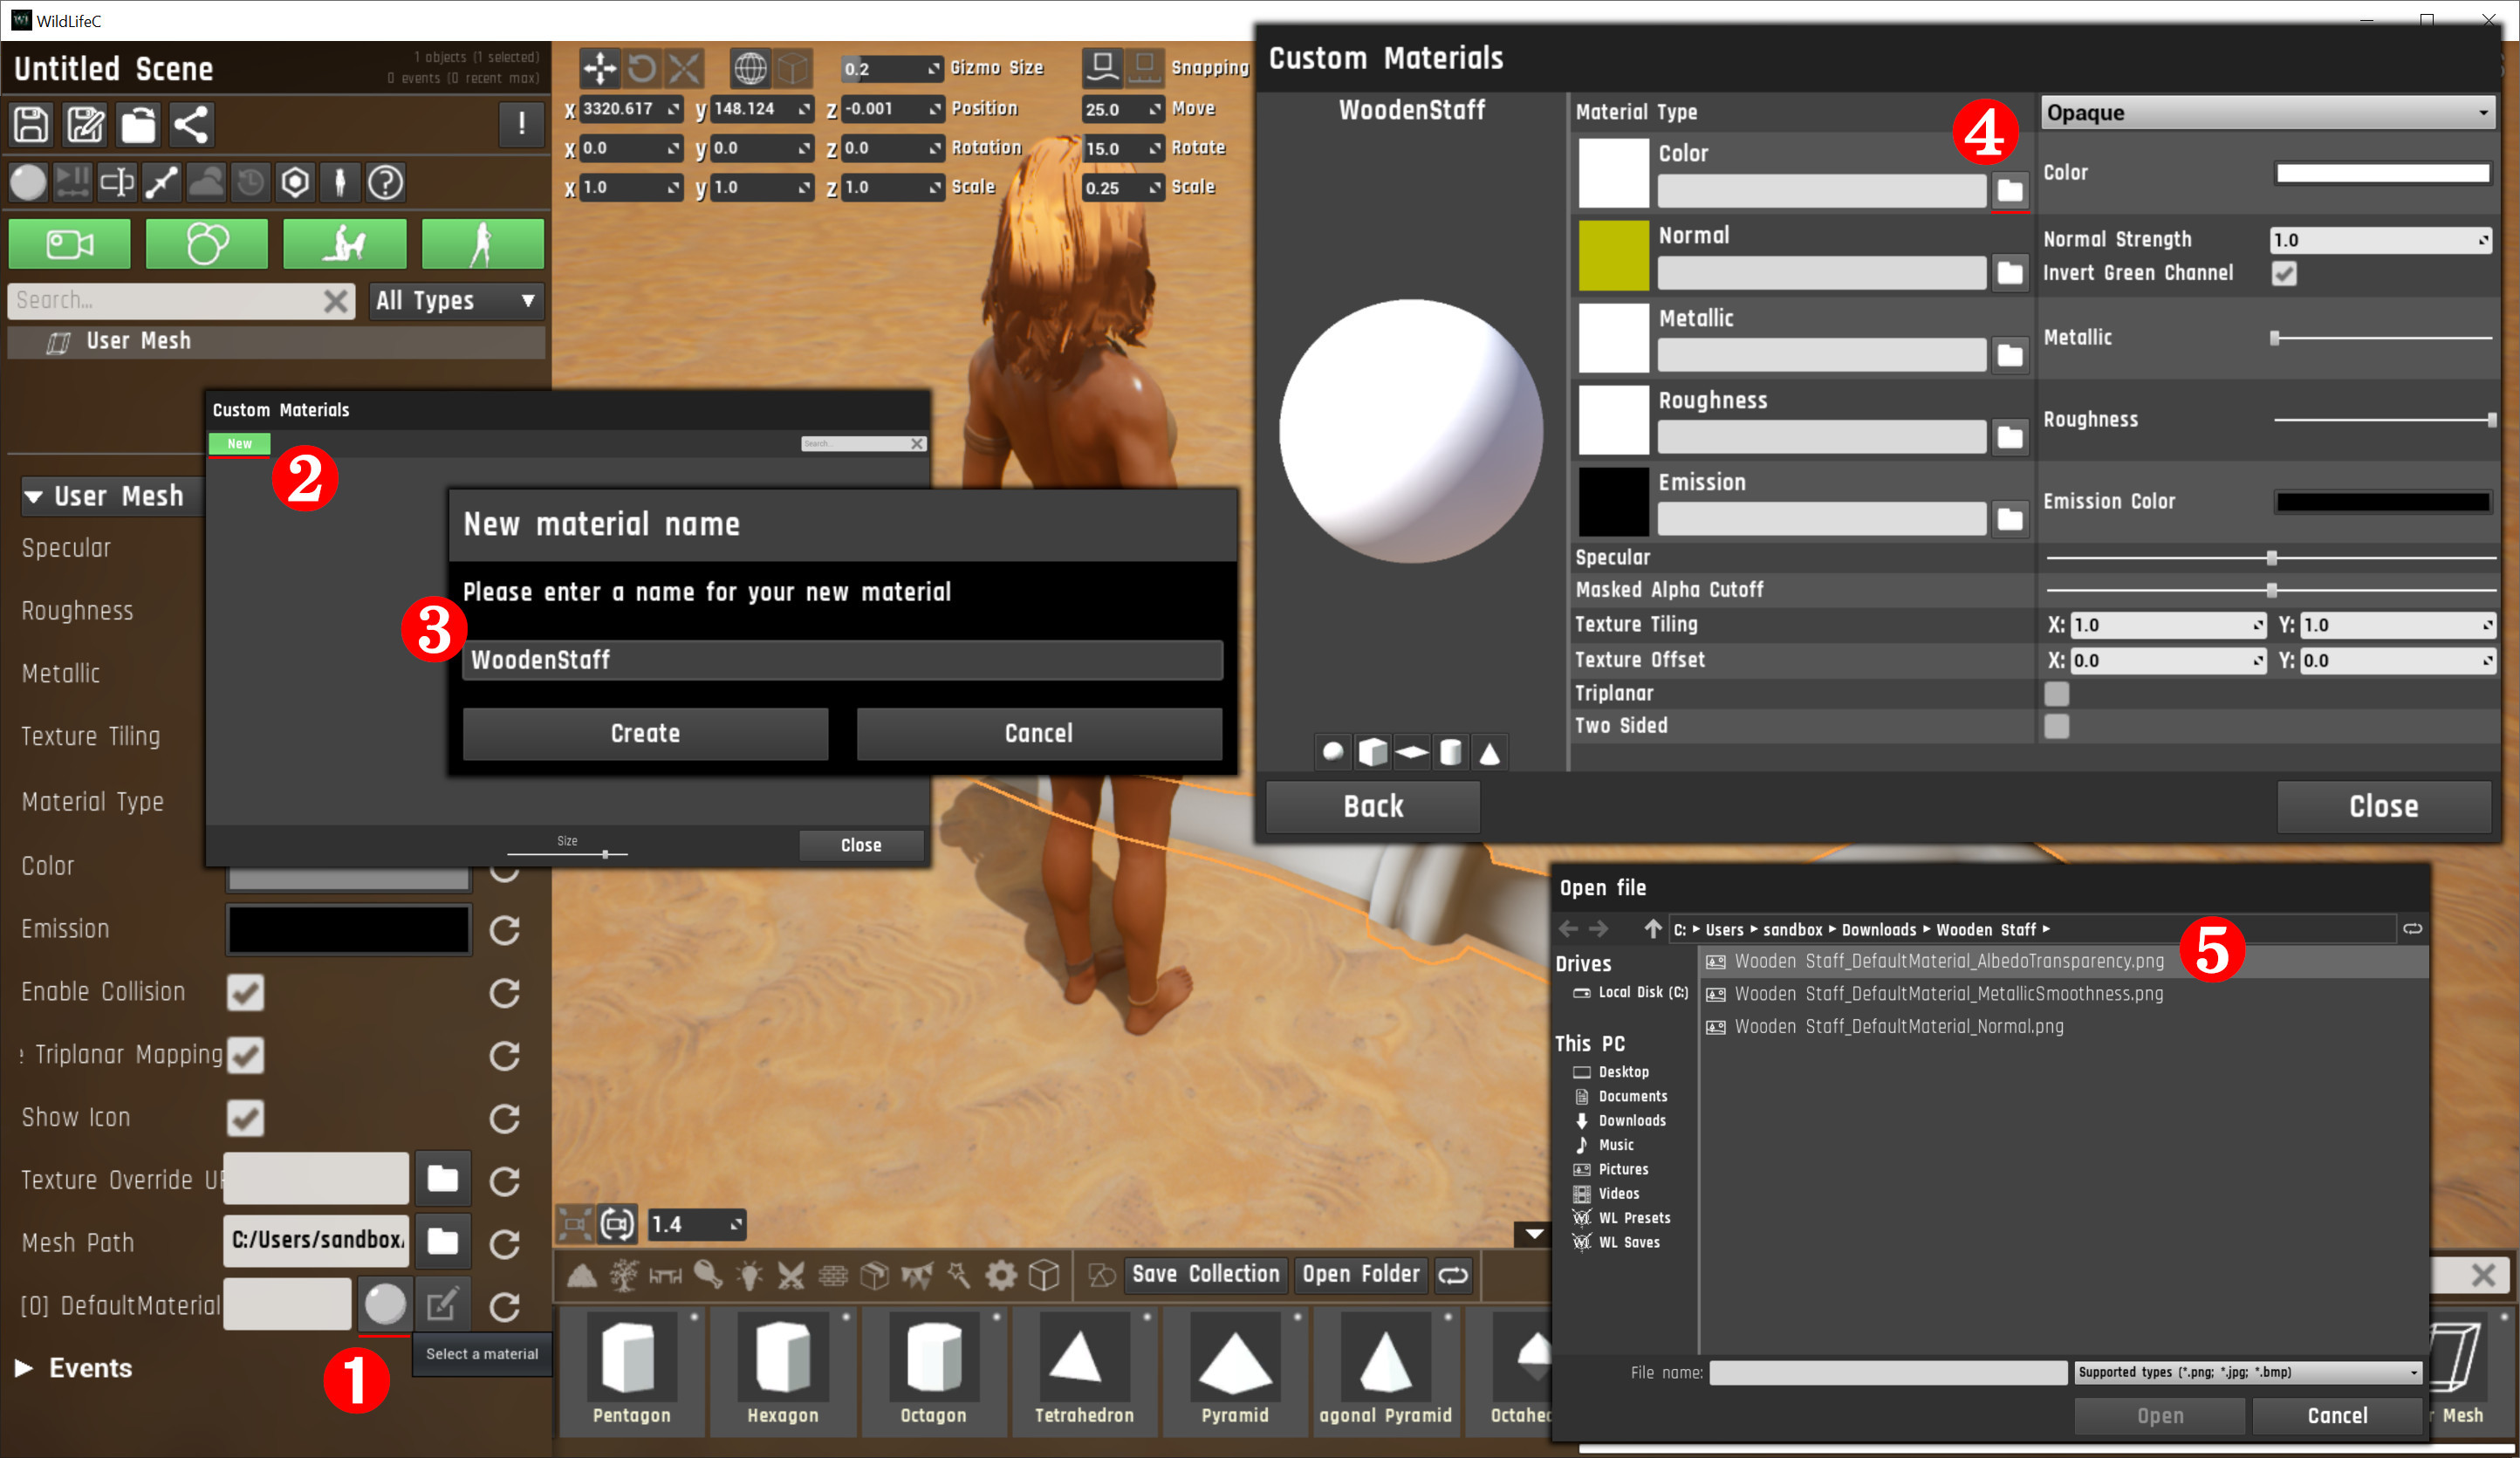
In the properties of the User Mesh prop there will now be one or more materials/textures to be filled in — the wooden staff model only has 1 material, but other models can have more. To fill in the material, click the "select a material" icon (❶). This will bring up the "Custom Materials" dialog. Click "new" to create a new material (❷) and choose any name you like (❸). A new dialog will appear where you can configure the material. Under "color" (❹), select the texture file that contains the base texture (❺).
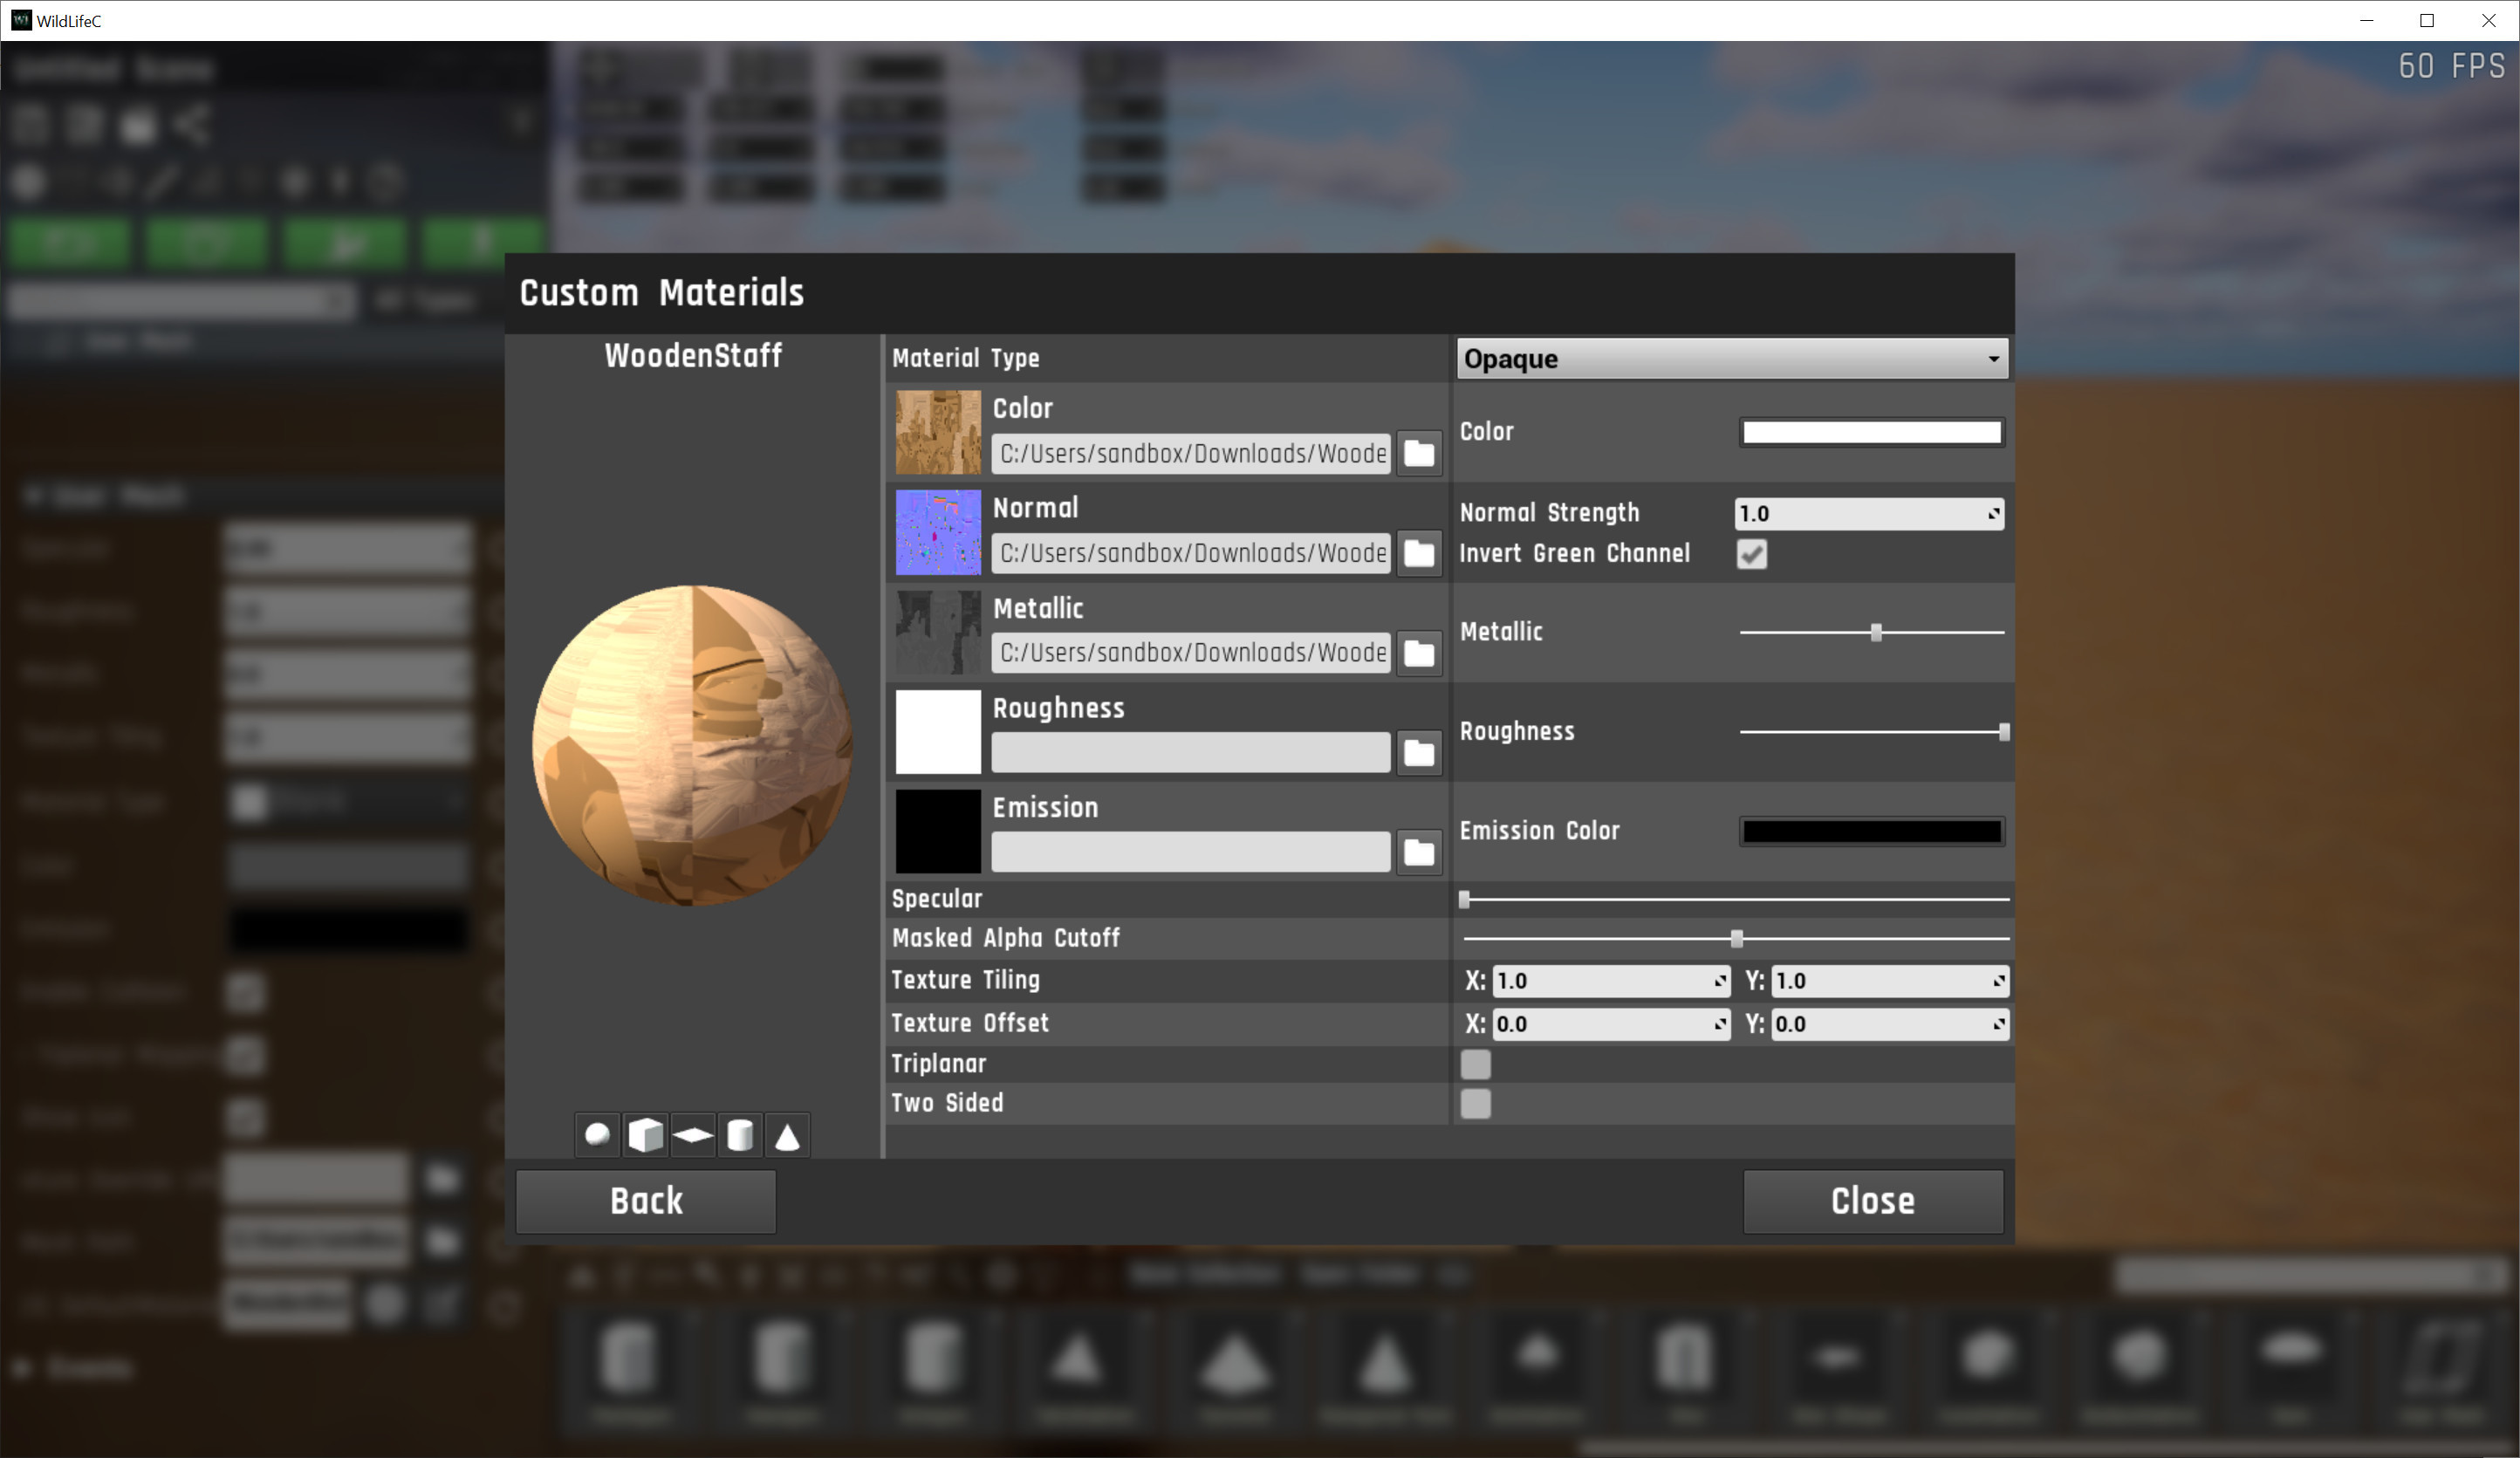
The wooden staff model also has normal and metallic maps, so we also set those (and tweak some sliders on the right side to get a nice look — just find any settings you like):
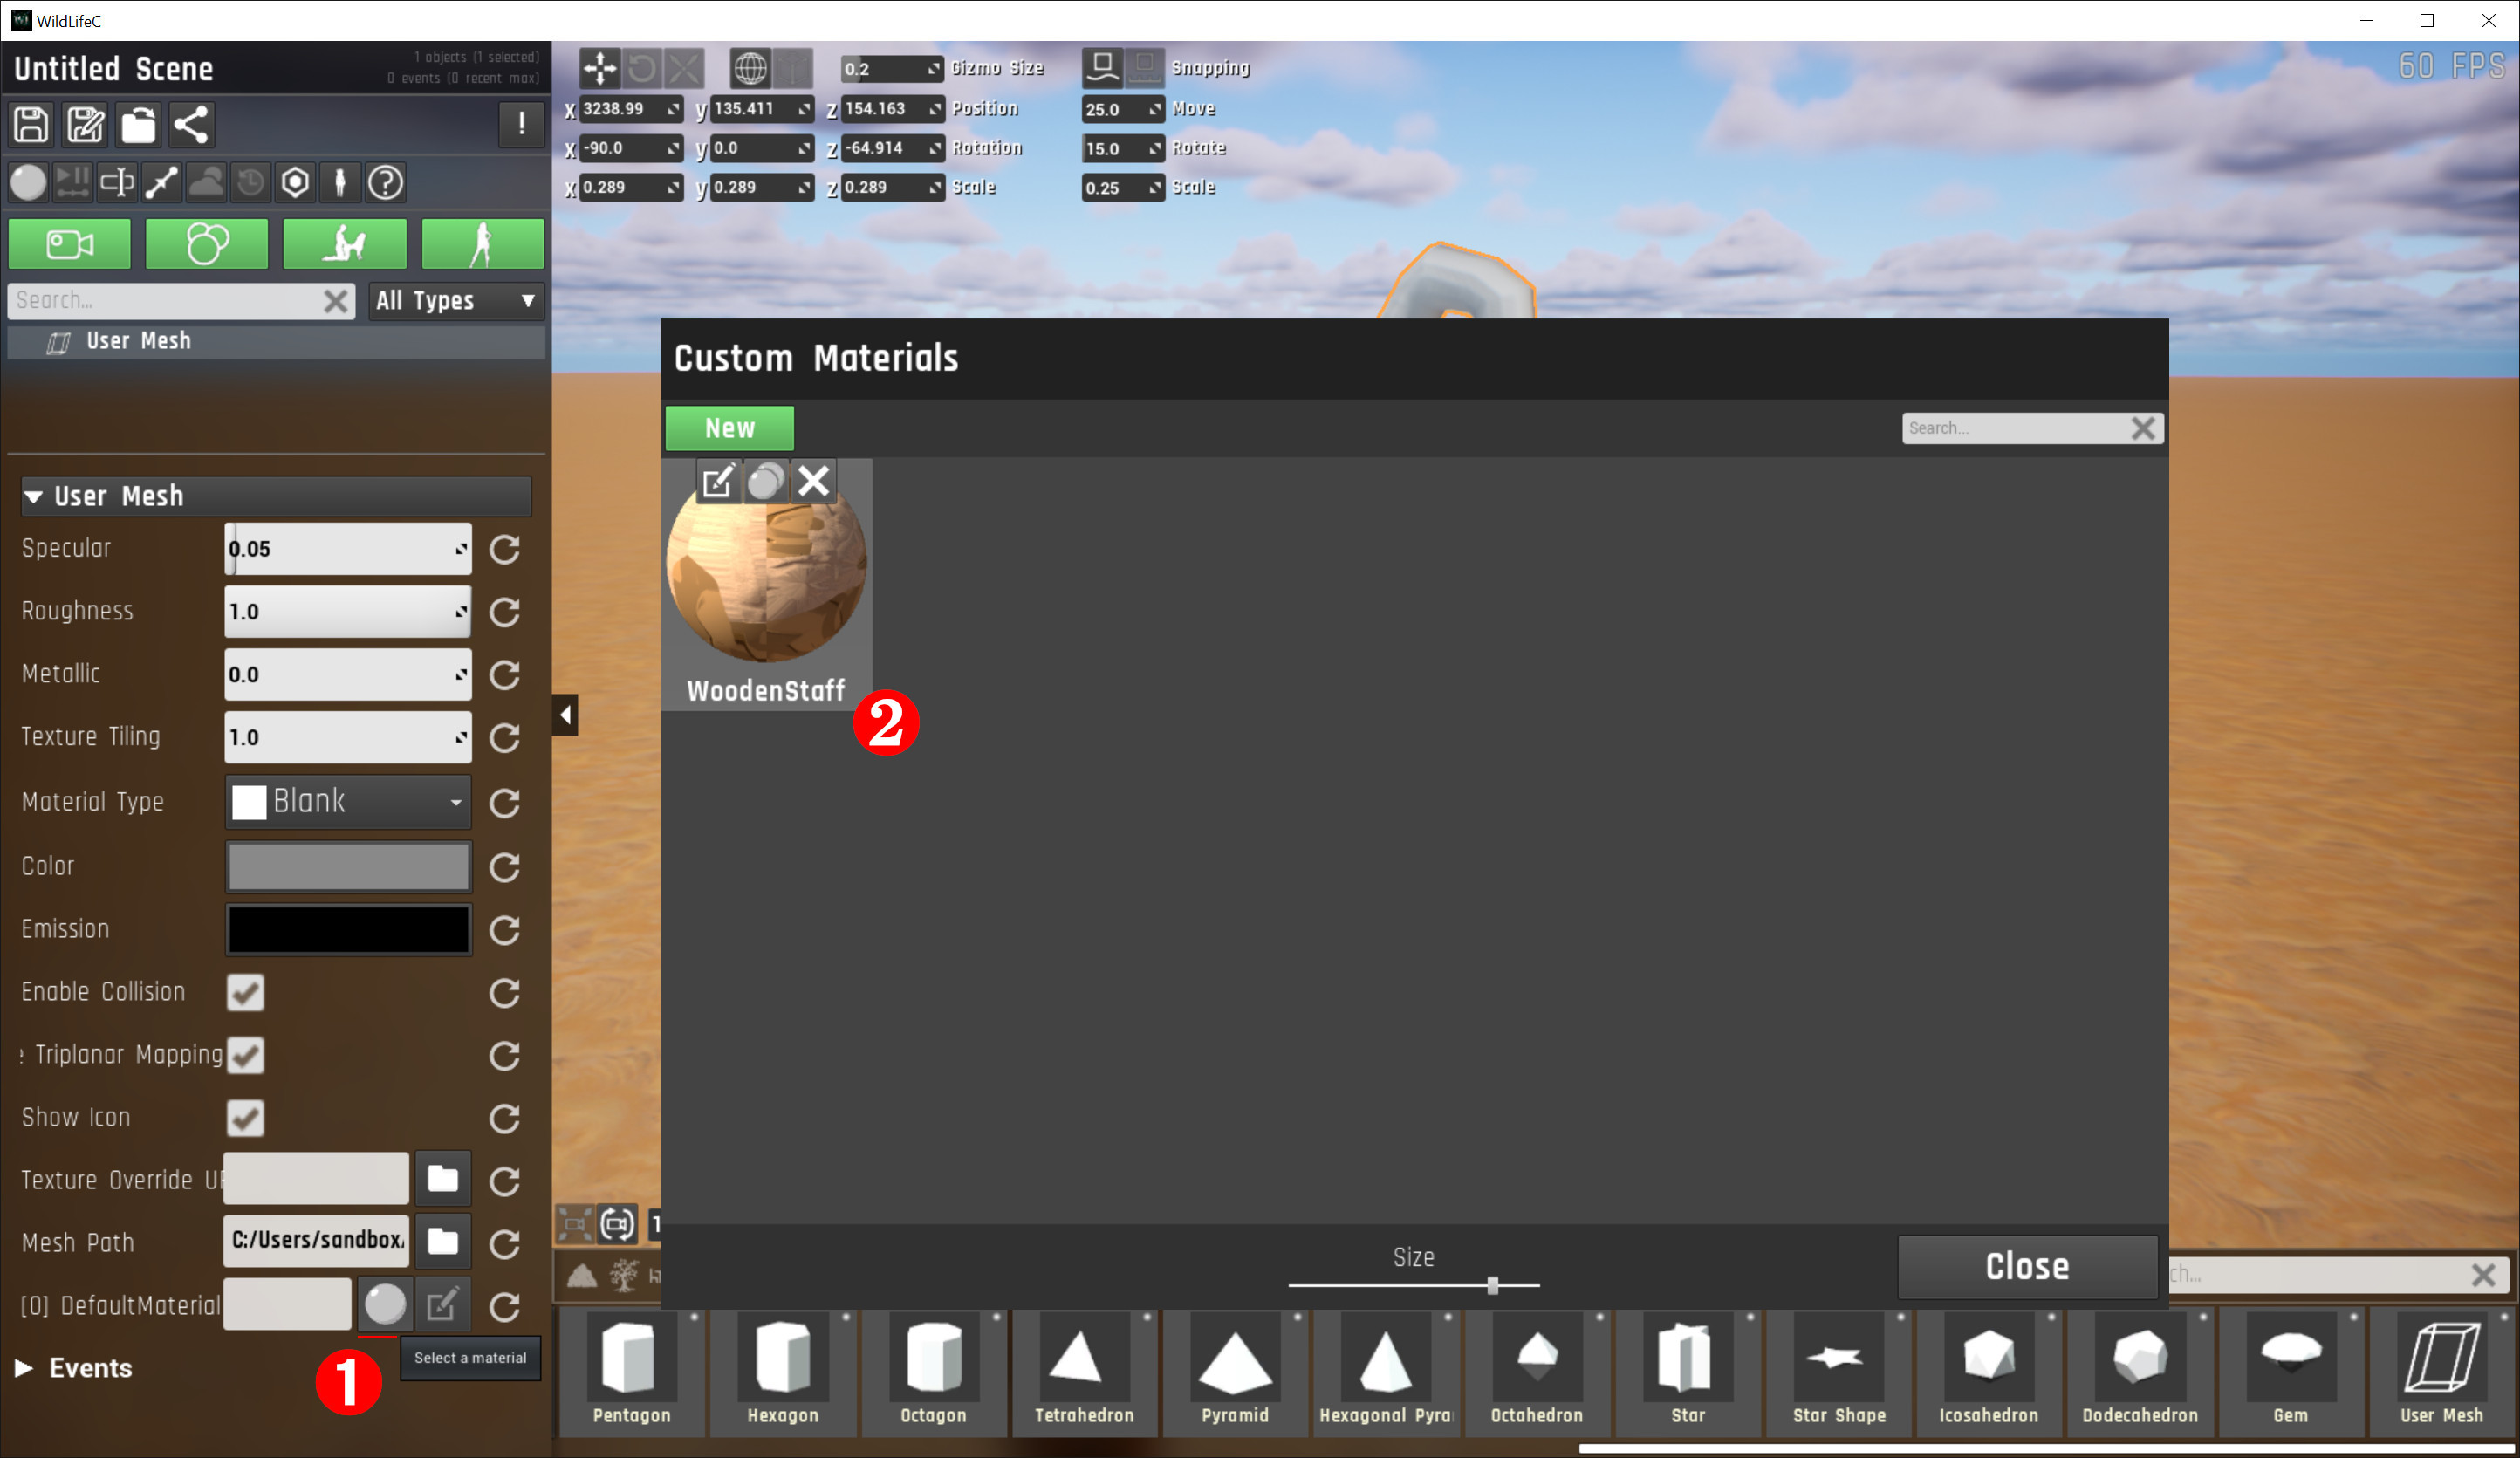
Finally, click again the "select a material" button and choose the material you have created:
Now the process is complete! Consider also resizing and rotating the model to your liking:
